
The Ultimate 10-Step Post Construction Cleaning Checklist for Your Portland Home
Published on January 18, 2026

That final walk-through of your newly built or renovated Portland home is exhilarating. The fresh paint, the pristine floors, the gleaming fixtures—it’s the moment you’ve been waiting for. But between the vision and the reality lies a significant layer of fine drywall dust, stray paint splatters, and hidden construction debris. This isn't just an ordinary mess; it's a specialized cleaning challenge that requires a systematic approach to protect your investment and ensure your new space is truly move-in ready.
Whether you've just completed a kitchen remodel in a classic Beaverton craftsman or built a brand-new home in Hillsboro, tackling the post-construction cleanup is the final, crucial step. This comprehensive post construction cleaning checklist breaks down the entire process into manageable stages. It provides professional-level insights to transform your construction zone into a spotless, healthy, and welcoming home.
We’ll guide you through the exact steps, from an initial rough clean to a final detailed touch-up, ensuring no corner is overlooked. You will learn about the right tools, proper techniques, and critical safety precautions needed to handle everything from dust-caked ceiling fans down to the stubborn grout haze on your new tile floors. Think of this as your professional playbook for achieving a truly pristine finish, making your new space safe, beautiful, and ready for you to enjoy.
1. Dust and Debris Removal from All Surfaces
The most crucial and foundational step in any effective post-construction cleaning checklist is the initial dust and debris removal. Construction projects, whether a kitchen remodel in a Lake Oswego home or a full commercial build-out in downtown Portland, generate an astonishing amount of fine dust. This isn't ordinary household dust; it often contains drywall particles, sawdust, and even harmful crystalline silica, which can pose health risks and infiltrate HVAC systems if not handled correctly.
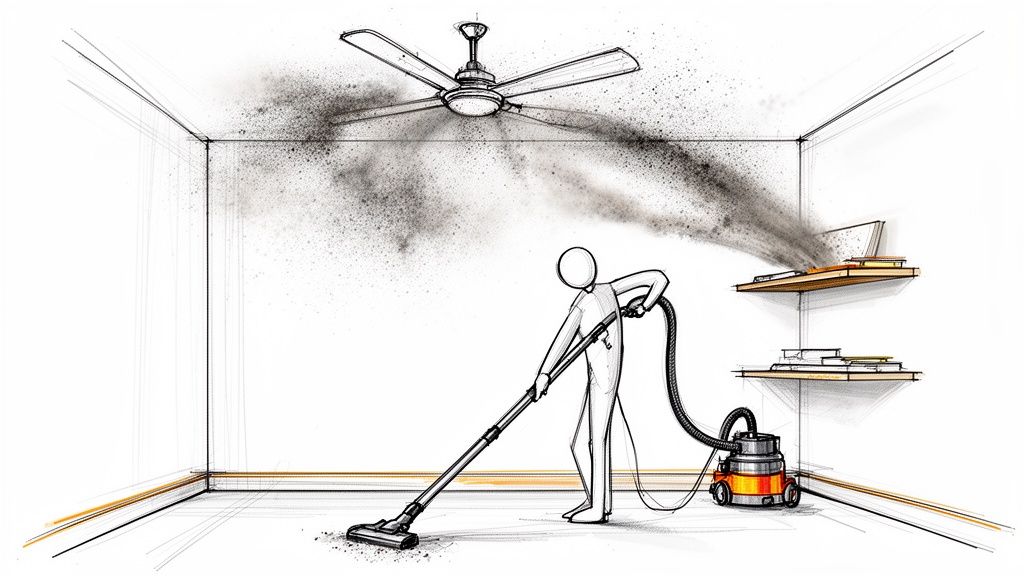
This initial "dry clean" is performed before any wet cleaning methods are introduced. Attempting to wipe dusty surfaces with wet cloths will only turn the fine particles into a muddy, streaky mess that is much harder to remove. The primary goal is to capture and eliminate as much loose debris as possible from every horizontal and vertical surface.
Why This Step Is Essential
- Improves Air Quality: Removing fine particles from the air and surfaces is vital for creating a healthy, breathable indoor environment post-renovation.
- Protects HVAC Systems: Construction dust that settles in ductwork can circulate for months, reducing system efficiency and longevity. Sealing off vents during this phase is a key protective measure.
- Sets the Stage for Deep Cleaning: A thorough dry dust removal ensures that subsequent steps, like wiping down walls or mopping floors, are effective and don't just spread grime around. For a deeper look into how this step fits into a larger cleaning strategy, you can explore our comprehensive guide on how to deep clean a house.
Actionable Tips for Effective Dust Removal
- Work Top-to-Bottom: Always start with the highest points in a room, such as ceiling fans, light fixtures, and the tops of window frames, and work your way down. Gravity is your ally.
- Use the Right Tools: A HEPA-filter vacuum with brush and crevice attachments is indispensable. For surfaces, use electrostatic or microfiber cloths that attract and trap dust rather than just pushing it around.
- Don't Forget Hidden Areas: Pay close attention to the interiors of cabinets and closets, drawer tracks, and the tops of baseboards where dust loves to settle.
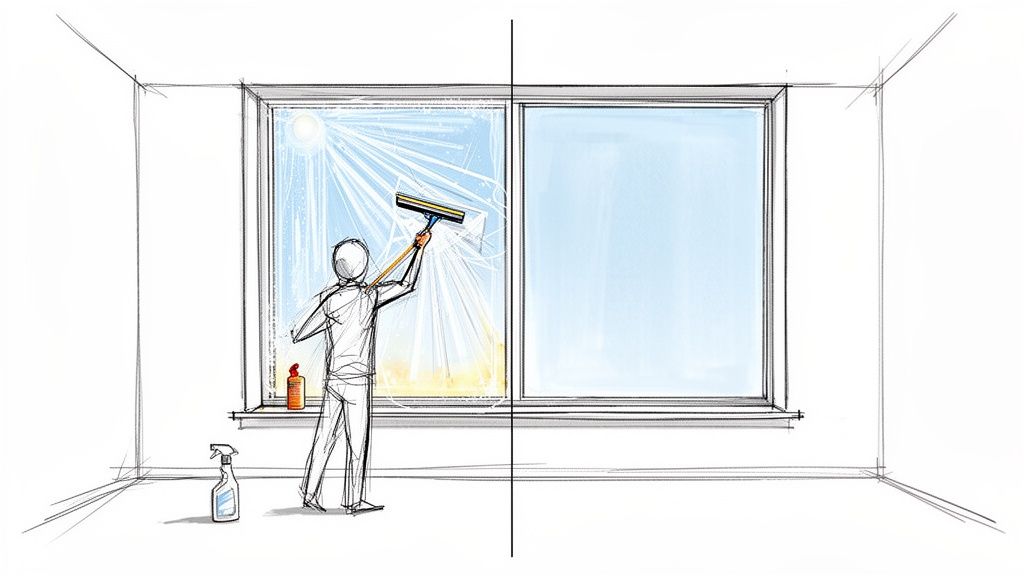
2. Window and Glass Cleaning
After the initial dust removal, tackling windows and glass is a critical next step that dramatically impacts the final look and feel of a newly constructed or renovated space. Construction leaves more than just dust on glass; it leaves behind a stubborn combination of paint overspray, sticker adhesive, caulk smears, and silicone residue. Cleaning these surfaces effectively is a multi-step process that transforms a project from a construction site into a finished, move-in-ready property.
Whether it’s the extensive glazing in a new Hillsboro home or the large storefront windows of a renovated Portland commercial space, smudged and debris-covered glass can make the entire property feel unfinished. This part of a post construction cleaning checklist requires more finesse and specialized tools than standard window washing to achieve a truly pristine, transparent finish.
Why This Step Is Essential
- Creates a Polished First Impression: Sparkling clean windows are one of the first things people notice. They allow natural light to flood the space, highlighting the quality of the new construction.
- Prevents Permanent Damage: Removing substances like paint and caulk promptly prevents them from permanently bonding to or etching the glass surface.
- Ensures Full Functionality: Cleaning tracks and frames of sliding doors and windows removes debris that can hinder smooth operation and cause scratches over time.
Actionable Tips for Effective Window and Glass Cleaning
- Remove Protective Film First: Carefully peel off any protective plastic film left by manufacturers. Use a plastic scraper or a new razor blade held at a very low angle for any stubborn spots, being extremely cautious not to scratch the glass.
- Tackle Heavy Residue: Use a solvent like isopropyl alcohol or a specialized adhesive remover to dissolve stubborn paint overspray, silicone, and sticker glue. Apply it to a cloth first, not directly onto the glass.
- Use the Right Solution and Technique: For the final clean, use a professional-grade glass cleaner and a high-quality squeegee. Work from top to bottom, overlapping each stroke slightly and wiping the squeegee blade with a clean microfiber cloth after each pass to prevent streaks.
- Time it Right: Whenever possible, clean windows on an overcast day. Direct sunlight can cause the cleaning solution to evaporate too quickly, leaving behind unsightly streaks and residue.
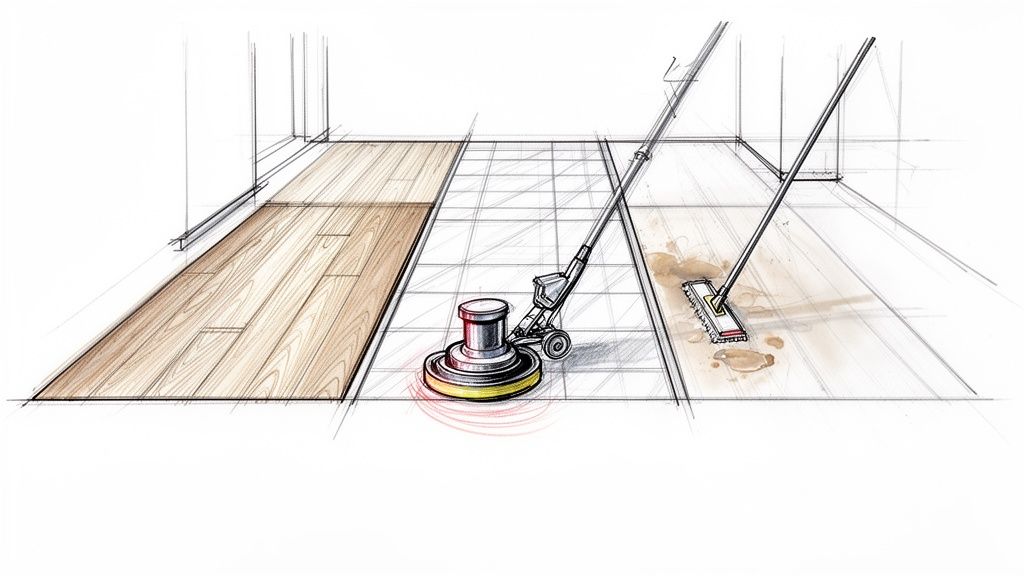
3. Floor Cleaning and Polishing
After walls, ceilings, and fixtures are addressed, the final frontier of post-construction cleaning is the floor. This is more than a simple sweep and mop; it’s a detailed restoration process to remove stubborn construction residues. Floors endure heavy foot traffic, dropped materials, and spills, resulting in a combination of fine dust, adhesive spots, paint splatters, and for tiled areas, persistent grout haze. Each flooring type, from luxury vinyl plank in a new Hillsboro home to original hardwood in a renovated Portland craftsman, requires a specific approach to be safely and effectively cleaned.
Ready for a spotless home?
This final, ground-level cleaning is what makes a space truly feel finished and move-in ready. Neglecting this step can lead to permanent damage, such as grout haze that cures and becomes nearly impossible to remove, or scratches on delicate surfaces from leftover grit. Properly cleaning and polishing the floors is a critical part of the post construction cleaning checklist.
Why This Step Is Essential
- Reveals the True Finish: Proper cleaning removes the layer of construction grime to showcase the intended beauty and color of your new flooring.
- Prevents Long-Term Damage: Removing abrasive debris prevents scratches on hardwood and LVP, while timely grout haze removal stops it from permanently bonding to tile surfaces.
- Ensures a Safe Surface: Eliminating leftover screws, adhesive, and other small hazards makes the floor safe for foot traffic, especially for families with children or pets.
Actionable Tips for Effective Floor Cleaning
- Address Grout Haze Quickly: Grout haze should be removed within 24-72 hours of installation. After this window, it begins to cure and requires much stronger, potentially harmful chemicals to remove.
- Match Cleaner to Material: Use pH-neutral cleaners for natural stone and LVP to avoid etching or damaging the protective wear layer. For hardwood, use a designated hardwood floor cleaner and a damp, not wet, mop.
- Test First, Clean Later: Always test any cleaning solution on a small, inconspicuous area first to ensure it doesn't cause discoloration or damage.
- Apply Protective Finishes: Once the floors are thoroughly cleaned and dried, apply the appropriate sealer or polish to protect them from future wear and tear and enhance their appearance.
4. Bathroom Deep Clean and Fixture Sanitization
After construction, bathrooms are often covered in a unique combination of fine dust, grout haze, and adhesive residue. This step of the post construction cleaning checklist goes far beyond a standard wipe-down; it's an intensive sanitization process. Whether it's a newly tiled master bath in a Beaverton home or a multi-stall commercial restroom in a new Hillsboro office building, this area demands meticulous attention to ensure it is not only visibly clean but also hygienically safe for use.
This process involves disinfecting all high-touch surfaces, removing stubborn construction-specific residues like grout haze from new tile, and ensuring every fixture shines. Because bathrooms are high-moisture environments, it's crucial to remove all construction dust, which can otherwise turn into a sludge that clogs drains and embeds in grout lines.
Why This Step Is Essential
- Ensures Health and Hygiene: Bathrooms are breeding grounds for germs. Sanitizing toilets, sinks, showers, and tubs with appropriate disinfectants is non-negotiable for a safe environment.
- Protects New Investments: Proper cleaning techniques for new tile, stone, and fixtures prevent scratches and damage. Removing grout haze, for instance, is critical for revealing the true finish of the tile work.
- Guarantees a Finished Look: A truly finished project includes sparkling chrome fixtures, streak-free mirrors, and immaculate surfaces. This detailed cleaning is what provides that final, professional polish.
Actionable Tips for Bathroom Sanitization
- Address Grout Haze First: Use a specialized grout haze remover and follow the manufacturer's instructions carefully. This is often an acidic product, so proper ventilation and protective gear are essential.
- Use pH-Neutral Cleaners on Stone: If the bathroom features natural stone like marble or travertine, avoid acidic or alkaline cleaners which can etch the surface. A pH-neutral cleaner is the safest choice.
- Allow Disinfectant Dwell Time: For effective sanitization, spray disinfectants on surfaces like toilets, sinks, and countertops and let them sit for 5-10 minutes (check product label) before wiping. This "dwell time" is necessary to kill germs.
- Detail the Details: Use a soft-bristled brush to clean around faucet bases, drain rings, and toilet hinges where dust and grime accumulate. Don't forget to vacuum out the exhaust fan cover.
5. Kitchen Appliance and Cabinet Cleaning
The kitchen is often the centerpiece of a renovation, and its final cleaning requires meticulous attention to detail. This step focuses on every surface, from brand-new appliances to custom cabinetry, ensuring they are not only dust-free but also sanitized and ready for use. Post-construction grime in a kitchen can include sawdust inside drawers, adhesive residue on stainless steel, and a fine layer of drywall dust over every surface, which must be addressed before the space is considered food-safe.
This crucial stage transforms the kitchen from a construction zone into a functional, hygienic heart of the home. Whether it's a sleek, modern kitchen in a new Hillsboro condo or a classic remodel in a Lake Oswego residence, the process involves removing all traces of construction, including protective films, stickers, and settled dust from both visible and hidden areas.
Why This Step Is Essential
- Ensures Food Safety: Removing construction contaminants from countertops, sinks, and appliance interiors is non-negotiable for creating a safe food preparation environment.
- Protects New Investments: Improper cleaning methods can scratch high-end appliance finishes or damage custom cabinet surfaces. Using the correct techniques and products is vital for protecting these expensive upgrades.
- Showcases the Final Look: A thoroughly cleaned kitchen highlights the quality of the craftsmanship and materials. Polished hardware, streak-free stainless steel, and dust-free cabinets allow the final design to shine.
Actionable Tips for Kitchen Cleaning
- Follow Manufacturer Guidance: Always start by removing protective films and stickers from new appliances. Use manufacturer-recommended cleaners for specific finishes like stainless steel or matte black to avoid damage.
- Clean Inside and Out: Use a HEPA-filter vacuum with a brush attachment to remove all dust from the inside of cabinets and drawers before wiping them down with a damp microfiber cloth.
- Work with the Grain: For stainless steel surfaces, always wipe with a clean microfiber cloth in the direction of the grain to prevent streaks and achieve a polished, uniform look.
- Disinfect Properly: After all dust and debris are removed, use a food-grade disinfectant on all food preparation surfaces, including countertops, islands, and sinks, to ensure they are fully sanitized.
6. Wall and Trim Cleaning
Often overlooked until the final walkthrough, walls and trim act as magnets for fine construction dust, scuff marks, paint splatters, and smudges. This step in a post-construction cleaning checklist focuses on meticulously cleaning all vertical surfaces, including drywall, baseboards, door frames, and window sills, without damaging fresh paint or new finishes. Whether it’s a new residential build in Beaverton with extensive trim work or a commercial office renovation in Hillsboro, cleaning these surfaces properly is what separates a good clean from a great one.
The process requires a delicate touch. Aggressive scrubbing or using the wrong cleaning agents can easily mar a brand-new paint job, leading to costly and frustrating touch-ups. The goal is to lift and remove residue, not grind it into the surface or create water stains, which is a common issue with flat or matte finishes.
Why This Step Is Essential
- Creates a Finished Look: Clean walls and bright, dust-free trim provide the crisp, sharp lines that signify a truly completed project.
- Ensures Paint Integrity: Proper cleaning techniques remove scuffs and grime without dulling the sheen or lifting the paint, preserving the investment in new finishes.
- Improves Indoor Hygiene: Walls, baseboards, and especially high-touch areas like light switch plates and door frames harbor dust and germs that need to be removed for a healthy environment. For more targeted advice, you can learn about how to remove stains from walls with our specialized guide.
Actionable Tips for Wall and Trim Cleaning
- Dry Dust First: Always begin with a dry, soft microfiber cloth or a vacuum with a soft brush attachment to remove all loose dust. Start from the top of the wall and work down to the baseboards.
- Use a Lightly Dampened Cloth: If dry dusting isn't enough, use a microfiber cloth lightly dampened with water. Wring it out thoroughly to prevent drips and streaks, especially on flat paint finishes.
- Test Cleaners in a Hidden Spot: Before using any cleaning solution, even a mild one, test it on an inconspicuous area like inside a closet to ensure it doesn't cause discoloration.
- Be Gentle with Magic Erasers: While effective on scuffs, magic erasers are micro-abrasive and can dull glossy or semi-gloss finishes. Use them with minimal pressure and only when necessary.
7. HVAC System and Ductwork Cleaning
A step often overlooked in a standard post-construction cleaning checklist, but critical for long-term health and system efficiency, is addressing the HVAC system. Construction projects in Beaverton homes and Hillsboro commercial spaces alike produce an immense volume of airborne particulates. Without intervention, this dust, sawdust, and drywall debris gets pulled directly into your air returns, settling deep within the ductwork and coating vital system components.
This process involves more than just swapping out a dirty filter; it's a comprehensive cleaning of the entire system. From the visible registers and vents to the hidden network of ducts, the goal is to purge all construction-related contaminants. Neglecting this allows the system to circulate harmful particles throughout your newly cleaned property for months, diminishing air quality and putting unnecessary strain on the furnace and air conditioner.
Why This Step Is Essential
- Protects Occupant Health: Removing fine dust, silica, and potential chemical residues from the air circulation system is crucial for creating a safe and breathable indoor environment.
- Ensures HVAC Longevity: Debris can clog filters, coat coils, and strain fan motors, leading to reduced efficiency and costly premature system failure.
- Prevents Re-Contamination: A clean HVAC system ensures that all the meticulous surface cleaning isn't undone the moment you turn on the heat or air conditioning.
Actionable Tips for HVAC System Cleaning
- Replace the Filter Immediately: Before running the HVAC system for regular use, replace the old filter with a new, high-quality one. Document the date to establish a proper maintenance schedule.
- Seal Vents During Cleaning: During the dustiest phases of the cleanup, use painter's tape and plastic to temporarily seal off air vents and returns. This prevents the majority of debris from entering the system in the first place.
- Hire a Professional for Duct Cleaning: While you can clean individual registers, a full duct cleaning requires specialized equipment like high-powered vacuums and agitation tools. For a thorough job, especially in a new Portland construction, professional service is highly recommended.
- Schedule a System Inspection: After the cleaning is complete, have a qualified HVAC technician inspect the system to ensure all components are clean and functioning correctly before you occupy the space.
8. Lighting Fixtures and Ceiling Cleaning
After the primary dust-down, the next logical step is to address the highest surfaces in any room: the ceilings and light fixtures. This part of a post-construction cleaning checklist is often overlooked, but construction dust defies gravity, settling everywhere. Ceilings, fans, pendant lights, and recessed lighting in properties from Beaverton homes to commercial spaces in Hillsboro become magnets for fine dust and debris.
Cleaning these upper areas before moving to walls and floors is a critical part of the top-to-bottom methodology. It ensures that any dislodged particles fall onto uncleaned surfaces below, preventing the need to re-clean areas you've already finished. Proper cleaning not only removes unsightly grime but also improves light quality and prevents dust from circulating back into the air.
Why This Step Is Essential
- Prevents Re-contamination: Cleaning from the top down is the most efficient professional cleaning strategy, ensuring dust and debris are systematically worked downwards.
- Improves Light Output: A fine layer of dust on bulbs and fixtures can significantly dim the light they produce, making a freshly renovated space feel dull.
- Finalizes Dust Removal: Ceilings represent a large, horizontal surface area where fine particles settle. Cleaning them is a non-negotiable step for achieving a truly dust-free environment.
Actionable Tips for Cleaning Ceilings and Fixtures
- Safety First: Always use a stable ladder for high-to-reach areas. Ensure light fixtures are turned off and cool to the touch before you begin cleaning.
- Use the Right Tools: An extension pole with a soft-bristled brush or microfiber duster is perfect for ceilings and high fixtures. For delicate lampshades or recessed lighting trim, a soft cloth or a can of compressed air works best.
- Handle Textured Ceilings with Care: For "popcorn" ceilings, only use dry dusting methods. A wet cloth can easily damage the texture. Apply minimal pressure to avoid scraping off the finish.
- Address Fixture Details: Carefully wipe down ceiling fan blades, the bodies of pendant lights, and the exterior and interior of glass or plastic covers to remove all traces of dust.
9. Exterior Pressure Washing and Grounds Cleanup
The final step in a truly comprehensive post-construction cleaning checklist extends beyond the interior walls. A construction project's impact is often visible on the home's exterior, leaving behind a layer of dust, mud, and stray debris. Exterior pressure washing and grounds cleanup is the crucial last stage that transforms the property from a work site into a polished, move-in-ready home, significantly boosting curb appeal.
This process involves more than just a quick rinse. It’s a methodical cleaning of surfaces like driveways, patios, walkways, and siding to remove stubborn construction residues. Whether it's a new build in Hillsboro with a fresh concrete driveway or a Beaverton remodel with dusty siding, this final touch ensures the outside of the home matches the pristine interior, completing the project's visual and functional transition.
Why This Step Is Essential
- Restores Curb Appeal: A clean exterior makes a powerful first impression, restoring the property's aesthetic and presenting the finished project in the best possible light.
- Prevents Long-Term Damage: Construction dust and chemical residue can stain or etch exterior surfaces like concrete and siding if left to sit. Timely removal protects these materials.
- Prepares for Final Finishes: For many projects, pressure washing is a necessary preparatory step before applying paint, stain, or sealant to driveways, decks, or patios.
Actionable Tips for Effective Exterior Cleanup
- Test Pressure Settings: Always start the pressure washer on a low setting and test it on an inconspicuous area first to prevent damage to wood, vinyl siding, or older concrete. A pressure of 1500-2000 PSI is generally safe for most residential surfaces.
- Maintain Safe Distance: Keep the nozzle at least 12 inches away from the surface. Getting too close can strip paint, gouge wood, or damage mortar between bricks.
- Protect Vulnerable Areas: Avoid directly spraying fresh caulk, window seals, and outdoor electrical outlets. Ensure all windows and doors are securely closed before starting.
- Clear the Area First: Before washing, sweep and remove all loose debris, tools, and materials from the work area to ensure an even and efficient clean.
10. Final Walkthrough and Quality Inspection
The final step in a comprehensive post-construction cleaning checklist is the quality inspection and client walkthrough. This isn't just a quick glance around; it's a systematic verification process to ensure every task has been completed to the highest standard. Whether it's a newly built home in Beaverton or a commercial office space in Hillsboro, this final review guarantees that the property is truly move-in ready and meets all expectations before handover.
This crucial phase acts as a final quality control gate. It involves a detailed, room-by-room inspection to identify any missed spots, remaining paint splatters, or lingering dust. For professional cleaning services, this step is integral to ensuring the client is completely happy with the pristine condition of their new space.
Why This Step Is Essential
- Guarantees Client Satisfaction: A thorough walkthrough confirms that all contracted work is complete and provides the client an opportunity to point out any areas needing a touch-up.
- Provides Professional Closure: It formalizes the end of the cleaning project, creating a clear point of completion and preventing future disputes about the state of the property.
- Identifies Overlooked Details: Even the most meticulous teams can miss a spot. A fresh set of eyes during the final inspection often catches minor issues, like sticker residue on windows or dust inside a high cabinet. This process is very similar to the detailed review needed for a move-in ready space, which you can learn more about in our comprehensive move-in cleaning checklist.
Actionable Tips for an Effective Final Walkthrough
- Use a Detailed Checklist: Arm yourself with the original cleaning scope or a pre-made inspection checklist to systematically review every room and surface.
- Inspect at Different Times of Day: Natural light and artificial light can reveal different imperfections. View the property in both morning and afternoon light if possible.
- Document Everything: Take date-stamped photos of any identified issues. This creates a clear "punch list" of items that need correction before the project is officially closed.
- Involve the Client: Whenever possible, schedule the final walkthrough with the client present. This allows for immediate feedback and ensures everyone is aligned on the final result, leading to a successful project sign-off.
10-Point Post-Construction Cleaning Comparison
| Service | Process Complexity 🔄 | Resource Requirements ⚡ | Expected Outcomes 📊 | Ideal Use Cases 💡 | Key Advantages ⭐ |
|---|---|---|---|---|---|
| Dust and Debris Removal from All Surfaces | 🔄🔄🔄🔄 — top-to-bottom, multiple passes | ⚡⚡⚡ — HEPA vacuums, extension tools, trained crew | 📊 Immediate air-quality improvement; ⭐⭐⭐⭐ prevents recontamination | New builds, large renovations, HVAC-sensitive projects | Protects HVAC; makes all subsequent cleaning effective |
| Window and Glass Cleaning | 🔄🔄🔄 — interior/exterior, solvent work | ⚡⚡⚡ — safety gear, ladders, glass solvents, water-fed poles | 📊 Dramatic light/appearance improvement; ⭐⭐⭐⭐ streak-free finish | Properties with floor-to-ceiling glazing or exterior film | Restores natural light; removes adhesive/paint residues |
| Floor Cleaning and Polishing | 🔄🔄🔄🔄 — material-specific methods | ⚡⚡⚡ — buffers, polishers, pH‑neutral cleaners, sanding | 📊 Reveals true finish; protects flooring; ⭐⭐⭐⭐ visible impact | Mixed-floor homes, new tile grout, hardwood installations | Prevents permanent staining; restores finish and safety |
| Bathroom Deep Clean and Fixture Sanitization | 🔄🔄🔄 — tight spaces, disinfection dwell times | ⚡⚡ — disinfectants, brushes, specialty cleaners | 📊 Hygienic, mold-preventive bathrooms; ⭐⭐⭐⭐ health compliance | Residential and commercial bathrooms, new tile/grout | Eliminates health risks; extends fixture lifespan |
| Kitchen Appliance and Cabinet Cleaning | 🔄🔄🔄 — interior/exterior appliance care | ⚡⚡ — manufacturer cleaners, food-safe disinfectants | 📊 Functional, food-safe kitchen ready for use; ⭐⭐⭐ | New kitchens, renovated appliance installs | Ensures food-safety; protects appliance finishes |
| Wall and Trim Cleaning | 🔄🔄🔄 — gentle techniques to protect paint | ⚡⚡ — microfiber, mild cleaners, testing | 📊 Clean, finished appearance; identifies touch-ups; ⭐⭐⭐ | Fresh paint jobs, detailed trim work, textured finishes | Prevents spread of dust; reveals paint imperfections |
| HVAC System and Ductwork Cleaning | 🔄🔄🔄🔄 — inspection, possible professional duct work | ⚡⚡⚡⚡ — licensed techs, duct vacuums, filter upgrades | 📊 Major air-quality and efficiency gains; ⭐⭐⭐⭐ reduces allergens | Buildings with active HVAC during construction | Prevents system damage; improves indoor air & efficiency |
| Lighting Fixtures and Ceiling Cleaning | 🔄🔄 — elevated access, delicate fixtures | ⚡⚡ — lifts/extension poles, soft tools | 📊 Brighter, cleaner ceilings; less falling dust; ⭐⭐⭐ | Homes/offices with many fixtures or ceiling fans | Improves light output; prevents dust redistribution |
| Exterior Pressure Washing and Grounds Cleanup | 🔄🔄🔄 — surface-sensitive pressure settings | ⚡⚡⚡ — pressure washers, site prep, weather window | 📊 Strong curb-appeal restoration; ⭐⭐⭐⭐ removes mud/debris | Driveways, patios, building exteriors, landscaping cleanup | Restores exterior appearance; addresses safety hazards |
| Final Walkthrough and Quality Inspection | 🔄🔄 — systematic checklist and documentation | ⚡ — time, photo/video tools, QA protocols | 📊 Ensures completeness and client sign-off; ⭐⭐⭐⭐ documents quality | Every project prior to handover or occupancy | Creates accountability; captures punch list and sign-off |
Enjoy Your Sparkling New Space—Without the Stress
Crossing the finish line of a renovation or construction project is an exhilarating moment. You've navigated design choices, managed timelines, and now your vision is a tangible reality. But between you and enjoying that new space lies the final, often underestimated, hurdle: the post-construction cleanup. As we've detailed in this guide, this task is far more intensive than a standard deep clean service; it's a systematic battle against pervasive dust, stubborn debris, and hidden hazards.
The comprehensive post construction cleaning checklist we’ve outlined, from HVAC ductwork to the final polish on your floors, serves as your strategic roadmap. It breaks down an overwhelming job into manageable phases and tasks, ensuring no corner is overlooked. Remember, the key to success is a methodical approach: start high, work your way down, and tackle the project in distinct stages from the initial rough clean to the final touch-up.
Key Takeaways for a Flawless Finish
Mastering your post-construction cleanup hinges on a few core principles.
- Patience is Paramount: The fine, airborne dust from drywall, wood, and concrete settles slowly and in layers. What looks clean one day may reveal a new film of dust the next. Rushing the process will only lead to frustration and a less-than-perfect result.
- Safety First, Always: From wearing appropriate PPE like N95 masks and safety glasses to ensuring proper ventilation, protecting your health is non-negotiable. Construction dust isn't just messy; it can contain harmful silica, chemicals, and other irritants.
- The Right Tools for the Job: As you've seen, standard household cleaners and a simple vacuum won't cut it. A HEPA-filter vacuum is essential for capturing fine particulates, specialized solvents are needed for adhesive and paint removal, and the right microfiber cloths are crucial for a streak-free finish.
Your Next Steps: From Checklist to Clean
With this detailed guide in hand, you are now equipped to make an informed decision. You can confidently assemble your supplies, block out your timeline, and begin the methodical process of reclaiming your home. Refer back to the room-by-room sections as you progress, using the estimated times to plan your efforts effectively.
However, it's also important to realistically assess the scope of the project. For many homeowners juggling work and family in busy areas like Beaverton, or for property managers in Lake Oswego preparing a high-end rental, the time, physical effort, and cost of specialized equipment can be significant. The true value of a professional house cleaning service isn't just about cleaning; it’s about reclaiming your time and ensuring the job is done to a standard that protects your investment.
Ultimately, completing this final step transforms your property from a construction site into a pristine, healthy, and welcoming space. Whether you choose the DIY path or enlist professional help, the goal remains the same: to step into your new kitchen, bathroom, or office and feel nothing but pride and excitement. You’ve worked hard to get to this point, and you deserve a flawless final result that lets the quality of the craftsmanship truly shine.
Ready to skip the dust and stress and step directly into your beautifully finished space? The professional team at Neat Hive Cleaning specializes in detailed post-construction and move in cleaning services across the Portland metro area. Let us handle the final, intensive step so you can start enjoying your new home or business right away by visiting us at Neat Hive Cleaning to get your free estimate.
Ready for a spotless home?