
How to Remove Stains from Walls A Practical Homeowner's Guide
Published on January 14, 2026
Before you even think about grabbing a sponge, take a moment to play detective. Tackling a wall stain successfully isn't about scrubbing harder—it's about scrubbing smarter. A little prep work now can save you from the headache of a damaged paint job or a stubborn stain that just won't budge.
The first step is always observation. What are you actually dealing with?
Is it a waxy crayon masterpiece from your toddler? An oily splatter from last night's stir-fry? Or a simple scuff mark from moving the couch? Each of these common culprits has a totally different chemical makeup, which means they need different removal tactics. Using the wrong cleaner on a grease stain can just spread it around, and scrubbing a crayon mark too hard can grind the wax even deeper into the paint.
Know Your Paint Finish
Just as important as the stain is the surface you're working on. The type of paint on your wall determines how much elbow grease it can handle before you start doing more harm than good.
Not sure what kind of paint you have? It’s easy to figure out. Stand with a light source behind you and look at the wall from an angle. The amount of shine you see will tell you everything you need to know.
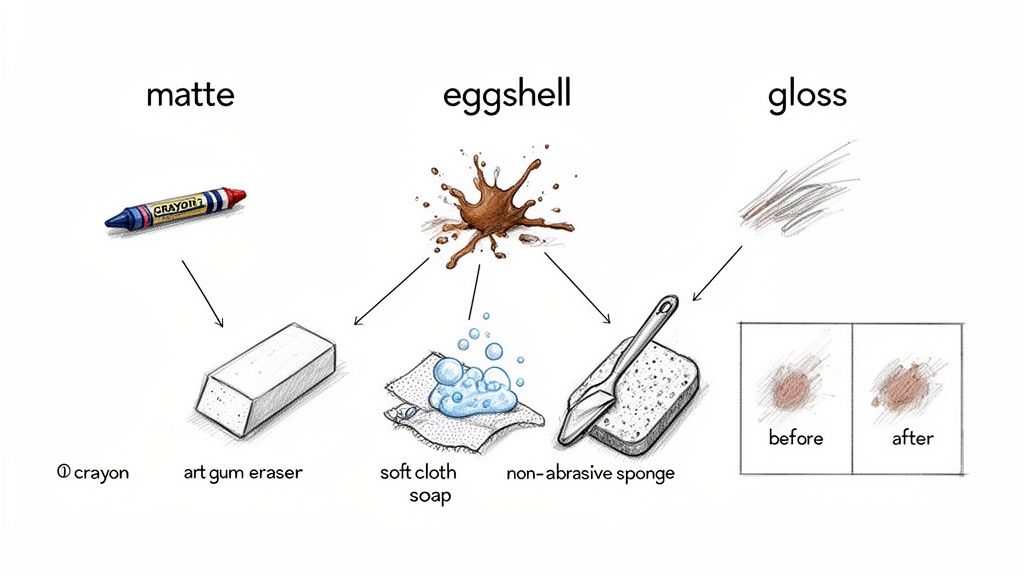
- Matte or Flat Finish: This paint has zero shine and a porous, almost velvety texture. I'll be honest, it's the trickiest to clean without leaving a new mark. Your mantra here is "less is more"—use as little water as possible and absolutely no abrasive tools.
- Eggshell or Satin Finish: You'll see a slight sheen with these finishes. They're more durable than matte and are a popular choice for living rooms and bedrooms for that reason. They can handle a gentle cleaning with a mild soap solution.
- Semi-Gloss or Gloss Finish: These are the shiny, tough guys of the paint world. You’ll usually find them in kitchens, bathrooms, and on trim because they stand up to moisture and scrubbing. You can be a bit more aggressive with your cleaning here.
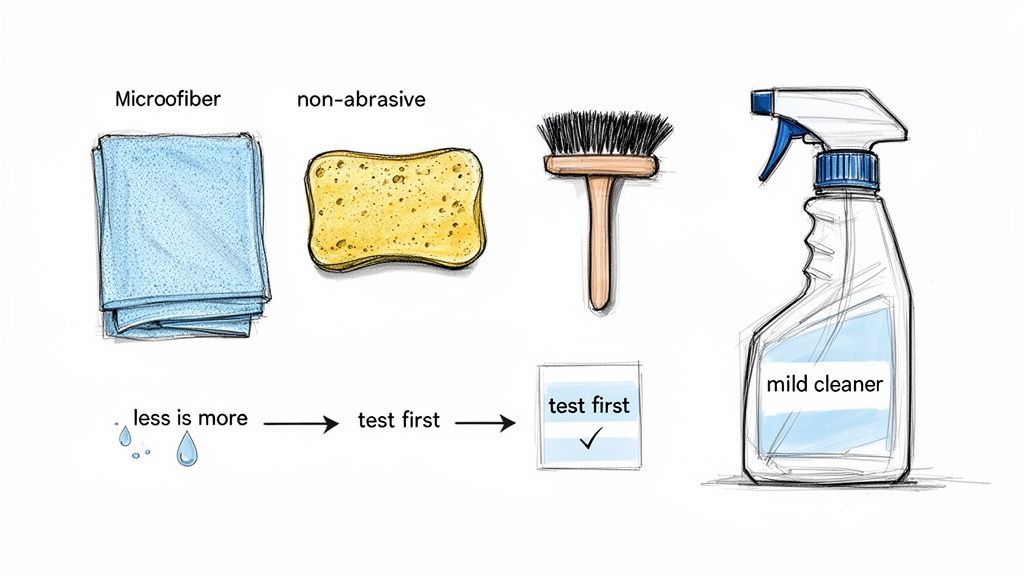
This flowchart is a great visual guide for matching your cleaning plan to both the stain and your wall type.
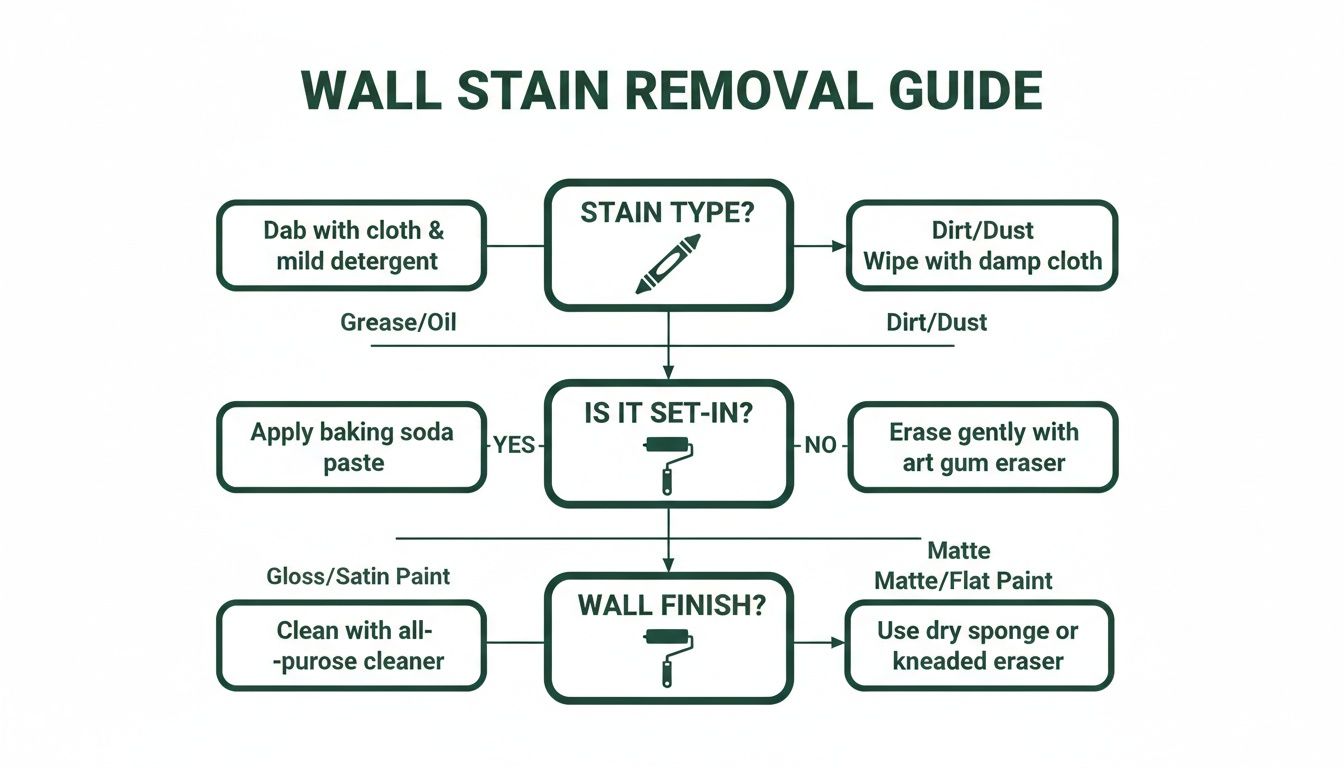
As you can see, figuring out the stain and wall finish first sets you on the right path for a clean, damage-free wall.
Expert Tip: Never, ever use a one-size-fits-all approach. A durable, glossy paint in a bathroom can take a lot more punishment than a delicate matte finish in the dining room. Matching your method to the material is the golden rule of wall cleaning. A few seconds of diagnosis ensures you grab the right tools from the start, saving your walls and your sanity.
Your Go-To Guide for Everyday Wall Stains
Let's get down to the nitty-gritty of handling those everyday messes that just seem to appear out of nowhere. From a toddler's impromptu art project to the inevitable kitchen splatters, most common wall stains are no match for a few household staples and the right technique.
Before you reach for a harsh chemical cleaner, remember that many of these marks respond surprisingly well to a gentler approach. The goal is to lift the stain without taking the paint along with it.
Banishing Crayon and Colored Pencil Marks
Ah, the unexpected crayon mural. It’s a classic parenting milestone, but thankfully, figuring out how to remove these stains from your walls is easier than you might think. Many people’s first instinct is to grab an abrasive cleaner, but that often just strips the paint right off with the wax.
A much better approach is to whip up a simple, non-abrasive paste.
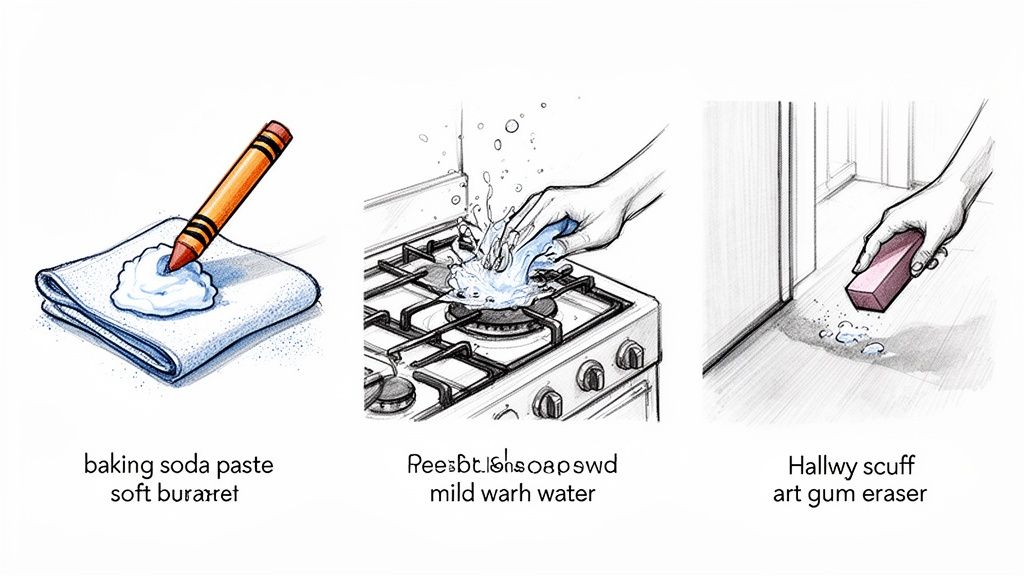
- Just mix baking soda with a few drops of water until it has a toothpaste-like consistency.
- Gently rub this paste onto the crayon marks using a soft cloth or even your fingertips.
- Use a light, circular motion. The fine grit of the baking soda lifts the waxy pigment without scratching the paint.
- Wipe the area clean with a fresh, damp cloth and let it dry. I've found this method works wonders, especially on matte and eggshell finishes that can't handle aggressive scrubbing.
For colored pencil marks, your best friend is often a simple art gum eraser. It’s much softer than a standard pink eraser and crumbles as it works, which prevents it from smearing the mark or damaging the paint surface. Just rub lightly until the line is gone.
A Quick Tip: If you're left with a stubborn bit of crayon residue after the baking soda trick, try this. A quick blast with a hairdryer on a low setting will soften the wax. Immediately blot the spot with a paper towel to soak it up before giving it a final wipe.
Tackling Grease and Kitchen Splatters
The walls behind the stove or near the dining table are magnets for greasy fingerprints and oily splatters. Left unchecked, they can attract dust and eventually turn into stubborn, yellowed stains. The secret here is using a cleaner that can cut through the oil without stripping your paint.
You don't need anything fancy. A few drops of a mild dish soap (the kind advertised for cutting grease) mixed into a bowl of warm water is usually the perfect solution.
- Dip a soft microfiber cloth into your soapy water and wring it out so it's damp, not dripping.
- Gently wipe down the greasy areas. You should see the stain start to dissolve almost right away.
- Follow up with a second cloth dampened with plain water to rinse away any soap residue.
- Pat the wall dry. It's important not to skip the rinse step, as leftover soap can leave a sticky film that just attracts more grime.
This simple soap-and-water method is incredibly effective and safe for almost all paint finishes, including the durable semi-gloss and satin paints typically used in kitchens.
Erasing Scuff Marks and Smudges
Black scuff marks from shoes, furniture, and tossed-aside bags are practically unavoidable in high-traffic areas like hallways and entryways. They look intimidating, but they are often just surface-level transfers that haven't actually bonded with the paint.
For many light scuffs, a clean, damp microfiber cloth is all you need. Give the mark a firm rub, and you might be surprised to see it lift right off. If it’s a bit more stubborn, a cleaning eraser sponge can work, but use it cautiously. These are mildly abrasive and can sometimes dull the paint's sheen, particularly on flat or matte finishes.
If your home maintenance list is starting to feel overwhelming, or you're facing marks in multiple rooms, bringing in a standard cleaning service can be a fantastic way to reset your space and get expert advice on keeping your walls looking their best.
At the end of the day, tackling these common stains quickly is the best strategy. The longer a stain sits, the deeper it can set into the paint, making it that much harder to remove. With these simple tips, you can confidently handle most everyday messes and keep your home looking fresh and clean.
Tackling Tough Stains: Going Beyond Surface Cleaning
Ready for a spotless home?
Some wall stains are more than just a little grime; they’re stubborn marks that have worked their way deep into the paint or even the drywall. When you're facing down an old water ring or a masterpiece drawn in permanent marker, you have to shift your mindset from simple cleaning to restoration.
The biggest mistake I see people make with these tough stains is only treating what's on the surface. That’s why that faint brown ring from a long-gone leak keeps bleeding through a fresh coat of paint. You're fighting the symptom, not the source.
The Right Way to Handle Water Stains
A water stain that keeps coming back is your wall telling you there's a deeper issue. Just painting over it is like putting a bandage on a broken arm—it looks better for a moment, but the underlying problem will always reappear. To fix it for good, you have to break the cycle.
- Find and Fix the Leak: First things first, stop the water at its source. This is non-negotiable. Whether it's a leaky pipe or a bad shingle on the roof, get it repaired completely before you even think about touching the wall.
- Let It Dry Completely: The wall has to be bone dry. 100% dry. I recommend using fans or even a dehumidifier to pull all that moisture out of the drywall, a process that can easily take a few days. Don't rush it.
- Seal the Deal: This is the most important step. Get a high-quality, stain-blocking primer. The shellac-based ones are fantastic for this. Apply it directly over the dried, ugly stain. This creates a bulletproof barrier that locks the discoloration behind it so it can't creep back out.
- Finally, Repaint: Once that primer has fully cured, you're clear to paint. A fresh coat of your wall color will blend it in perfectly, and the stain will be gone for good.
Take it from me: Never, ever paint directly over a water stain without priming it first. The stain will almost certainly bleed through within weeks, and you'll be right back where you started. Sealing it is the only way to guarantee a lasting fix.
Erasing Permanent Marker and Ink
"Permanent" marker sounds intimidating, but it's not always a life sentence for your wall. The trick is using the right solvent to dissolve the ink pigments that have latched onto the paint. For this job, your best friend is isopropyl alcohol, or just plain rubbing alcohol.
Get a clean white cloth or a cotton ball and put a small amount of alcohol on it. Now, dab the ink stain, don’t scrub it. You’ll see the ink start to lift off the wall and transfer to your cloth. To keep from making a bigger mess, work from the outside edge of the stain inward and keep switching to a clean spot on your cloth.
For more widespread problems, like lingering smoke damage from a kitchen mishap or stains that seem to have penetrated the entire room, you might be out of your league. If you're facing a whole-home issue, calling in a professional deep cleaning service can deliver the heavy-duty restoration needed to make your walls look brand new again.
The Right Tools and Techniques for a Flawless Finish
I've learned over the years that the secret to getting a wall perfectly clean isn't always about the fancy cleaning solution. More often than not, it comes down to having the right tools and knowing how to use them. If you’ve got the right kit ready to go, you can deal with a stain right away without making a bigger mess, like stripping the paint or leaving a dull spot.
Your best friends for this job? A simple stack of clean microfiber cloths and a couple of non-abrasive sponges. That’s really all you need for most situations. Microfiber is incredible at trapping dirt and lifting smudges without scratching the surface. Just promise me you'll stay away from harsh scrub brushes or those green scouring pads—they'll permanently wreck your paint's finish.
The Golden Rule of Spot-Testing
Before you even think about tackling that stain in the middle of the wall, you have to do a spot-test. This is non-negotiable. I can't tell you how many times this single step has saved a client from a huge headache and a costly repainting job.
Just find an inconspicuous spot—behind a piece of furniture, inside a closet, or way down by the baseboard. Dab a little bit of your cleaning solution there, let it sit for a minute, then wipe it off and let it dry completely. Once it’s dry, look closely for any discoloration, paint transfer, or changes in the sheen. If it looks untouched, you're good to go.
A Quick Guide to Choosing Your Cleaning Solution
Picking the right cleaner can feel like a guessing game, but it doesn't have to be. It's all about matching the cleaner's strength to the stain and your wall's finish. I've put together this quick table to help you make the right choice without hesitation.
| Cleaning Agent | Best For Stains Like... | Use On Paint Finishes | Cautionary Note |
|---|---|---|---|
| Water & Microfiber Cloth | Dust, fresh smudges, light fingerprints | All finishes (flat, eggshell, satin, gloss) | Your first line of defense; always start here. |
| Mild Dish Soap & Water | Everyday grime, greasy splatters, food stains | Eggshell, satin, semi-gloss, gloss | Avoid on flat/matte paint as it can leave streaks. |
| Baking Soda Paste | Crayon, stubborn scuff marks | Satin, semi-gloss, gloss | Gently rub; it's a mild abrasive and can dull flat finishes. |
| Isopropyl (Rubbing) Alcohol | Permanent marker, ink stains | Semi-gloss, gloss | Use sparingly on a cotton ball; can damage latex paint. |
| Diluted Bleach Solution | Mold and mildew growth | Most finishes, but spot-test is critical! | Ensure proper ventilation and protect surrounding areas. |
Remember, this is a guide to get you started. The real key is to begin with the mildest option and only move to something stronger if you absolutely have to.
The "Less Is More" Cleaning Approach
When it comes to cleaning painted walls, always start with the gentlest method first. You'd be surprised how often a simple fix does the trick. This approach protects your paint and prevents you from accidentally causing damage.
Here’s the order I always follow:
First, try plain water. Just dampen a microfiber cloth and give the spot a gentle wipe. You’ll be shocked at how many fresh smudges and light marks disappear with nothing more than water.
Next, a mild soap solution. If water didn't quite cut it, add a few drops of a gentle dish soap (like Dawn) to a small bowl of warm water. This is my go-to for most common household grime and light greasy spots.
Finally, targeted cleaners. Only if soap and water fail should you move on to things like a baking soda paste or rubbing alcohol. These are for specific, stubborn stains and should be used with care.
Sticking to this progression means you're only using as much cleaning power as you truly need. It’s the best way to keep your walls looking great for years to come.
Pro Tip from Experience: When you're washing a larger section of a wall, always work from the bottom up. It sounds counterintuitive, but this prevents dirty drips from running down and creating hard-to-clean streaks. When you rinse, you do the opposite—rinse from the top down.
When to Step Back and Call a Professional
There’s a real satisfaction in tackling a tough stain yourself, but every seasoned homeowner knows there's a time to put down the sponge and pick up the phone. Some wall stains are more than just a surface-level mess—they're symptoms of a bigger problem that a simple scrub will only cover up temporarily.
It’s not about admitting defeat. It's about knowing the difference between a simple cleanup and a situation that needs a specialist's eye. Making that call can save you a world of headaches and protect your home's value in the long run.
Stains That Signal a Deeper Problem
Think of certain stains as red flags. Trying to clean them yourself might not only be ineffective but could also make the underlying issue much worse. If you spot any of these, it's a good idea to pause and consider bringing in a pro.
Large or Recurring Water Stains: That brownish-yellow ring on your ceiling or wall that keeps coming back? That's almost always a sign of an active leak. You can paint over it, but the moisture is still there, seeping into your drywall and framing. A professional can help identify the source, preventing a small stain from becoming a massive repair job.
Widespread Mildew or Mold: If you're seeing dark, speckled patches spreading across a large area—especially in a damp space like a bathroom or basement—you’re probably looking at more than just surface mildew. A professional service can safely contain the spores, identify the type of mold, and tackle the moisture source to keep it from returning.
Key Takeaway: A professional cleaner is like a home diagnostician. They don't just get rid of the stain you can see; they figure out why it's there in the first place, protecting your property and your family's health.
When the Job Is Too Big or Too Stubborn
Sometimes, it’s just about the sheer scale of the problem. That stubborn yellow film and lingering smell from years of nicotine or heavy smoke, for example, can seep deep into the paint and drywall. Your average household cleaner simply won't cut it.
Professionals have access to equipment like ozone generators and thermal foggers that can neutralize odors and lift stains that are set deep into the walls. The investment often pays for itself when you consider the time, frustration, and disappointing results of trying to tackle it alone. It's a common dilemma, which is why the global market for wall cleaning services is valued at an impressive USD 1.11 billion—plenty of people turn to the experts for a guaranteed result. You can dive deeper into these trends by checking out the full market report.
Bringing in an expert isn’t giving up; it’s just the smarter, more efficient path for complex cleaning challenges. When you've decided it's time to get a quote and see what a professional can do for your home, you can easily schedule a cleaning service online and get your walls back to looking their best.
Answering Your Top Wall Stain Questions
Even after you've learned all the tricks, some questions always pop up when you're face-to-face with a stubborn wall stain. Let's run through a few of the most common ones I hear from homeowners. Getting these details right can be the difference between a quick fix and a repair job you didn't plan on.
We'll cover a few go-to tools, some frustrating "what-if" scenarios, and how to keep those walls looking fresh long after you've put the sponges away.
Can I Use a Magic Eraser on Any Wall?
I get this one a lot. Magic erasers feel like, well, magic, but they aren't a universal solution. It's best to think of them as a super-fine sandpaper. They work because they're slightly abrasive, which is fantastic for lifting a tough scuff mark but can be a disaster on the wrong surface.
They're at their best on durable, higher-sheen paints like semi-gloss or gloss. But if you try to scrub a wall with a flat or matte finish, you're likely to rub the paint right off. This leaves behind a shiny, burnished-looking patch that often looks worse than the stain you were trying to remove.
The Golden Rule: Always, always test a magic eraser on a small, hidden spot first. Tuck it behind a piece of furniture or test it inside a closet. Use gentle pressure, let it dry completely, and then check the spot from different angles to see if the sheen has changed. Only then should you tackle the real stain.
Why Does a Stain Keep Coming Back After I Clean It?
This is a classic—and incredibly frustrating—problem, especially when dealing with water or grease. You scrub a spot until it's gone, only to watch it creep back into view a few days later. This happens because the stain has soaked deeper than just the surface layer of paint.
- For water stains, a reappearing spot almost always means there’s still moisture in the drywall. Either the original leak wasn't fully fixed, or the wall hasn't completely dried out. The discoloration will just keep wicking its way back to the surface.
- With grease, the oils penetrate deep into porous materials like paint and drywall. You might clean the surface, but the oil that's trapped underneath will slowly seep back out over time.
To fix this for good, you need to create a barrier. Once you've cleaned the area and are positive it's bone dry, you absolutely must apply a high-quality, stain-blocking primer. This seals the residue into the wall, preventing it from ever bleeding through your topcoat. After that, you're clear to repaint.
How Can I Prevent Wall Stains in the First Place?
An ounce of prevention is truly worth a pound of cure here. A little forethought can save you a ton of scrubbing later on.
For starters, think about the paint itself. In high-traffic zones like hallways, kitchens, or kids' playrooms, opt for a more durable, washable paint. A satin or eggshell finish strikes a great balance, offering scrubbability without a ton of shine.
Beyond that, it’s about good habits. Wipe up splatters and spills the moment you see them, before they have a chance to set. And don't underestimate the power of regular dusting—it stops that thin layer of grime from building up and making your walls look dingy.
Feeling like you're fighting a losing battle with stubborn stains? If you're ready to see your home at its absolute best, the experts at Neat Hive Cleaning are here to help. We provide meticulous, professional cleaning services that will leave your walls—and your entire home—looking spotless. Book your cleaning online today!
Ready for a spotless home?