
Your Ultimate 10-Point Move In Cleaning Checklist for a Fresh Start
Published on January 13, 2026
Moving into a new home is an exciting milestone, but that excitement can quickly fade when faced with the hidden grime left by previous occupants. An empty house reveals every speck of dust, smudge, and forgotten spill, and it's impossible to know the cleaning standards of the people who lived there before you. Tackling this task yourself without a plan can be overwhelming, which is why a systematic approach is crucial for a truly fresh start.
This comprehensive move in cleaning checklist breaks down the entire process into 10 essential, manageable tasks. We'll guide you through each room with a prioritized plan designed to maximize efficiency and ensure no corner is overlooked. This isn't just a list; it's a strategic guide.
Inside, you will find:
- A printable, room-by-room checklist to keep you organized.
- Estimated timings for each task to help you plan your schedule.
- Expert tips to distinguish between a standard surface clean and a deep, restorative one.
- Guidance on when to DIY versus when to hire professionals for a flawless finish.
Whether you're a DIY enthusiast determined to scrub every surface or a busy professional in Portland considering expert help, this guide ensures your new chapter begins in a space that is not just visibly clean, but hygienically pristine and ready for you to make it your own. Let's get started on transforming your new house into a spotless home.
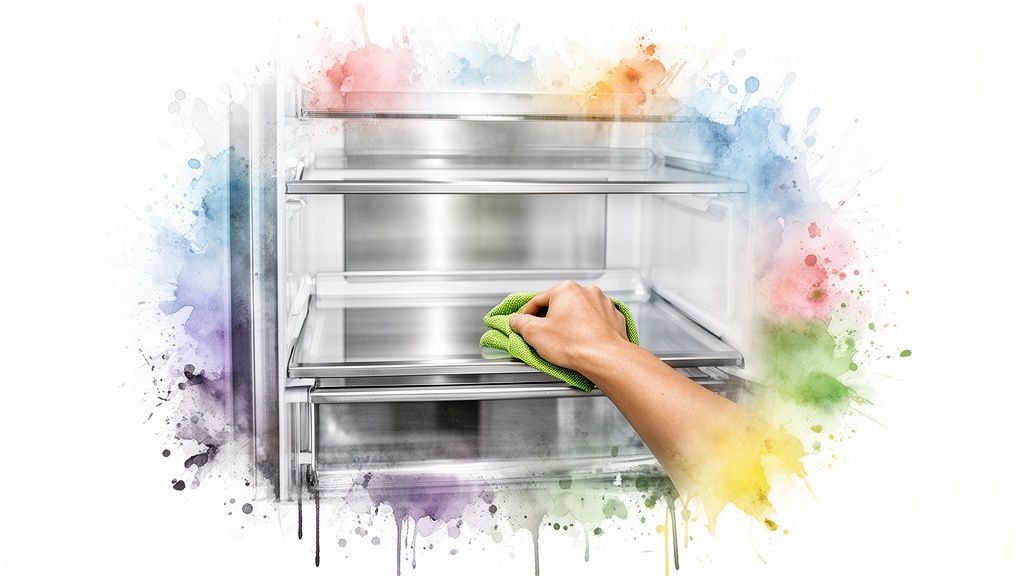
1. Kitchen Appliance Deep Clean
No one wants to cook their first meal in a new home using appliances coated in the previous resident's grease and food splatters. A deep clean of all kitchen appliances is a non-negotiable first step in any effective move-in cleaning checklist. This task goes far beyond a simple wipe-down, targeting the hidden grime, bacteria, and odors lurking inside and out of your refrigerator, oven, microwave, and dishwasher. Tackling this first ensures your food preparation areas are hygienic and truly ready for a fresh start.
Why It's a Top Priority
Neglected appliances can harbor bacteria, affect food taste, and even become fire hazards from excessive grease buildup. By addressing these areas before you unpack a single box, you create a sanitary foundation for your new kitchen. It also allows you to use strong degreasers and cleaning agents without worrying about contaminating your food, a luxury you won't have once the kitchen is stocked.
Key Tasks for an Appliance Deep Clean
To ensure a comprehensive clean, focus on these critical areas:
- Refrigerator: Remove all shelves and drawers. Wash them with warm, soapy water and wipe down the interior with a food-safe cleaner. Don't forget to vacuum the dust from the condenser coils at the back or bottom for improved efficiency.
- Oven: Take out the racks and soak them in a degreasing solution. Scrub the interior to remove baked-on residue. Use the self-cleaning function if available, but only in a well-ventilated space before you've fully moved in.
- Stovetop & Hood: Remove burner grates and caps to soak and scrub. Clean the cooktop surface thoroughly. Degrease the range hood and wash its filter to improve air quality and prevent fire risks.
Pro Tip: Always begin cleaning from the top down. Start with the microwave and range hood, then the stovetop, and finish with the oven. This prevents drips and debris from dirtying already cleaned surfaces. For a truly professional touch on these essential areas, you can explore the specifics of a comprehensive appliance deep clean and see how experts restore them to a like-new condition.
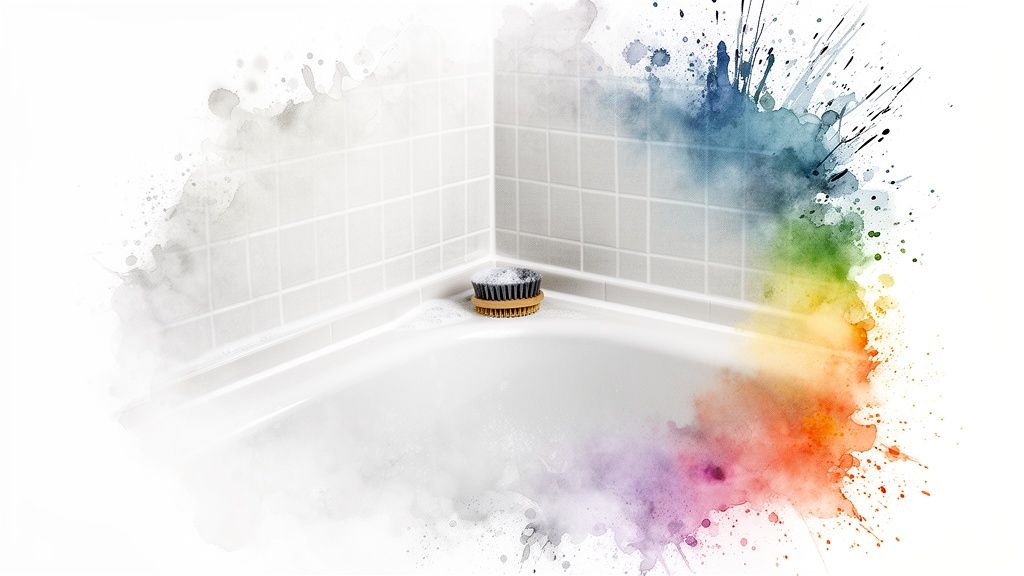
2. Bathroom Sanitization and Grout Cleaning
Stepping into a new bathroom should feel refreshing, not questionable. A thorough sanitization of all bathroom surfaces is a critical health and safety measure on any move-in cleaning checklist. This goes far beyond a quick wipe of the counter, targeting the unseen bacteria, mold, mildew, and hard water deposits left behind. Properly sanitizing the toilet, shower, sink, and especially the grout lines ensures you eliminate potential germs and start fresh in your most personal space.
Why It's a Top Priority
Bathrooms are high-moisture environments, making them a prime breeding ground for mold, mildew, and various bacteria. Previous occupants may have left behind invisible contamination in shower corners, around the toilet base, and deep within tile grout. Addressing this before you unpack toiletries and towels is essential for hygiene and prevents you from unknowingly spreading germs throughout your new home.
Key Tasks for Bathroom Sanitization
For a truly deep and hygienic clean, concentrate your efforts on these vital tasks:
- Toilet Disinfection: Clean and disinfect the entire toilet, inside and out. Pay special attention to the base, behind the seat, and the flush handle. Use a disinfectant cleaner and let it sit for the recommended contact time to kill germs effectively.
- Shower & Tub Scrub: Remove soap scum and hard water stains from the tub, shower walls, and glass doors. Use a powerful, appropriate cleaner for the surface material to avoid damage while effectively dissolving buildup.
- Grout & Tile Cleaning: Scrub grout lines with a stiff brush and a dedicated grout cleaner to remove discoloration from mold and grime. Treat tile surfaces with an antifungal solution to kill existing spores and help prevent their return.
Pro Tip: When cleaning grout, allow your cleaning solution to sit for 10-15 minutes to penetrate the grime before you start scrubbing. After cleaning and once the grout is completely dry, apply a grout sealant. This creates a protective barrier that repels moisture and makes future cleaning significantly easier.
3. Floor Cleaning and Baseboards
Floors and baseboards set the stage for the entire home, yet they often hold the most accumulated grime from previous occupants. A thorough floor and baseboard cleaning is a crucial part of any move-in cleaning checklist, removing layers of dust, dirt, pet dander, and scuff marks that a quick sweep would miss. Addressing this before furniture arrives ensures you can reach every corner and edge, creating a truly clean foundation from the ground up for your belongings and family.

Why It's a Top Priority
Neglected floors can harbor allergens and bacteria, while dirty baseboards make even a clean room feel unfinished and grimy. Tackling this task early prevents you from spreading dirt and dust as you move boxes around your new space. A comprehensive floor cleaning not only sanitizes the surface but also eliminates lingering odors and restores the original luster to hardwood, tile, or laminate, instantly making the home feel brighter and more welcoming.
Key Tasks for Floor and Baseboard Cleaning
For a complete and effective clean, concentrate on these specific actions:
- Baseboards and Corners: Use a vacuum with a brush attachment to remove all loose dust from baseboards and corners first. Then, wipe them down with a damp microfiber cloth and a gentle cleaning solution to remove scuffs and stuck-on grime.
- Hard Surfaces: After a thorough sweep or vacuum, mop all hard floors (hardwood, tile, vinyl, laminate) with a cleaner appropriate for the material. Pay special attention to high-traffic areas and any sticky spots or residue.
- Grout Lines: For tiled floors, use a grout brush and a specialized cleaner to scrub away discoloration and embedded dirt in the grout lines, which can dramatically brighten the appearance of a kitchen or bathroom.
Pro Tip: Always clean baseboards before you mop the floors to avoid dripping dirty water onto your freshly cleaned surfaces. Start in the farthest corner of a room and mop your way out toward the exit to avoid tracking footprints across the damp floor. If this level of detail sounds overwhelming, understanding what’s included in a standard professional cleaning can show you how experts achieve flawless results every time.
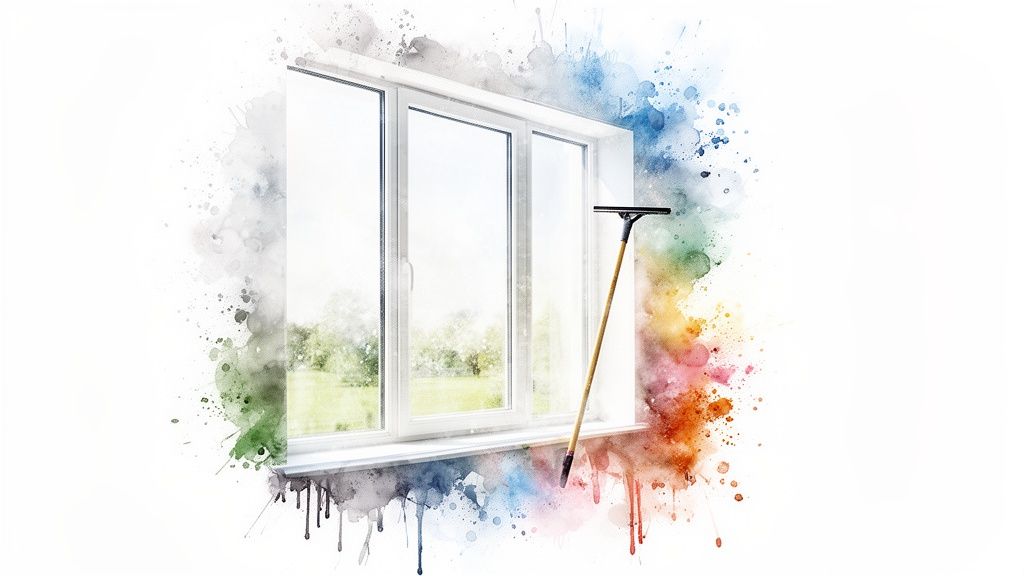
4. Window and Glass Surface Cleaning
Years of accumulated dust, hard water spots, and exterior grime can make a new home feel dark and dingy. A thorough cleaning of all windows, mirrors, and glass surfaces is a crucial task on your move-in cleaning checklist that instantly brightens the space. This goes beyond a quick spritz and wipe; it involves tackling built-up residue to let the maximum amount of natural light flood into your new home, making every room feel more welcoming and expansive.
Why It's a Top Priority
Clean windows and glass can dramatically change the entire atmosphere of a house, making it feel cleaner, bigger, and more cheerful. Addressing this before furniture arrives gives you unobstructed access to every window, sliding door, and mirror. It also allows you to deep clean tracks and sills without worrying about splashing onto your belongings, setting a sparkling clean foundation for your home’s interior.
Ready for a spotless home?
Key Tasks for Window and Glass Surfaces
For a truly transparent, streak-free finish, concentrate on these essential areas:
- Window Panes: Clean both the interior and exterior of every window. Use a quality glass cleaner or a vinegar-water solution and wipe with a microfiber cloth to prevent lint. For large panes, a squeegee can provide a professional, streak-free shine.
- Mirrors & Glass Doors: Pay special attention to bathroom mirrors, which often have hard water deposit buildup. Clean all sliding glass doors, ensuring you remove smudges and fingerprints for a flawless look.
- Tracks and Sills: Don't neglect the frames. Vacuum out loose dust, cobwebs, and debris from window and door tracks. Use an old toothbrush and a cleaning solution to scrub away any stubborn, caked-on grime.
Pro Tip: Avoid cleaning windows on a hot, sunny day. The heat can cause your cleaning solution to dry too quickly, leaving behind unsightly streaks. Opt for an overcast day for the best results. A consistent wiping pattern, either top-to-bottom or side-to-side, also helps ensure you don’t miss any spots and minimizes streaking.
5. Bedroom and Living Area Dusting
Walking into your new bedroom or living space should feel like a fresh start, not an encounter with the previous resident's dust and allergens. A thorough top-to-bottom dusting is a fundamental part of any move-in cleaning checklist, as it removes the settled debris, cobwebs, and particulates that accumulate in an empty home. This step is crucial for establishing good indoor air quality and ensuring your personal spaces are clean, comfortable, and truly ready for you to inhabit.
Why It's a Top Priority
Dust isn't just unsightly; it's a mixture of skin cells, fibers, pollen, and other allergens that can trigger respiratory issues and allergies. Tackling this before your furniture arrives prevents this accumulated grime from being kicked up and settling on your belongings. An empty room provides unparalleled access to high corners, light fixtures, and baseboards that are difficult to reach once furniture is in place, making this the perfect time for a deep, comprehensive dusting.
Key Tasks for Dusting Living Areas
To create a truly dust-free environment, focus on these often-overlooked spots:
- High Areas: Start with ceiling corners, removing any cobwebs. Carefully dust light fixtures, ceiling fan blades, and the tops of window and door frames.
- Walls and Trim: Gently wipe down walls and baseboards. Pay close attention to trim, windowsills, and any built-in shelving where dust settles heavily.
- Fixtures and Vents: Clean all light switches, outlet covers, and return air vents. Dusting vents can help prevent the HVAC system from circulating old dust throughout your new home.
Pro Tip: Always use microfiber cloths that trap and hold dust particles instead of just pushing them around. For best results, work from the top of the room down to the bottom. Dust the ceiling fan first, then the window sills, and finish with the baseboards, allowing gravity to work in your favor. This ensures you capture all the debris before you begin vacuuming the floors.
6. Cabinet and Drawer Interior Cleaning
Unpacking your dishes, utensils, and linens into someone else's leftover crumbs and dust is an unsettling way to start life in a new home. Cleaning the interiors of all cabinets and drawers is a critical task on any move-in cleaning checklist, ensuring your belongings have a truly fresh, sanitary space from day one. This process involves more than a quick wipe; it's about removing lingering debris, sanitizing surfaces where you'll store food and personal items, and creating a pristine foundation for organization.
Why It's a Top Priority
Cabinet and drawer interiors are out-of-sight spaces that often harbor dust, food particles, and grime left behind by previous occupants. Skipping this step means you're placing your clean items directly onto dirty surfaces, which can be unhygienic, especially in the kitchen and bathroom. A thorough cleaning before you unpack makes organizing easier and guarantees that every storage space, seen or unseen, meets your standards of cleanliness.
Key Tasks for Cleaning Cabinets and Drawers
To ensure every nook is addressed, focus on a methodical approach:
- Remove Old Liners: Carefully peel up any old, grimy shelf liners. If stubborn adhesive residue remains, use a citrus-based cleaner or a gentle adhesive remover to dissolve it without damaging the surface.
- Vacuum First: Use a vacuum with a hose attachment to quickly remove all loose crumbs, dust, and debris. Pay special attention to the corners and crevices where dirt accumulates.
- Wipe and Sanitize: Mix a solution of warm water and a mild detergent or use a multi-surface cleaner. Wipe down all interior surfaces, including shelves, walls, and the drawer bottoms. For bathroom vanities, use a disinfecting cleaner.
- Dry Completely: After cleaning, use a dry microfiber cloth to wipe away any moisture. This step is crucial to prevent wood from warping and to avoid creating a damp environment that could lead to mildew.
Pro Tip: Work on one cabinet or set of drawers at a time, from top to bottom. This systematic approach ensures you don't miss any spots and keeps the task from feeling overwhelming. Once everything is clean and dry, consider installing fresh, new shelf liners to protect the surfaces and make future cleanups even easier.
7. Door and Hardware Cleaning
Often overlooked, doors and their hardware are some of the most frequently touched surfaces in any home. From fingerprints and grime on door panels to the buildup on doorknobs and hinges, these areas collect a surprising amount of dirt and germs. A thorough cleaning of every door, frame, and piece of hardware is a critical task on any move-in cleaning checklist, instantly making the entire space feel fresher and more hygienic. This detailed attention ensures every entry point is not just clean but also functions smoothly from the moment you arrive.
Why It's a Top Priority
Doors and doorknobs are high-traffic, high-touch zones that can harbor a significant amount of bacteria left by previous occupants. Cleaning them before you unpack disinfects these key surfaces, contributing to a healthier living environment. Furthermore, clean, polished hardware and dirt-free doorframes significantly elevate the home's overall appearance, providing a subtle but powerful feeling of a truly fresh start. It also gives you a chance to check that all locks and latches are working properly.
Key Tasks for Door and Hardware Cleaning
To guarantee a complete and detailed clean, concentrate on these specific actions:
- Wipe Down All Surfaces: Using a damp microfiber cloth and a gentle all-purpose cleaner, wipe down both sides of every interior and exterior door. Pay special attention to the areas around the handles where fingerprints accumulate.
- Clean and Polish Hardware: Disinfect and polish all doorknobs, handles, locks, and hinges. Use a cleaner appropriate for the material, such as a brass polish for brass or a stainless steel cleaner for modern fixtures, to restore their shine without causing damage.
- Address Frames and Molding: Dust and wipe down all doorframes, trim, and baseboards surrounding the entryway. This removes settled dust and scuff marks, creating a clean, seamless look from floor to ceiling.
Pro Tip: For sticky or stiff locks, apply a small amount of graphite lubricant directly into the keyhole. Avoid using oil-based products like WD-40, which can attract more dust and gum up the lock mechanism over time. A quick spritz of the right lubricant ensures smooth operation for years to come.
8. Wall and Light Switch Cleaning
Walls and light switches are the silent witnesses to a home's history, often covered in invisible germs, scuffs, and dust from previous occupants. A thorough wall and switch cleaning is a critical, yet frequently overlooked, task on any move-in cleaning checklist. This goes beyond aesthetic touch-ups; it's about sanitizing high-touch surfaces and removing allergens and grime that have settled on the home's largest surface area. Addressing this before furniture arrives ensures a healthier, truly clean slate for your new beginning.
Why It's a Top Priority
Light switches, outlet covers, and thermostat controls are among the most frequently touched spots in any home, making them hotspots for bacteria and viruses. Walls accumulate dust, cobwebs, and airborne particles that can trigger allergies. Cleaning these surfaces before you unpack eliminates the risk of spreading contaminants and ensures the air quality in your new home is as fresh as possible. It’s far easier to tackle large wall surfaces in an empty room than to maneuver around furniture and belongings later.
Key Tasks for Wall and Light Switch Cleaning
For a comprehensive clean that enhances both hygiene and appearance, focus on these critical tasks:
- Sanitize High-Touch Points: Use a disinfecting wipe or a cloth lightly sprayed with a sanitizing solution to meticulously clean all light switches, outlet plates, thermostats, and doorbell units.
- Wash the Walls: Use a long-handled duster or a vacuum with a brush attachment to remove loose dust and cobwebs from walls and corners. For fingerprints and smudges, use a barely-damp microfiber cloth with a mild soap and water solution.
- Spot-Treat Stubborn Marks: Address scuffs, crayon marks, or other stubborn stains with a magic eraser or a targeted cleaning paste. Always test your cleaning solution on an inconspicuous spot first to ensure it doesn't damage the paint.
Pro Tip: When cleaning walls, always work from top to bottom to prevent dust and drips from dirtying areas you've already cleaned. Use two buckets: one with your mild cleaning solution and one with clean rinse water. This prevents you from spreading grime across the wall surfaces. For a professional-grade clean that leaves every surface spotless and sanitized, consider the detailed approach used in a dedicated move-in cleaning service, which guarantees no detail is overlooked.
9. Entryway and Foyer Deep Clean
The entryway is the first impression of your new home, and it often bears the brunt of foot traffic from the previous occupants and their move-out process. A thorough deep clean of the foyer, front door, and any transition spaces is essential for setting a welcoming and hygienic tone. This task focuses on removing tracked-in dirt, scuff marks, and accumulated grime from surfaces that greet you and your guests every day, ensuring your fresh start begins the moment you step inside.
Why It's a Top Priority
As the primary gateway into your home, the entryway collects a high concentration of outside allergens, dirt, and bacteria. Neglecting this area means this debris can easily be tracked further into your newly cleaned living spaces, undermining your efforts. By deep cleaning the foyer as part of your move-in cleaning checklist, you create a clean buffer zone and immediately establish a higher standard of cleanliness for your entire home from day one.
Key Tasks for an Entryway Deep Clean
To guarantee a pristine first impression, concentrate on these crucial areas:
- Front Door and Threshold: Wipe down the entire door, inside and out, including the handle, knocker, and any glass panes. Pay special attention to the door threshold, vacuuming and scrubbing this high-traffic groove where dirt loves to hide.
- Floors and Baseboards: Mop or scrub the entry flooring, using a cleaner appropriate for the material (hardwood, tile, vinyl). Don't forget to wipe down the baseboards, which are magnets for scuff marks and dust.
- Entry Closet: If there's an entry closet, wipe down the shelves, hanging rod, and walls before you hang your first coat. This prevents transferring dust and grime onto your outerwear.
- Light Fixtures and Walls: Dust and clean any foyer light fixtures to maximize brightness. Spot-clean walls to remove any fingerprints, smudges, or marks left behind during the moving process.
Pro Tip: Make the entryway the very last area you clean. Since you and any helpers will be walking in and out frequently, cleaning this space last prevents it from immediately getting dirty again. This ensures it's spotless and completely dry right before you officially settle in.
10. Post-Cleaning Inspection and Quality Assurance
The final, crucial step after hours of scrubbing and sanitizing is often the most overlooked: a systematic final inspection. This quality assurance walkthrough isn't just a quick glance; it's a methodical verification process to ensure every single task on your move in cleaning checklist has been completed to a high standard. This final check guarantees that your new home is not just visibly clean but truly ready for a fresh start, with no missed corners or overlooked grime.
Why It's a Top Priority
A post-cleaning inspection transforms your effort from just "cleaning" into a completed project with a verifiable outcome. It catches the small details that are easy to miss when you're tired, such as a dusty ceiling fan blade or a streaky window. For those hiring professionals, this step ensures you receive the service you paid for. It provides peace of mind that every nook and cranny is sanitized before your belongings arrive, preventing the frustrating discovery of a missed spot after you've already unpacked.
Key Tasks for a Final Inspection
To conduct a thorough and effective quality check, follow a structured approach:
- Use Your Checklist: Go back through your initial move in cleaning checklist, physically ticking off each completed item as you inspect the area. This ensures nothing is forgotten.
- Check High and Low: Inspect areas that are often missed, such as the tops of door frames, inside cabinets and drawers, along baseboards, and behind toilets.
- Test Functionality: Run faucets to ensure they are clean and draining properly. Flick light switches to confirm the fixtures and switch plates are free of dust and smudges.
- Document Everything: Taking "after" photos of key areas provides a valuable record of the home's condition upon move-in, which can be especially useful for renters.
Pro Tip: Always conduct your final inspection in bright, natural daylight if possible. Artificial lighting can cast shadows that hide dust and streaks. Open all blinds and turn on all lights to get the clearest possible view of every surface. This professional standard is a key part of ensuring a comprehensive move-in cleaning service that leaves no detail overlooked.
10-Point Move-In Cleaning Comparison
| Service | 🔄 Implementation Complexity | ⚡ Resource Requirements | ⭐ Expected Outcomes | 📊 Ideal Use Cases | 💡 Key Advantages / Tips |
|---|---|---|---|---|---|
| Kitchen Appliance Deep Clean | High — appliance-specific methods and care | Specialized cleaners, scrubbing tools, time | ⭐⭐⭐⭐ Hygienic, odor-free appliances; extends lifespan | Move-in kitchens, rentals, inspections | Use food-safe degreasers; follow manufacturer guidelines |
| Bathroom Sanitization and Grout Cleaning | High — intensive scrubbing and mold treatments | Strong disinfectants, grout tools, PPE, ventilation | ⭐⭐⭐⭐ Eliminates mold/mildew; reduces health risks | Bathrooms with mold, health-sensitive occupants | Ventilate, allow contact time; seal grout after cleaning |
| Floor Cleaning and Baseboards | Moderate — varies by floor type; careful drying needed | Mops, pH-neutral cleaners, vacuums, specialty solvents | ⭐⭐⭐ Clean, allergen-reduced floors; protected surfaces | Whole-home move-in, allergy concerns, pre-staging | Sweep first; use correct cleaner per floor; dry fully |
| Window and Glass Surface Cleaning | Moderate — safety for exterior windows can increase complexity | Squeegees, microfiber, ladders, glass solutions | ⭐⭐⭐⭐ Brighter rooms; improved curb appeal; removes deposits | Homes for sale, brightening interiors, hard-water stains | Clean on overcast days; use squeegee and microfiber for streak-free finish |
| Bedroom and Living Area Dusting | Low–Moderate — many surfaces and heights to access | Microfiber cloths, extension poles, vacuums | ⭐⭐⭐ Improved indoor air quality; reduced allergens | Allergy-prone households, staging, move-in prep | Dust top-to-bottom; capture dust with microfiber; change cloths often |
| Cabinet and Drawer Interior Cleaning | Moderate — labor-intensive, careful item handling | Cloths, adhesive removers, sanitizers, time | ⭐⭐⭐ Clean, food-safe storage; ready-to-use cabinets | Kitchens/bathrooms before occupancy, rental turnovers | Remove liners first; dry thoroughly; work cabinet-by-cabinet |
| Door and Hardware Cleaning | Low–Moderate — many materials require different products | Polishes, non-abrasive cleaners, lubricants | ⭐⭐⭐ Enhanced appearance; functional locks; reduced germs | Entryways, high-touch areas, staging | Use material-specific cleaners; lubricate locks sparingly |
| Wall and Light Switch Cleaning | Low — spot-cleaning with care for paint and outlets | Mild cleaners, sanitizing wipes, magic erasers | ⭐⭐⭐ Removes marks, reduces bacteria on high-touch areas | Homes with visible scuffs, preparing walls for paint | Test solutions first; use barely-damp cloths; work top-to-bottom |
| Entryway and Foyer Deep Clean | Moderate — high-traffic debris and varied surfaces | Floor cleaners, doormat cleaning, closet attention | ⭐⭐⭐ Fresh first impression; reduced tracked debris | Foyers, rental entries, staging for showings | Clean entry last; ensure floors dry; attend thresholds and closets |
| Post-Cleaning Inspection and Quality Assurance | Moderate — requires trained staff and documentation | Checklists, camera, time for walkthroughs | ⭐⭐⭐⭐ Verifies completeness; reduces callbacks; builds trust | All move-in/out projects and premium services | Use dated photos, standardized checklists, and customer sign-off |
DIY or Delegate? Making the Right Choice for Your Move
You now have a comprehensive, room-by-room move in cleaning checklist designed to transform any space from vacant to vibrant. This blueprint is your key to a systematic and thorough clean, ensuring no dusty corner or grimy surface is overlooked. From the deep sanitization of kitchen appliances and bathroom grout to the meticulous detailing of baseboards, light switches, and window tracks, you are fully equipped to tackle the task head-on.
Following this guide methodically ensures you create a truly healthy and welcoming environment for your first night and beyond. The value isn't just in the cleanliness itself; it’s in the peace of mind that comes from knowing every inch of your new home has been properly sanitized and prepared for your arrival. This structured approach prevents overwhelm and replaces moving chaos with controlled, satisfying progress.
Evaluating Your Resources: Time, Energy, and Tools
The biggest decision you face now isn't what to clean, but who will do the cleaning. The reality of moving is often a collision of tight deadlines, physical exhaustion, and the sheer volume of tasks competing for your attention. Before you commit to the DIY route, perform a quick, honest assessment of your resources:
- Time Commitment: Look at your moving schedule. Do you realistically have the 8 to 16 hours required to complete a deep clean, on top of packing, unpacking, and logistical planning? Remember, unexpected delays are common during a move.
- Physical Energy: Moving is a physically demanding process. Lifting boxes, assembling furniture, and organizing your belongings will take a toll. Consider whether you will have the stamina left to scrub floors, degrease ovens, and detail bathrooms to the standard you desire.
- Equipment and Supplies: Do you own or are you willing to purchase all the necessary supplies, from a wet/dry vac and microfiber cloths to specialized grout cleaners and degreasers? The cost of these items can add up quickly.
If you find yourself short on any of these resources, delegating the cleaning is not a luxury; it's a strategic decision. It’s an investment in your well-being and a way to reclaim precious hours during one of life's most stressful events.
Key Takeaway: The ultimate goal is a perfectly clean home, not the personal satisfaction of having scrubbed it yourself. Choosing the most efficient path to that goal is the smartest move you can make.
The Professional Advantage: Certainty in a Time of Chaos
When the demands of moving become overwhelming, bringing in a professional cleaning service like Neat Hive Cleaning is a powerful solution. For Portland-area residents, our move-in/move-out services are specifically designed to execute every item on this detailed checklist with expert efficiency and professional-grade equipment. We handle the demanding tasks of sanitizing bathrooms, deep cleaning kitchen appliances, and ensuring every surface is pristine, so you don't have to.
Our insured and bonded teams deliver a guaranteed, high-quality clean that provides a true fresh start. This allows you to focus your energy where it matters most: unpacking, decorating, and celebrating the beginning of a new chapter. Instead of spending your first day in your new home with a scrub brush in hand, you can walk through the door and simply breathe a sigh of relief. Your move-in experience sets the tone for your life in a new home; make sure it's one of peace, excitement, and comfort.
Ready to step into a flawlessly clean home without lifting a finger? Let the experts at Neat Hive Cleaning handle your move-in clean with our detailed, professional service. Visit Neat Hive Cleaning to get your free estimate and book online in minutes, so you can focus on what truly matters: settling in.
Ready for a spotless home?