
How to Clean Kitchen Cabinets Inside: A Pro's Guide
Published on January 24, 2026
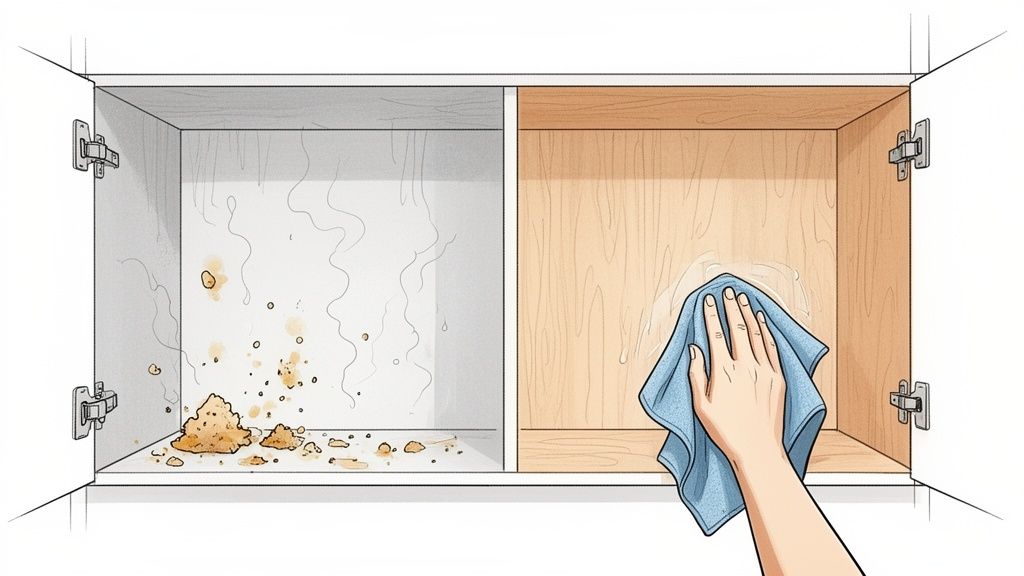
A proper cabinet clean goes far beyond a quick wipe-down. It's about completely emptying them out, vacuuming up all the loose crumbs and dust, and then washing the interior surfaces with the right cleaner—often, a simple mix of mild dish soap and warm water is all you need. The most crucial step? Drying everything completely before you even think about putting things back. This prevents moisture damage and leaves your kitchen feeling genuinely fresh and hygienic.
Getting Your Cabinets Back to Brand New
Kitchen cabinets are the unsung heroes of your home, aren't they? They quietly hold everything from your morning coffee mugs to your treasured dinner plates. But behind those closed doors, they often become a forgotten zone—a collection pot for crumbs, sticky spills, and that nearly invisible film of cooking grease. It's a classic situation our cleaning services team sees in homes all over, from spacious Beaverton kitchens to the compact apartments in downtown Portland.
Over time, this buildup is more than just an eyesore. It can attract pests and create stubborn, lingering odors. And here in the Pacific Northwest, with our damp air, any trapped moisture can quickly lead to musty smells that are impossible to ignore.
The Hidden Impact of Neglected Cabinets
Cleaning the inside of your cabinets regularly is about more than just appearances; it's a fundamental part of home hygiene. It's a perfect example of "out of sight, out of mind," but those hidden surfaces can harbor a surprising amount of bacteria if they aren't cleaned.
A deep clean isn't just about making things look good. It’s about resetting your kitchen's hygiene baseline, getting rid of hidden grime, and protecting your investment in your home.
This direct link between cleanliness and longevity is exactly why a thorough interior cabinet cleaning is a non-negotiable part of any professional house cleaning service.
The Value of a Deep Clean
Cabinets are a huge part of your kitchen's value—the global kitchen cabinets market is a massive industry for a reason. Taking care of them pays off. A simple cleaning solution, like a 1:1 vinegar-and-water mix, can eliminate up to 95% of common bacterial buildup and help extend the life of your cabinets by as much as 25-30%. It's a small bit of effort that protects one of your kitchen’s biggest assets.
This guide will walk you through a straightforward, professional approach to cleaning your cabinet interiors. We're laying out the whole process to give you a clear action plan, so you can tackle the job with confidence and reclaim your kitchen storage, one shelf at a time.
For those who like a clear roadmap, this checklist breaks down the process into manageable phases.
Quick-Start Cabinet Cleaning Checklist
| Phase | Action Steps | Estimated Time |
|---|---|---|
| Preparation | Empty cabinets, sort items, vacuum debris, set up cleaning station. | 30-60 minutes |
| Cleaning | Mix cleaning solution, wipe down all interior surfaces, tackle tough stains. | 45-90 minutes |
| Finishing | Dry cabinets thoroughly, deodorize if needed, reorganize and restock. | 30-60 minutes |
Following these key phases will ensure you don't miss a single step, making the entire project feel much more organized and less overwhelming.
Getting Your Cabinet Cleaning Kit Ready
Before you pull out a single dish, let's talk about tools. Getting your supplies in order first is the secret sauce to a smooth, efficient cleaning session. It’s what separates a frustrating, stop-and-start job from a process that just flows.
Honestly, this is a pro tip we live by in our daily work providing cleaning services in Portland. A well-stocked kit means no mid-project runs to the store and, more importantly, no accidentally grabbing the wrong cleaner and damaging your cabinets.
The Essentials for Any Cabinet Job
You probably have most of what you need already tucked away under your sink. The trick is to pick tools that are effective but gentle on your cabinet surfaces.
Here's the basic rundown of what our teams never leave home without:
- Microfiber Cloths: These are the undisputed champions of cleaning. They grab onto dust and grime instead of just pushing it around, and they won’t leave lint behind. Grab at least three—one for washing, one for rinsing, and one for buffing dry.
- Soft-Bristle Brush or an Old Toothbrush: Perfect for digging into those tricky corners, hardware edges, and any decorative trim where gunk loves to build up.
- Vacuum with a Brush Attachment: Before any liquid touches those shelves, you’ve got to get the loose crumbs and dust out. A quick once-over with the vacuum is the fastest and cleanest way to do this.
- A Bucket or Bowl: You'll want one for your cleaning mix and a second one filled with clean water for rinsing. This little step is key to avoiding a streaky finish from dirty water.
Gathering these items first makes the whole job of cleaning the inside of kitchen cabinets feel so much more manageable.
Picking the Right Cleaner
You really don’t need a cabinet full of harsh chemicals to get sparkling results. In our experience, some of the most effective solutions are the simplest ones you can mix yourself—a big plus for creating a healthier home environment.
For the vast majority of cabinets, one of these two simple mixes will do the trick:
- Mild Dish Soap and Warm Water: This is our go-to starting point for almost every job. A few squirts of a good grease-cutting dish soap (like Dawn) in a bucket of warm water is all you need to cut through most grime and food spills without harming the finish.
- White Vinegar and Water Solution: If you're dealing with lingering odors or want a natural disinfectant, a 50/50 mix of white vinegar and water is a fantastic choice. It works wonders on those slightly musty smells that can sometimes crop up.
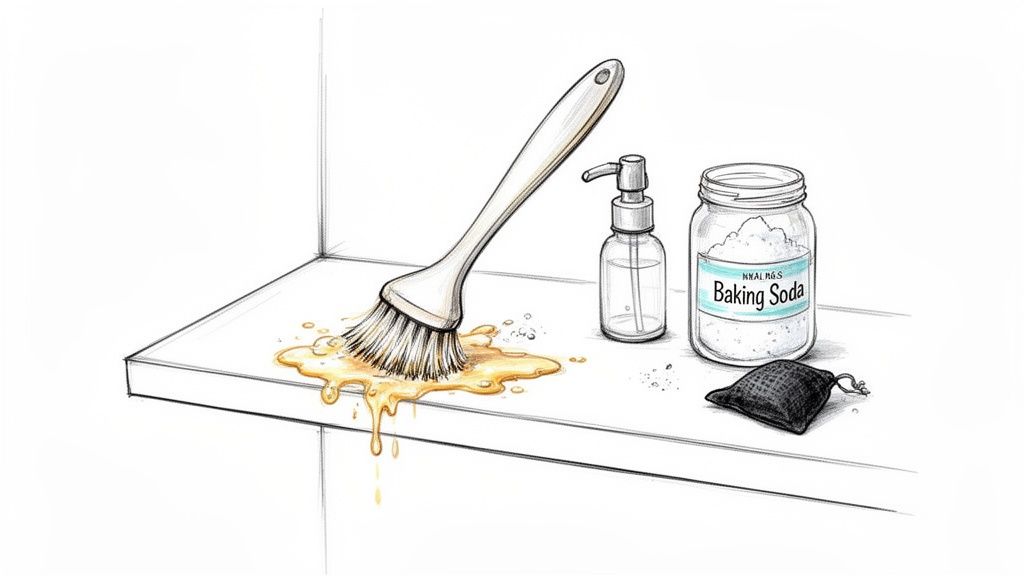
Pro Tip for Stubborn Grease: Got some sticky, built-up gunk? Mix baking soda with a little water to form a paste. Dab it onto the spot, let it sit for about 5-10 minutes, and then gently scrub it off with your soft brush. It works like a charm without scratching the surface.
This is what professional house cleaning is all about. It’s not about finding the strongest chemical on the shelf; it's about using the smartest solution for the job to get things clean while protecting your investment.
Time to Get Cleaning: The Step-by-Step Action Plan
Alright, you've got your supplies rounded up, and you're ready to go. This is where the magic happens—turning those forgotten, cluttered cabinet interiors into clean, organized spaces that actually work for you. We’ll walk through it step-by-step so you get a professional-quality clean without the stress.
Think of this as more than just a cleaning task. It’s a full reset for your kitchen. The key is to tackle it one cabinet at a time. It makes the whole project feel less overwhelming and way more satisfying.
First Things First: Empty and Edit
Start by picking one cabinet and taking everything out. Seriously, everything. Lay it all out on your counter or a nearby table so you can see what you're working with and get a clear look inside the empty cabinet.
This is your golden opportunity to declutter. Sort everything into three piles: keep, donate, and toss. Now’s the time to be ruthless. That chipped mug you never use? The spice blend that expired two years ago? Let them go. This one move will make a huge difference in how your kitchen functions long after the cleaning is done.
Next Up: Clear Out the Crumbs
Once a cabinet is empty, you’ll probably find a lovely collection of dust, crumbs, and other bits of mystery debris. The easiest way to get rid of it all is with a vacuum cleaner. Pop on the soft brush attachment to suck up all that loose stuff without just spreading it around.
Make sure to get right into the corners, along the shelf joints, and where the cabinet frame meets the wall—those are dust magnets. A good vacuuming session makes the next part, the actual washing, much cleaner and more effective.
The Right Way to Wash Your Cabinets
Not all cabinets are the same, and the wrong cleaner can cause real damage. Here in Hillsboro, where damp air can be a factor, it’s especially important to use the right technique to avoid warping or bubbling. The goal here is to clean thoroughly while protecting the material.
For Painted Wood Cabinets
So common in Portland-area homes, painted cabinets need a gentle approach. All you need is a simple mix of a few drops of mild dish soap in a bucket of warm water. Stay away from harsh scrubbers or acidic cleaners like straight vinegar, which can dull the paint or even strip it off over time.
For Natural Wood Cabinets
Moisture is the main enemy of natural wood. Use that same mild soap and water solution, but make sure your cloth is just damp, not dripping wet. Always wipe in the direction of the wood grain, and follow up immediately with a dry microfiber cloth to prevent water spots and keep the wood from swelling.
For Laminate and Melamine Cabinets
These modern finishes are tough and non-porous, which makes them a breeze to clean. A 50/50 mix of white vinegar and water works wonders, cutting through grease and disinfecting the surface. If you hit a stubborn spot, a simple paste of baking soda and water applied with a soft brush will do the trick.
Ready for a spotless home?
This simple trio is really all you need for most cabinet cleaning jobs.
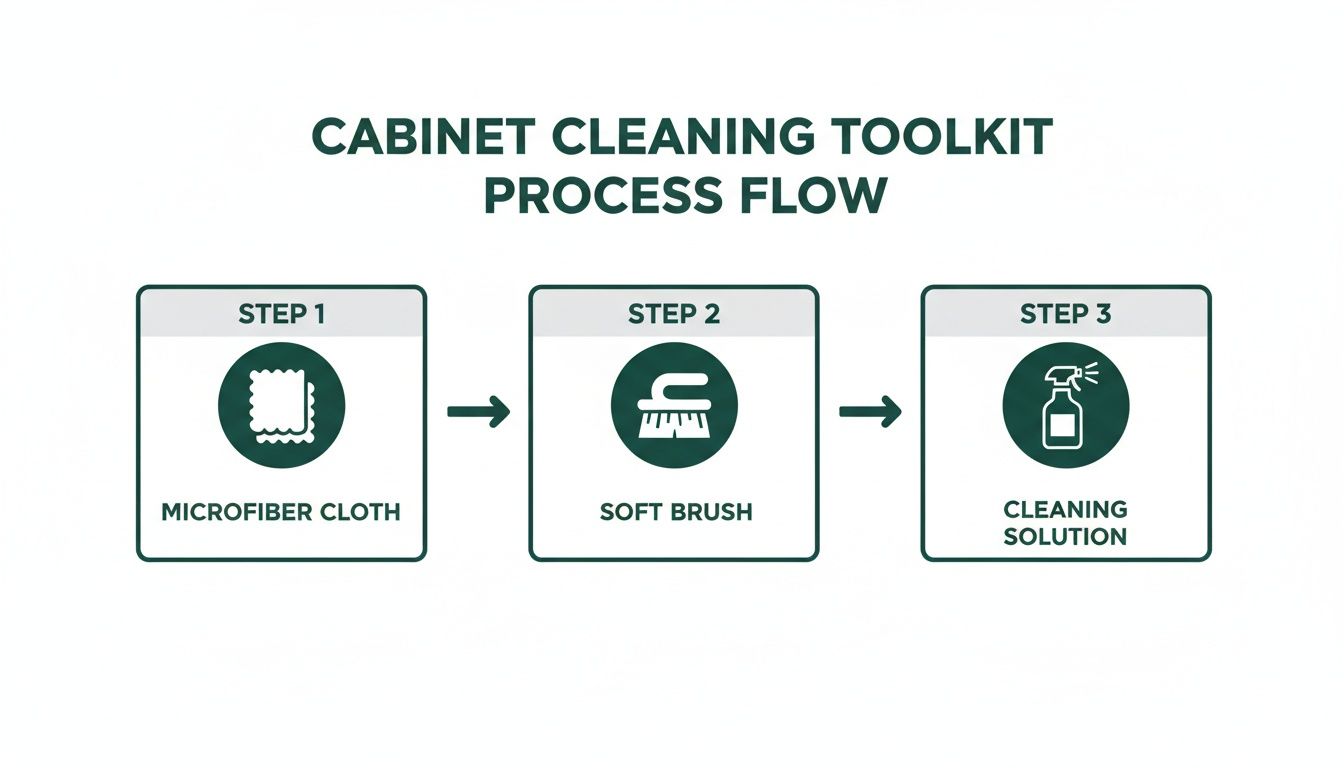
As you can see, professional results often come from using basic tools in the right order—a gentle cloth for wiping, a brush for details, and a simple, safe cleaning solution.
Don't Skip This: The Drying Stage
After all that washing, the final step is absolutely critical: drying. Any moisture left behind, especially in wood cabinets, can lead to musty smells, mold, or long-term damage.
Grab a clean, dry microfiber towel and wipe down every single surface—the shelves, the interior walls, and the floor of the cabinet. To be extra sure, leave the cabinet doors wide open for at least an hour. You can even point a small fan inside to speed things up. Don't even think about putting things back until you are 100% certain everything is bone dry.
It's a common struggle—research shows that 68% of homeowners find it hard to keep cabinet interiors clean, where grime can build up twice as fast as on countertops. But the solution is simple. You can remove 70% of loose debris just by vacuuming, and a hot soapy water mix can break down 85% of grime in under five minutes. For more stats on household cleaning, check out Metastat Insight.
Following these steps methodically is how we get fantastic results in our professional home cleaning service. To see how this fits into a bigger plan, take a look at our guide on building a kitchen deep cleaning checklist. It’s the perfect next step after conquering your cabinets.
How to Beat Stubborn Grease Stains and Odors
Sometimes, a standard wash with soapy water just doesn’t cut it. Years of cooking, especially frying or sautéing, can leave a sticky, stubborn film of grease on everything—even inside the cabinets closest to your stovetop. This is a common challenge we see in homes all over, but it’s one you can absolutely conquer.
When you're dealing with that level of grime, you have to move beyond general cleaners and bring in targeted solutions designed to break down oils and knock out odors. The trick is to be methodical and use the right tool for the specific mess you're facing.
Cutting Through Stubborn Grease Buildup
That tacky, yellowish film you find inside your cabinets? That’s polymerized grease—basically, oil that has hardened over time into a stubborn lacquer. To dissolve it, you need a solid degreasing agent.
While there are plenty of strong commercial degreasers out there, a simple and powerful DIY paste is often just as effective and much gentler on your cabinet surfaces.
Here's our go-to method:
- Mix up a baking soda paste. Just add enough warm water to baking soda to create a thick paste, about the consistency of toothpaste.
- Apply it and let it work. Spread this paste directly onto the greasy spots and give it 15-20 minutes to sit. The baking soda’s alkaline nature will get to work breaking down the acidic grease molecules.
- Give it a gentle scrub. Using a soft-bristle brush (an old toothbrush is perfect), gently scrub the area in small circles. You'll literally feel the sticky residue start to lift.
- Wipe, rinse, and dry. Grab a damp microfiber cloth to wipe away the paste and all the loosened grime. You’ll probably need to rinse your cloth a few times to get everything off. Once it's clean, dry the area completely.
This technique is safe for most cabinet finishes and works like a charm. We even use similar methods for other household surfaces, which you can read about in our guide on how to remove stains from walls.
Dealing with Food Stains and Water Marks
Spills happen. It could be a slow leak from an olive oil bottle or a splash of coffee from your morning rush. If left to sit, these can leave behind ugly stains and even attract pests.
For most food-based stains, that same baking soda paste works wonders. But for those dark rings left behind by wet glasses or cans, the approach is a bit different. Try making a paste with equal parts baking soda and white vinegar. Apply it right on the water ring, let it fizz and sit for about 10 minutes, then gently wipe it away. Just remember to test this in an inconspicuous spot first, especially if you have dark wood cabinets.
Think of your kitchen cabinets as small-scale commercial grease traps. A surprising 70% of households report issues with those sticky residues. In a humid climate, this can also increase the risk of interior cabinet mold growth by up to 40%. The good news? A simple method, like applying a baking soda paste for 20 minutes, can lift stains on 92% of common cabinet surfaces without resorting to harsh chemicals.
Banishing Musty and Lingering Odors
Even after a deep clean, some cabinets can hold onto old smells from spices, certain foods, or just a general mustiness from poor airflow. Instead of trying to mask the scent with artificial air fresheners, it’s much more effective to absorb it.
Here are a few professional secrets for deodorizing your cabinets naturally:
- Baking Soda: The classic. Place an open box or a small bowl of baking soda on a shelf, close the door, and let it absorb odors over a few days.
- Activated Charcoal: Small bags of activated charcoal are fantastic at trapping smells. Just place one in each cabinet that needs some help.
- Coffee Grounds: For a pleasant alternative, a small bowl of fresh, unused coffee grounds works great. They absorb bad odors and leave behind a faint, pleasant coffee scent.
These simple tricks are part of what defines a true deep clean service. It’s not just about what you can see; it’s about creating a space that feels and smells genuinely clean and fresh from the inside out.
Maintaining That "Just Cleaned" Feeling in Your Cabinets
You've put in the work to get your cabinet interiors looking brand new, and the last thing you want is for that greasy film and crumb collection to creep back in. The secret isn't more deep cleaning; it's about shifting from a major project to a simple, consistent maintenance routine.
A little bit of ongoing care is what stops that slow, sneaky buildup of grime in its tracks. It's all about working smarter, not harder, to keep your kitchen feeling clean and functional all the time.
Your First Line of Defense: Shelf Liners
One of the best things you can do right away is to line your shelves. Think of liners as a protective shield for your cabinet surfaces. They guard against scratches from pots and pans, catch minor drips and spills, and make future cleanups almost effortless. If you've invested in beautiful custom cabinetry, like many homeowners in Lake Oswego, this small step is a fantastic way to preserve the wood's finish for years.
You've got a few solid options, and each has its place:
- Non-adhesive Liners: These are our go-to recommendation. They have a grippy bottom that keeps them in place but can be easily lifted out for a quick wash in the sink. No sticky mess left behind.
- Adhesive Liners: These are better for high-traffic shelves where things get slid around a lot. They offer excellent protection but be warned—they can be a real pain to remove and replace down the line.
- Fabric or Cork Liners: A great choice for cabinets holding delicate glassware or china. The cushioned surface helps prevent chips and keeps things quiet.
With liners, your next wipe-down becomes incredibly simple. Just pull the liner out, clean it, and you're done.
A Simple Cleaning Rhythm You Can Actually Stick To
Consistency is what keeps grime from ever getting a foothold. You don't need a complicated, military-style schedule. Something simple that fits into your life is what will actually work long-term.
A proactive approach to cabinet maintenance isn't just about cleanliness—it's about preserving the value and longevity of one of your kitchen's most significant investments. A few minutes each month can prevent the kind of buildup that requires hours of intensive scrubbing later on.
Here's a practical schedule that works for most people:
- Monthly Wipe-Down: Once a month, just take five minutes to give the interior shelves of your most-used cabinets a quick wipe. The one with the cooking oils, spices, or coffee is a good place to start. A damp microfiber cloth is usually all it takes.
- Quarterly Check-In: Every three months or so, do a quick spot-check inside all your cabinets. Look for new spills or sticky spots and tackle them right away before they have time to set and become a bigger problem.
- Semi-Annual Refresh: Twice a year, set aside time for a more thorough clean, similar to the one you just finished. This is your chance to catch anything you might have missed and keep your cabinets in top-notch condition.
This simple rhythm turns a daunting task into a series of small, manageable actions. It's a core principle we build into our house cleaning services, empowering clients to effortlessly maintain their homes between our professional visits.
When to Call in the Pros
Let’s be honest, sometimes a DIY project is the last thing you have the time or energy for. Life in the Portland metro area can get hectic. Whether you're navigating a demanding schedule in the Pearl District or managing a busy family home out in Beaverton, cleaning the inside of your kitchen cabinets can easily fall to the bottom of the list.
Knowing how to clean kitchen cabinets inside is one thing, but actually carving out the hours to do it right is another. There are definitely times when calling in a professional cleaning service isn't just an indulgence—it's a smart, practical solution.
When Professional Help is a Game-Changer
So, when does it make sense to hand the job over to an expert team?
- Tackling Years of Grime: If you're dealing with that thick, sticky, yellowish film of grease that’s built up over years, you know what we're talking about. A professional crew has the heavy-duty, cabinet-safe degreasers and the know-how to cut through it without damaging the finish.
- The Stress of Moving: Move-in or move-out cleans are a massive undertaking. Getting a rental deposit back or ensuring your new home is truly fresh and sanitized is a perfect job to delegate. Our move out cleaning services are designed for this exact scenario.
- Staging a Home to Sell: First impressions are everything in real estate. Clean, fresh-smelling cabinets can make a kitchen feel well-maintained and inviting to potential buyers. It's a small detail that can have a big impact.
Our bonded and insured maid service teams see these exact scenarios every day across Portland. We arrive with all the right tools and products to get the job done efficiently, saving you the headache.
The biggest benefit of hiring a professional team is the peace of mind. You get to reclaim your weekend and trust that the job will be done to a high standard, guaranteed.
For those moments when the task feels overwhelming, see how our deep clean service can give your entire kitchen a complete refresh.
Tackling Your Top Cabinet Cleaning Questions
Let's dive into some of the questions we hear all the time from folks around Portland. When you're staring down a weekend of cabinet cleaning, a few common hurdles always seem to pop up. Here are some quick, practical answers to get you through them.
Can I Just Use an All-Purpose Cleaner on My Cabinets?
This is probably the #1 question we get, and it's a great one. It feels so simple to just grab that one trusty spray bottle, right? But for most kitchen cabinets, especially those with painted or natural wood finishes, all-purpose cleaners are just too aggressive.
Think of it this way: those cleaners are designed to cut through heavy grease on a stovetop, not to gently clean a delicate wood varnish. They often contain harsh chemicals that can strip the protective finish, dull the shine, or even cause discoloration over time. Your safest—and surprisingly effective—bet is almost always a simple mixture of mild dish soap and warm water.
How Long Is This Really Going to Take?
Honestly, it varies quite a bit. The biggest factors are the size of your kitchen and how much "stuff" you've accumulated inside those cabinets. If you're in a smaller apartment, you could probably knock this out in a couple of hours.
But for a larger family kitchen, say in a home out in Lake Oswego with a pantry and plenty of storage, you're likely looking at a half-day project, maybe more.
Our best advice? Don't even try to do it all at once. You'll burn out. Instead, break it into manageable chunks. Tackle one or two cabinets a day over a weekend. This makes the whole process feel less like a massive chore and more like a series of small wins.
This way, you can give each cabinet the attention it needs without feeling like you've lost your entire Saturday to cleaning.
Do I Really Have to Empty Everything Out?
Yep, you really do. We know, it's the part everyone dreads, but trying to wipe around stacks of plates and cans is a shortcut that just doesn't work. You’ll inevitably miss the sticky rings from a honey jar or the crumbs that have gathered in the back corners.
Pulling everything out is non-negotiable because it's the only way to:
- See what you actually have and finally get rid of those expired spices.
- Vacuum out all the loose debris for a truly fresh start.
- Wash and—most importantly—thoroughly dry every single surface before putting things back.
This one step is what elevates a quick wipe-down to a genuine, satisfying deep clean. It's the difference between "looks clean" and "actually is clean."
When life gets too hectic or the kitchen grime just feels like too much to handle, bringing in a professional home cleaning service can be a game-changer. If you're ready to get your time back and enjoy a sparkling kitchen, Neat Hive Cleaning is here for you. Get your free estimate and book your service online today!
Ready for a spotless home?