
The Ultimate 10-Point Kitchen Deep Cleaning Checklist for Your Portland Home
Published on January 20, 2026

In the vibrant Portland metro area, the kitchen is the heart of the home, a hub for morning coffee before a commute to Beaverton, family dinners in a cozy Hillsboro suburb, or prepping for a weekend get-together in Lake Oswego. But over time, daily life leaves its mark. Spatters from cooking Pacific Northwest salmon, a subtle grease film from countless meals, and the slow accumulation of dust and crumbs can turn this beloved space into a source of stress. A standard wipe-down only goes so far.
To truly restore your kitchen’s sparkle and hygiene, a methodical deep clean is essential. This isn't just about appearances; it's about improving food safety, extending appliance longevity, and creating a healthier environment for your family. A proper deep clean tackles the built-up grime that routine cleaning misses, from inside your oven to the hidden filters in your dishwasher. This comprehensive kitchen deep cleaning checklist, developed from our experience providing professional house cleaning services across the region, breaks down the entire process into manageable, high-impact tasks.
We'll guide you through each step with actionable advice and professional insights. You will learn the correct order of operations to clean efficiently, how to tackle stubborn grease on a range hood, and the best techniques for sanitizing often-neglected areas like cabinet interiors and refrigerator coils. This guide empowers you to achieve a professional-level clean, transforming your kitchen back into the pristine, functional, and welcoming space it was meant to be.
1. Degreasing and Deep Cleaning Stovetop and Range Hood
The stovetop and range hood are the workhorses of any kitchen, but they also attract the most stubborn grease and grime. This essential task in our kitchen deep cleaning checklist involves more than a simple wipe-down; it's a comprehensive disassembly and degreasing process that tackles baked-on food, splatters, and oily residue. Neglecting this area not only looks messy but can become a genuine fire hazard and negatively affect your home's air quality.
Why It's a Top Priority
A clean stovetop is fundamental to kitchen hygiene, but the often-overlooked range hood is just as critical. Its filters trap airborne grease particles, preventing them from settling on your cabinets and walls. When clogged, the fan becomes ineffective, and the trapped grease poses a fire risk. A thorough degreasing restores both safety and functionality, creating a healthier cooking environment. We've seen five-year-old stoves in busy Beaverton family homes look brand new after a professional degreasing, proving its transformative impact.
How to Tackle Grease and Grime
Follow these steps for a sparkling clean finish:
- Disassemble and Soak: Start by removing burner grates, caps, and control knobs. Submerge them in a sink filled with hot, soapy water and a splash of vinegar for 20-30 minutes to loosen tough residue before scrubbing.
- Target the Surface: While parts are soaking, apply a degreasing spray appropriate for your stovetop’s material. Let it sit for 5-10 minutes to break down grime before wiping with a microfiber cloth. For stubborn spots, a non-abrasive scrub pad can be used gently.
- Clean the Hood and Filters: Work from top to bottom. Clean the exterior of the range hood first. Then, remove the filters and soak them in a separate degreasing solution. Most modern metal filters can even be run through a dishwasher cycle for convenience.
Pro Tip: Cleaning range hood filters should be a monthly task to prevent heavy accumulation. For a more comprehensive guide on tackling tough jobs like this, learn more about how to deep clean a house in our detailed blog post.
When to Call the Professionals
While DIY cleaning is effective for regular maintenance, certain situations benefit from professional help. If you're dealing with years of caked-on carbon, moving out of a rental in Lake Oswego and need to pass an inspection, or managing an Airbnb turnover, our deep clean service ensures a flawless result. We use commercial-grade degreasers and specialized tools to restore your cooking appliances to pristine condition safely and efficiently.
2. Cabinet Interior Deep Cleaning and Organization
Tackling the inside of your kitchen cabinets is a cornerstone of any true kitchen deep cleaning checklist. This task goes far beyond a simple surface wipe, involving a complete declutter and sanitization process that addresses hidden crumbs, sticky spills, and accumulated dust. Neglecting cabinet interiors can lead to pest problems and food contamination, while a well-organized space streamlines meal prep and reduces daily stress.
Why It's a Top Priority
Clean and organized cabinets are essential for food safety and kitchen efficiency. Over time, expired goods, forgotten ingredients, and unseen spills create a breeding ground for bacteria and attract pests. A thorough clean-out ensures everything you store is fresh and safe to use. We often find that for busy professionals in Portland, a reorganized cabinet system not only improves hygiene but also saves precious time during hectic weekday mornings.
How to Tackle Grease and Grime
Follow these steps for a sparkling clean finish:
- Empty and Assess: Work on one cabinet at a time to avoid being overwhelmed. Remove every item and place it on a clean countertop. This is the perfect time to check expiration dates and discard old or unused products.
- Wipe and Sanitize: Vacuum out any loose crumbs and debris. Then, using a warm, soapy microfiber cloth or an all-purpose cleaner, wipe down all interior surfaces, including shelves, walls, and the inside of the door.
- Organize and Restock: Before returning items, group them into logical categories like baking supplies, canned goods, or spices. Place frequently used items at eye level and consider using clear containers or shelf risers to maximize space and visibility.
Pro Tip: Install washable shelf liners to protect your cabinet surfaces from future spills. They make cleanup much easier and add a layer of protection to the wood or laminate, a simple trick that keeps cabinets looking new for years.
When to Call the Professionals
While organizing is a personal task, the deep cleaning aspect can be daunting, especially during a move. If you're preparing a rental property in Hillsboro for new tenants or need a flawless move in cleaning service to ensure the previous occupants left no trace behind, professionals are invaluable. Our team uses specialized techniques to eliminate stubborn, sticky residue and sanitize every corner, providing a perfectly clean slate for your belongings.
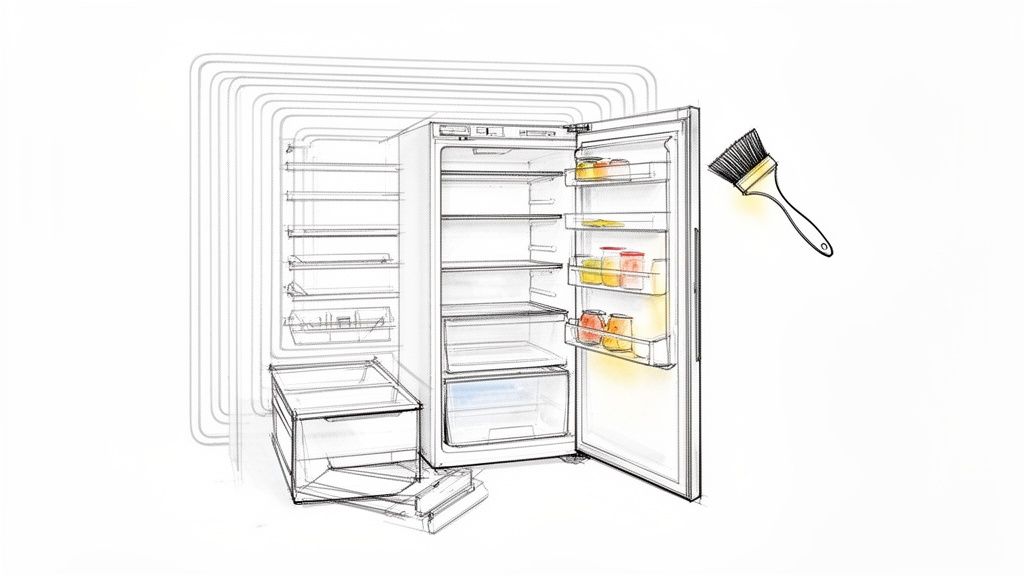
3. Refrigerator Deep Cleaning and Coil Maintenance
Often the centerpiece of the kitchen, the refrigerator requires more than just wiping up spills to be truly clean. This task on our kitchen deep cleaning checklist involves a thorough sanitization of the interior and the crucial, yet frequently ignored, maintenance of its condenser coils. This process eliminates lingering odors, removes bacterial growth from hidden spills, and restores the appliance's energy efficiency, ultimately extending its lifespan and keeping your food safer.
Why It's a Top Priority
A deep-cleaned refrigerator is essential for food safety, preventing cross-contamination from old spills and mold growth. More importantly, dirty condenser coils force the compressor to work harder, consuming more electricity and leading to premature appliance failure. We've seen refrigerators in Hillsboro family homes run quieter and more efficiently immediately after a proper coil cleaning. This comprehensive approach tackles both hygiene and appliance health, safeguarding your food and your investment.
How to Tackle Grease and Grime
Follow these steps for a sanitized and efficient refrigerator:
- Empty and Sanitize: Remove all food, shelves, and drawers. Wash removable parts in warm, soapy water. Wipe down the entire interior with a food-safe solution, such as a mixture of one tablespoon of liquid bleach to one gallon of water, to kill bacteria and mold.
- Clean Door Gaskets: The rubber door seals can trap crumbs and harbor mold. Gently clean them with a cloth dipped in a 50/50 solution of white vinegar and water, ensuring you get into all the folds.
- Address the Coils: Unplug the refrigerator and locate the condenser coils (usually on the back or bottom). Use a coil-cleaning brush or a vacuum with a brush attachment to gently remove all dust, pet hair, and debris. This single step can significantly improve its performance.
Pro Tip: Perform a full coil cleaning at least twice a year to maintain peak energy efficiency. Understanding the difference between a surface wipe-down and a sanitizing deep clean is key; explore the distinctions in our comprehensive guide on deep cleaning vs. regular cleaning.
When to Call the Professionals
While a DIY fridge clean-out is manageable, professional assistance is invaluable in certain situations. If you're tackling a move in cleaning for a new Portland rental with remnants from the previous tenant, or preparing an Airbnb property between guests, our team can ensure a pristine, sanitized result. Our deep clean service uses specialized tools to safely clean coils and meticulously detail every interior component, restoring your refrigerator to like-new condition.
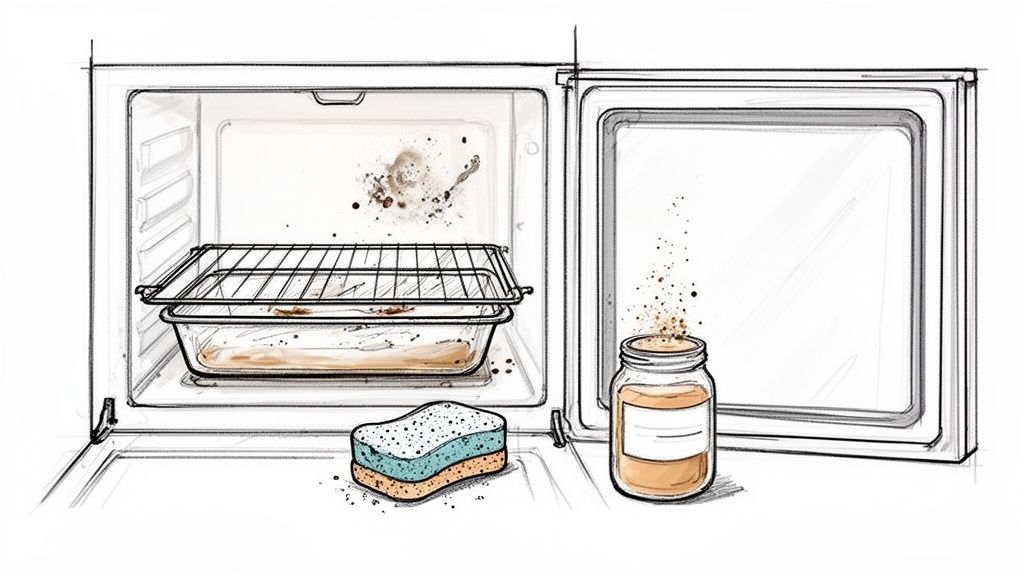
4. Deep Cleaning Oven Interior and Self-Cleaning Cycle Management
The oven is the heart of many kitchen creations, but it also becomes a collection point for burnt-on food, grease splatters, and stubborn carbon buildup. A crucial step in any kitchen deep cleaning checklist, this task involves a thorough cleaning of the interior walls, floor, and racks. Overlooking this appliance not only risks tainting your food with unpleasant smoky flavors but can also become a fire hazard and negatively impact your kitchen's air quality.
Why It's a Top Priority
A clean oven ensures your food cooks evenly and safely, free from the smoke and odors of past meals. Caked-on grease is flammable and can ignite at high temperatures, making regular deep cleaning a matter of home safety. For renters in Hillsboro or homeowners preparing a property for sale, a sparkling oven interior is a non-negotiable detail that signals a well-maintained home. It restores the appliance's efficiency and eliminates a significant source of kitchen smoke and pollutants.
How to Tackle Grease and Grime
Follow these steps for a pristine oven interior:
- Remove and Soak Racks: Take out the oven racks and any other removable parts. Submerge them in a tub or sink with hot, soapy water and let them soak for several hours to loosen baked-on residue before scrubbing them clean.
- Manual Scrub or Self-Clean: For manual cleaning, apply a fume-free oven cleaner or a paste of baking soda and water to the interior, avoiding the heating elements. Let it sit for several hours or overnight before wiping. If using the self-clean cycle, ensure the room is well-ventilated by opening windows, as the process can produce strong fumes.
- Wipe and Detail: After the cleaner or cycle has finished and the oven has cooled, use a damp cloth to wipe away all residue. A plastic scraper can help with stubborn spots. Finish by cleaning the oven door glass with a suitable cleaner for a streak-free view.
Pro Tip: Place a large sheet of aluminum foil on the bottom rack (not the oven floor) to catch drips and spills, making future cleanups much easier. For a natural approach, a paste of baking soda and water left overnight works wonders on tough grime.
When to Call the Professionals
While these methods are effective, some situations demand expert intervention. If you're tackling a rental turnover in Portland with a neglected appliance or need a post-construction cleanup where dust and debris have settled inside, our move in cleaning service is the perfect solution. We use powerful, professional-grade products and techniques to safely remove years of buildup, restoring your oven to like-new condition without the harsh fumes or hours of scrubbing.
Ready for a spotless home?
5. Backsplash Tile Deep Cleaning and Grout Restoration
The kitchen backsplash is designed to protect walls from cooking splatters, but it often ends up displaying a mosaic of grease, sauce, and food stains. This crucial task in our kitchen deep cleaning checklist goes beyond a simple wipe, focusing on restoring both the tile and the porous grout lines that trap grime and can become discolored over time. Neglecting the backsplash allows stains to set, making the entire kitchen feel less clean, no matter how spotless the countertops are.
Why It's a Top Priority
A clean backsplash instantly brightens the kitchen, but the real benefit lies in hygiene and maintenance. Grout, being porous, can harbor bacteria and even mold if moisture and food particles are left to sit. Over time, acidic food splatters can permanently stain and degrade grout, leading to costly repairs. A thorough deep clean removes this buildup, sanitizing the surface and restoring the original, crisp look of your tilework. We've seen this make a huge difference in Hillsboro homes with white or light-colored grout that had yellowed from years of cooking.
How to Tackle Grease and Grime
Follow these steps for a sparkling clean finish:
- Prep and Apply Cleaner: Begin by clearing the countertops. Spray a quality tile and grout cleaner directly onto the backsplash, ensuring full coverage. Allow the solution to sit for 5-10 minutes to penetrate the grime and loosen stains. For natural stone like marble or travertine, always use a pH-neutral cleaner to prevent etching.
- Scrub the Grout Lines: Use a stiff-bristled grout brush or an old toothbrush to scrub the grout lines vigorously. Work in small sections, applying firm pressure to lift embedded dirt. You’ll see the grout begin to lighten as the stains are removed.
- Wipe and Rinse: Once you've scrubbed all the grout, wipe the entire backsplash with a clean, damp microfiber cloth to remove the cleaning solution and loosened grime. Rinse the cloth frequently to avoid spreading dirt. Dry the area with a fresh cloth to prevent water spots.
Pro Tip: For stubborn stains on non-stone grout, a paste made from baking soda and water can work wonders. Apply it to the stained area, let it sit overnight, and then scrub it off in the morning.
When to Call the Professionals
While DIY methods are great for routine upkeep, grout restoration often requires a more powerful approach. If you're dealing with years of accumulated grease, preparing a rental property in Portland for a new tenant, or find that your grout is permanently discolored or cracked, it's time for professional help. Our deep clean service utilizes specialized equipment and commercial-grade cleaners to safely restore your backsplash and can recommend professional grout sealing to protect it from future stains.
6. Dishwasher Interior Deep Cleaning and Filter Maintenance
The dishwasher is a time-saving hero, but it can't clean itself. This crucial step in our kitchen deep cleaning checklist goes beyond just loading and unloading; it's a vital maintenance task to sanitize the machine that cleans your dishes. Over time, food debris, soap scum, and mineral deposits clog filters and spray arms, leading to foul odors, poor performance, and even mold growth.
Why It's a Top Priority
A dirty dishwasher simply cannot get your dishes clean. Clogged filters and spray arms prevent water from circulating effectively, leaving behind a grimy residue. More importantly, the warm, damp environment is a perfect breeding ground for mold and bacteria, which can cause musty smells and compromise kitchen hygiene. We often see this in rental properties across Hillsboro, where years of tenant neglect lead to a dishwasher that does more harm than good. Regular interior cleaning restores your appliance's sanitizing power and extends its lifespan.
How to Tackle Buildup and Odors
Follow these steps for a sanitized and efficient dishwasher:
- Remove and Clean Components: Start by pulling out the bottom rack to access the filter. Most modern dishwashers have a twist-and-lock filter system. Remove it and wash it thoroughly in the sink with a brush and hot, soapy water to remove all food particles.
- Clear the Spray Arms: Check the tiny holes on the spray arms for blockages. Use a toothpick, pin, or thin wire to gently poke out any debris or mineral deposits that could be obstructing the water jets.
- Run a Cleaning Cycle: Once the parts are back in place, run a sanitizing cycle. Place a dishwasher-safe bowl filled with one cup of white vinegar on the top rack and run an empty, hot water cycle. This will help break down grease, sanitize the interior, and eliminate odors.
Pro Tip: For stubborn odors or visible grime, follow the vinegar cycle with a second empty cycle, this time sprinkling a cup of baking soda across the bottom of the dishwasher. This will help neutralize any lingering smells and brighten the interior.
When to Call the Professionals
While monthly maintenance is manageable, a severely neglected dishwasher requires a more intensive approach. If you’ve moved into a new home and discovered a foul-smelling appliance, or you’re an Airbnb host in Portland needing a guaranteed-fresh kitchen for new guests, our deep clean service can help. We meticulously disassemble and scrub every component, using professional-grade cleaners to eliminate years of caked-on grime and restore your dishwasher to its optimal, hygienic condition.
7. Microwave Interior Deep Cleaning and Deodorization
The microwave is often the unsung hero of quick meals, but it can quickly become a containment zone for food splatters, grease, and unpleasant odors. A key part of any kitchen deep cleaning checklist, this task moves beyond a quick wipe-down to thoroughly sanitize the interior, tackling hardened food particles that can harbor bacteria. Overlooking this can lead to cross-contamination and lingering smells that affect the taste of your food.
Why It's a Top Priority
A clean microwave is essential for food safety and appliance longevity. Caked-on food splatters can absorb microwave energy, potentially causing hot spots that damage the interior walls over time. More importantly, these food particles create a breeding ground for bacteria. Thorough sanitization eliminates these risks, ensures even heating, and removes stubborn odors from past meals, so your morning oatmeal doesn't taste like last night's fish.
How to Tackle Grease and Grime
Follow these steps for a sparkling clean finish:
- Steam and Loosen: Fill a microwave-safe bowl with one cup of water and a few lemon slices or a splash of white vinegar. Microwave on high for 3-5 minutes, or until the water boils and the interior is steamy. Let it sit with the door closed for another 5 minutes to allow the steam to soften baked-on grime.
- Wipe Down and Detail: Carefully remove the hot bowl and the turntable. Wipe the ceiling, walls, and floor of the microwave with a soft sponge or microfiber cloth. The steam should make food splatters easy to remove. The turntable can be washed separately in the sink with hot, soapy water.
- Deodorize and Prevent: For persistent odors, place an open box of baking soda inside the microwave overnight to absorb any lingering smells. To prevent future messes, always use a microwave-safe splatter guard or cover when reheating food.
Pro Tip: Don't forget to wipe down the microwave door, including the seals and the handle, where germs and grime accumulate. A clean cloth dampened with a gentle all-purpose cleaner works perfectly.
When to Call the Professionals
While regular steam cleaning is effective, some situations require a more intensive approach. If you're preparing a rental property in Hillsboro for a new tenant or managing a quick Airbnb turnover, a professional touch ensures the appliance is perfectly sanitized. Our deep clean service uses specialized techniques to safely remove the most stubborn, baked-on messes, restoring your microwave to a like-new condition efficiently and effectively.
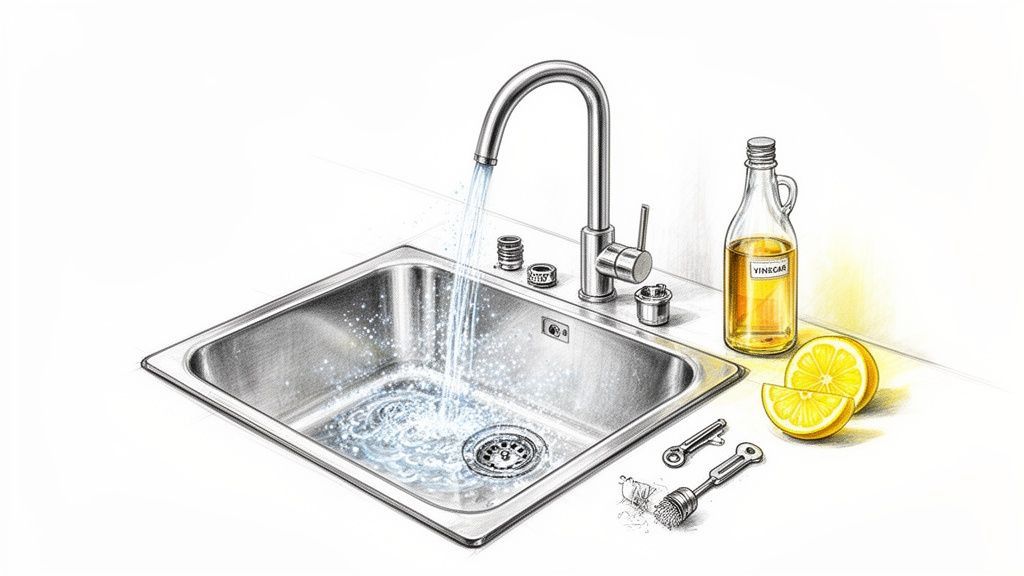
8. Deep Cleaning of Kitchen Sink, Faucet, and Drain
The kitchen sink is a high-traffic zone for everything from washing hands to rinsing produce and scrubbing greasy pans. This crucial part of our kitchen deep cleaning checklist focuses on sanitizing the basin, faucet, and drain, tackling the soap scum, mineral deposits, and bacterial buildup that accumulate daily. A thorough cleaning not only restores shine but also eliminates odors and prevents plumbing issues caused by decomposing food and grease.
Why It's a Top Priority
Beyond aesthetics, a dirty sink can harbor more bacteria than a toilet seat, including E. coli and salmonella. Mineral deposits from hard water can tarnish finishes and clog faucet aerators, reducing water pressure. Meanwhile, the drain can become a source of unpleasant odors and slow drainage if not maintained. We’ve serviced kitchens in Hillsboro where a simple, professional drain and faucet cleaning dramatically improved water flow and eliminated a persistent musty smell.
How to Tackle Grime and Buildup
Follow these steps for a sanitized and sparkling sink area:
- Sanitize the Basin: Start by clearing the sink. Sprinkle baking soda over the entire surface and use a non-abrasive sponge to scrub away residue. Rinse thoroughly, then plug the drain, fill the sink with a hot water and vinegar solution, and let it sit for 10 minutes before draining.
- Detail the Faucet: To remove mineral buildup, soak a cloth in white vinegar and wrap it around the base of the faucet and handles for 20-30 minutes. Use an old toothbrush to scrub crevices. Unscrew the aerator from the faucet tip and soak it in vinegar overnight to dissolve mineral deposits.
- Maintain the Drain: Pour a half cup of baking soda down the drain, followed by a cup of hot vinegar. Let it fizz for 15 minutes to break down grease and food particles, then flush with boiling water. For garbage disposals, run cold water and grind a few ice cubes and lemon peels to sharpen blades and deodorize.
Pro Tip: For a streak-free shine on stainless steel sinks, wipe the basin dry with a microfiber cloth after cleaning. You can then apply a few drops of mineral oil to a cloth and buff the surface to repel water and prevent spots.
When to Call the Professionals
If you’re dealing with a severely slow-draining sink, stubborn hard water stains that won't budge, or preparing for a move out cleaning in a Portland rental, professional intervention can save you time and effort. Our deep clean service includes specialized techniques to restore fixtures and ensure drains are clear without harsh chemicals. We guarantee a hygienic, fully functional sink area that looks and feels brand new.
9. Deep Cleaning of Kitchen Countertops, Edges, and Caulking
Kitchen countertops are the central stage for meal prep, but they also harbor hidden germs and grime far beyond what a daily wipe-down can handle. This crucial step in any kitchen deep cleaning checklist goes beneath the surface, targeting accumulated food particles, bacteria, and sticky residue in seams, edges, and along the backsplash. Neglecting this task compromises food safety and allows for stubborn buildup that can permanently stain or damage your surfaces.
Why It's a Top Priority
While a quick wipe cleans the surface, a deep clean addresses the microscopic world thriving in the crevices. The junction where the countertop meets the backsplash and the caulking around the sink are prime breeding grounds for mold, mildew, and bacteria. A thorough cleaning not only sanitizes these high-contact areas but also restores the original beauty of the material, whether it’s the natural luster of stone or the smooth finish of laminate. We often see Hillsboro homes with granite countertops that regain their showroom shine after a proper deep clean and seal.
How to Tackle Buildup and Grime
Follow these steps for a sanitized and sparkling finish:
- Identify Your Surface and Choose Cleaners: First, determine your countertop material. Use a pH-neutral, stone-safe cleaner for granite or marble, a simple solution of mild dish soap and water for laminate, and appropriate wood cleaners for butcher block. Avoid acidic or abrasive cleaners on natural stone.
- Clear and Scrub: Remove everything from the counters, including small appliances. Spray your chosen cleaner and let it sit for a few minutes to loosen grime. Use a soft-bristled brush to gently scrub the seams, edges, and the area where the counter meets the backsplash.
- Inspect and Detail the Caulking: Pay close attention to the caulking around the sink and backsplash. Use the brush to remove any grime. Inspect for signs of mold, mildew, or deterioration; old, cracked caulking may need to be replaced.
Pro Tip: After deep cleaning and drying natural stone countertops like granite or marble, apply a food-safe sealer according to the manufacturer's instructions. This creates a protective barrier that prevents stains and makes future cleaning easier.
When to Call the Professionals
While routine deep cleaning is manageable, certain situations warrant expert attention. If you are preparing a rental property for new tenants or tackling a move in cleaning for a home with years of visible neglect on the counters, professional help is invaluable. Our deep clean service uses specialized, material-safe products and techniques to safely remove tough stains, sanitize every crevice, and restore your countertops to a pristine, hygienic condition.
10. Deep Cleaning of Kitchen Windows, Glass Doors, and Interior Sills
Often overlooked in routine cleanings, kitchen windows and glass doors accumulate a unique film of grease, dust, and condensation that can dull the entire room. This step in our kitchen deep cleaning checklist focuses on restoring crystal-clear transparency to all glass surfaces, including windows, cabinet doors, and patio sliders. Tackling this task removes built-up grime and floods your kitchen with natural light, making the space feel brighter, bigger, and more inviting.
Why It's a Top Priority
Kitchen windows are magnets for airborne grease particles from cooking, which combine with dust and moisture to create a stubborn, hazy film. This grime not only obstructs your view but can also degrade window seals and frames over time. Clean glass doors on cabinets or leading to a patio make a significant aesthetic impact, reflecting a high standard of cleanliness. For an Airbnb property in Hillsboro, sparkling windows can make the difference in a five-star review, signaling a well-maintained and sanitary space for guests.
How to Tackle Grease and Grime
Follow these steps for a streak-free, professional-looking finish:
- Prepare the Area: Before applying any liquid, use a vacuum with a brush attachment or a soft-bristled brush to remove all loose dust, cobwebs, and debris from window sills, tracks, and frames. This prevents turning dust into muddy streaks.
- Create Your Solution: For greasy kitchen windows, a simple solution of equal parts white vinegar and hot water in a spray bottle works wonders. The acidity in the vinegar effectively cuts through the oily residue.
- Apply and Wipe Correctly: Spray the solution generously onto the glass. Use a high-quality squeegee for large surfaces, wiping the blade after each pass. For smaller panes or cabinet doors, a clean microfiber cloth is ideal. Avoid using paper towels, which can leave behind lint.
Pro Tip: To avoid frustrating streaks, clean your windows on an overcast day. Direct sunlight can cause the cleaning solution to evaporate too quickly, leaving behind residue before you have a chance to wipe it clean. This technique is also crucial for bathrooms, where soap scum presents similar challenges on glass shower doors. For more on this, check out our bathroom deep cleaning checklist.
When to Call the Professionals
While regular window cleaning is manageable, some situations call for expert attention. If you're dealing with hard-water stains, post-construction debris, or high, hard-to-reach windows in a Portland loft, professional help is a safer and more effective option. Our deep clean service includes meticulous window and sill cleaning, ensuring a flawless result, which is especially critical for a move-out cleaning where passing a final inspection is essential. We use specialized tools and solutions to restore clarity without damaging your surfaces.
10-Area Kitchen Deep-Cleaning Comparison
| Task | Implementation Complexity 🔄 | Resource Requirements ⚡ | Expected Outcomes 📊 | Ideal Use Cases 💡 | Key Advantages ⭐ |
|---|---|---|---|---|---|
| Degreasing and Deep Cleaning Stovetop and Range Hood | High 🔄 — disassembly, ventilation controls | Specialized degreasers, brushes, PPE; 1–2 hr | Significant air-quality & odor reduction; fire-risk mitigation 📊 ⭐⭐⭐⭐ | Heavily used/greasy stoves, post-construction, safety-focused | Removes fire hazards; restores appearance; extends appliance life ⭐ |
| Cabinet Interior Deep Cleaning and Organization | Medium-High 🔄 — sorting + inventory | Time, storage organizers, liners, labels; 2–3 hr | Improved accessibility, reduced pests, food-safety gains 📊 ⭐⭐⭐ | Move-in, Airbnb turnover, long-untouched cabinets | Better organization; identifies expired items; easier restock ⭐ |
| Refrigerator Deep Cleaning and Coil Maintenance | Medium 🔄 — interior + coil access | Sanitizers, vacuum/coil brush; possible unplugging; 1.5–2 hr | Odor removal, bacterial control; efficiency +15–25% gains 📊 ⭐⭐⭐⭐ | Energy-inefficient units, post-move, frequent turnover properties | Energy savings; prevents breakdowns; improves food safety ⭐ |
| Deep Cleaning Oven Interior & Self-Clean Cycle Management | High 🔄 — heavy scrubbing or high-heat cycle | Oven cleaner or self-clean prep; ventilation; 1.5–3 hr | Removes smoke/odors; improves food safety and function 📊 ⭐⭐⭐ | Heavily soiled ovens, rental turnovers, move-ins | Prevents smoke, restores appearance, protects heating elements ⭐ |
| Backsplash Tile Deep Cleaning & Grout Restoration | Medium 🔄 — focused grout work | Grout cleaners, stiff brushes, optional sealant; 1–2 hr | Restored grout color; mold reduction; aesthetic refresh 📊 ⭐⭐⭐ | Stained grout, pre-sale staging, long-neglected backsplashes | Improves appearance; prevents grout failure; mold control ⭐ |
| Dishwasher Interior Deep Cleaning & Filter Maintenance | Low–Medium 🔄 — filter/spray arm work | Commercial dishwasher cleaner, small tools; 1–1.5 hr | Restored cleaning performance; odor elimination 📊 ⭐⭐⭐ | Smelly/ineffective machines, Airbnb turnovers | Restores function; prevents mold; extends appliance life ⭐ |
| Microwave Interior Deep Cleaning & Deodorization | Low 🔄 — quick sanitization | Vinegar/lemon, sponge; 20–30 min ⚡ | Fast odor removal and sanitization; immediate usability 📊 ⭐⭐⭐ | Quick turnovers, routine maintenance, post-cooking splatters | Fast, low-cost, prevents cross-contamination ⭐ |
| Deep Cleaning of Kitchen Sink, Faucet, and Drain | Medium 🔄 — may need plumbing tools | Descalers, drain brush/snake, aerator tools; 45–60 min | Eliminates odors, prevents clogs, restores flow and shine 📊 ⭐⭐⭐ | Slow drains, odor issues, mineral buildup | Prevents plumbing issues; restores water pressure; hygiene boost ⭐ |
| Deep Cleaning of Countertops, Edges, and Caulking | Medium 🔄 — material-specific care | Material-appropriate cleaners, sealers; 1–1.5 hr | Sanitized prep surfaces; mold prevention at seams 📊 ⭐⭐⭐ | Food-prep areas, move-in, pre-sale staging | Enhances food safety; restores finish; extends lifespan ⭐ |
| Deep Cleaning of Kitchen Windows, Glass Doors, & Sills | Low–Medium 🔄 — interior + possible exterior | Glass cleaner, squeegee, microfiber, ladder for exterior; 1–2 hr | Improved light, clarity, and perceived cleanliness 📊 ⭐⭐⭐ | Greasy/streaked windows, staging, Airbnb | Boosts brightness and appearance; removes grease film ⭐ |
When to Call in the Professionals for Your Kitchen Deep Clean
Working your way through a comprehensive kitchen deep cleaning checklist is an incredibly satisfying project. Systematically tackling each area, from the stovetop range hood to the baseboards, restores not just the sparkle but also the hygiene of the most-used room in your home. This guide provides the detailed, step-by-step framework needed to achieve a truly professional-level result on your own, transforming grimy grout, greasy cabinets, and cluttered countertops into a pristine and welcoming space.
The real value of this checklist lies in its structure and specificity. By breaking down an overwhelming project into manageable zones and tasks, it turns daunting into doable. You now have a clear roadmap for what to clean, the order in which to clean it, and the best practices for handling stubborn problems like baked-on grease and stained tile grout. Mastering these techniques means you can maintain a cleaner, healthier kitchen environment year-round, extending the life of your appliances and surfaces.
From Checklist to Reality: Putting It All into Action
The ultimate takeaway is that a deep clean is about more than just surface-level tidiness; it's a systematic reset. The key is consistency and understanding the "why" behind each step. Degreasing cabinets before wiping prevents smearing. Cleaning from top to bottom ensures you aren't re-soiling areas you just finished. Maintaining dishwasher filters and refrigerator coils isn't just for cleanliness, it’s for appliance efficiency and longevity.
Your actionable next step is to schedule your deep clean. Don't wait for the mess to become overwhelming. Block out a weekend, gather your supplies, and choose one section from the checklist to start with. Even accomplishing just the oven and stovetop deep clean will make a significant impact on your kitchen's look and feel, building momentum to tackle the rest.
Key Insight: A successful kitchen deep clean isn't a sprint; it's a methodical marathon. The power of a great checklist is that it provides the pacing and direction needed to cross the finish line with a kitchen that feels brand new.
Knowing When to Get a Helping Hand
While this DIY checklist is thorough, there are times when calling in a professional home cleaning service is the most practical and effective solution. Life in the Portland area is demanding, and dedicating an entire weekend to scrubbing your kitchen isn't always feasible, especially for busy families in suburbs like Beaverton or professionals in downtown apartments.
Consider a professional deep clean service in these specific scenarios:
- Move-Out and Move-In Cleaning: Securing a security deposit or preparing a home for your family requires a level of detail that is difficult to achieve under the stress of moving. We handle move out cleaning with meticulous attention to every item on a landlord’s checklist.
- Stubborn, Long-Term Buildup: If you're facing years of accumulated grease on cabinets or deeply stained grout that home remedies won't touch, our team has the commercial-grade products and specialized equipment to restore these surfaces effectively.
- Time and Energy Constraints: Sometimes, you simply don't have the time or physical energy for such an intensive project. A professional maid service allows you to reclaim your weekend while still getting the pristine results you want.
- Rental Property Turnovers: For Airbnb hosts and property managers in places like Lake Oswego, a fast, reliable, and flawless turnover is critical. We ensure your kitchen is spotless and ready for the next guest or tenant, every single time.
Embracing this kitchen deep cleaning checklist empowers you to take control of your space. But knowing when to delegate allows you to manage your time and energy wisely. Whether you tackle it yourself or bring in the experts, the end goal is the same: a beautiful, functional, and hygienic kitchen you love to be in. The fresh start a deep clean provides is a powerful way to reset your home and your mindset.
Ready to skip the scrubbing and enjoy a professionally cleaned kitchen? The team at Neat Hive Cleaning uses this same meticulous, checklist-driven approach to deliver exceptional deep clean service results for homes and businesses across the Portland metro. Contact us today for a free estimate and let us handle the hard work for you.
Ready for a spotless home?