
A Simple Guide to Clean Shower Heads With Vinegar
Published on February 15, 2026

Yes, you can absolutely clean a shower head with vinegar. Soaking it for a few hours is one of the easiest and most effective ways to dissolve mineral buildup. It's a simple, non-toxic trick that works wonders to break down limescale and calcium, getting your water pressure back to where it should be. As a professional cleaning company serving the Portland area, this is one of the first things we recommend for improving your daily shower.
Why Portland Showers Lose Pressure And How Vinegar Fixes It
If your morning shower feels more like a weak drizzle than a powerful spray, you’re not alone. It’s a classic sign of a clogged shower head, and here in the Portland metro area, we know the culprit all too well: hard water. Mineral buildup—that chalky limescale and calcium—clogs up the tiny nozzles. It’s a problem our home cleaning service sees in homes all the time, from suburban houses in Beaverton to apartments in Lake Oswego.

The great news is that the solution is probably sitting in your pantry. Simple white vinegar is the hero here. The acetic acid in vinegar is a fantastic natural solvent that’s perfect for dissolving the alkaline mineral deposits our local water leaves behind.
The Science Behind The Soak
So, what’s actually happening during that vinegar soak? The magic is in the chemistry. The vinegar’s acidity reacts with the stubborn calcium carbonate and magnesium deposits, breaking them down into water-soluble bits. Once they're dissolved, you can just rinse them away, clearing the path for water to flow freely again.
It's a surprisingly powerful process. Think about it: shower heads in areas with hard water can lose up to 75% of their flow rate in under a year because of this mineral accumulation. With roughly 85% of U.S. households—including us in the Pacific Northwest—dealing with hard water, it's an incredibly common issue that turns a great shower into a frustrating trickle.
Pro Tip: We always tell clients to think of descaling their shower head like any other regular home maintenance task. Doing this simple vinegar soak every few months will prevent the kind of severe buildup that requires more elbow grease (or a replacement) down the line.
Benefits Beyond Better Water Pressure
Getting your water pressure back is the main goal, but using vinegar has some other fantastic perks for any homeowner or renter.
- It's Eco-Friendly: Unlike harsh chemical cleaners, white vinegar is biodegradable. You don't have to worry about what you're sending down the drain.
- It's Super Cheap: A big bottle of vinegar costs next to nothing. This has to be one of the most budget-friendly DIY cleaning jobs out there.
- It Disinfects Naturally: Vinegar has antimicrobial properties, which means it helps kill off any mold, mildew, or bacteria that might be hiding inside your damp shower head.
This quick fix is an easy way to restore your shower's performance and keep your home in great shape between professional house cleaning appointments. For a deeper dive into tackling stubborn mineral issues, check out our guide on removing hard water stains. Consider this your first step to a much better shower experience.
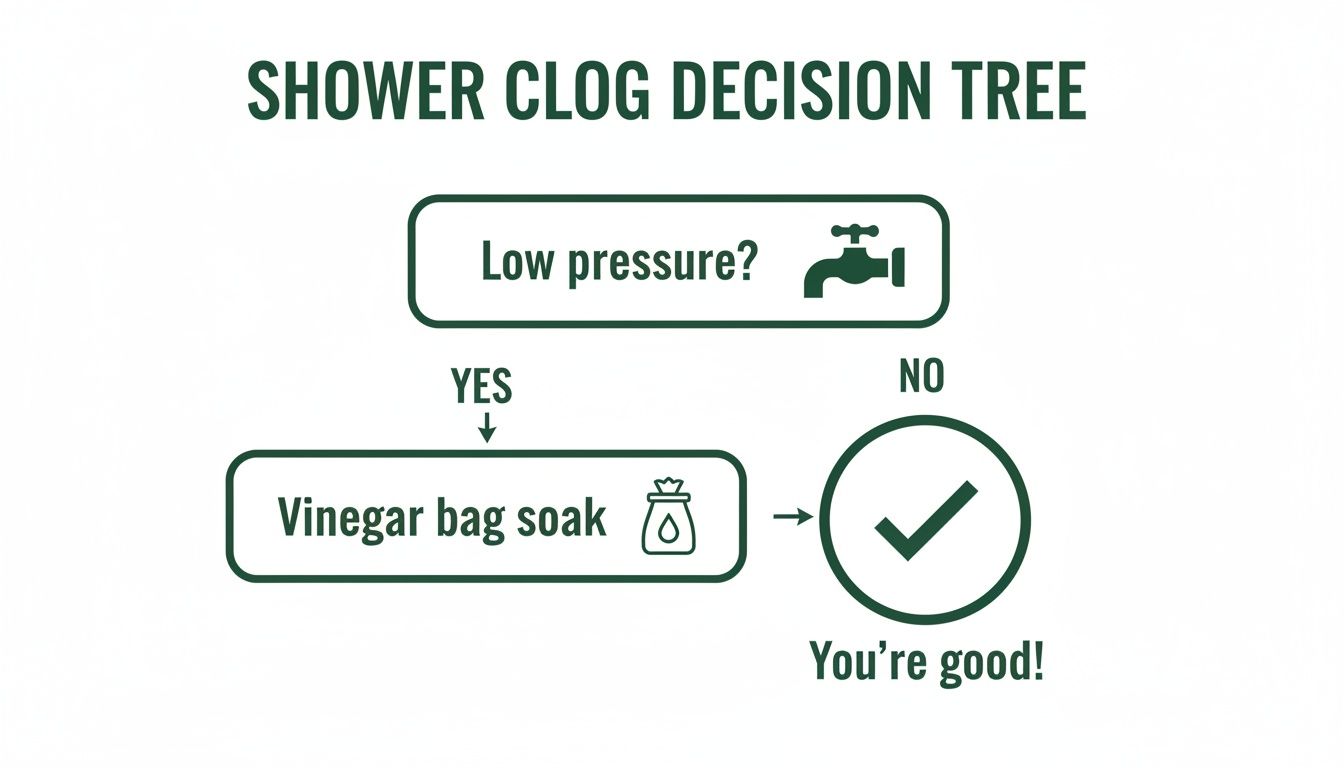
The Easiest Method: The No-Removal Vinegar Bag Soak
If you're looking for a quick fix that doesn't require a single tool, this is it. The vinegar bag soak is our go-to recommendation for anyone who wants to restore their shower pressure without the fuss of taking anything apart. It’s perfect for routine upkeep or for renters in Portland who might be hesitant to disassemble fixtures.
This is the technique we suggest most often for simple, preventative maintenance. It’s easy enough to do every few months to keep that notorious mineral buildup from our local water from getting out of hand.
Gathering Your Supplies
First things first, let's get your gear together. You'll only need a few things you probably already have lying around the house. The setup takes less than five minutes, which makes it one of the most satisfyingly quick home cleaning tasks you can tackle.
- A Sturdy Plastic Bag: Something like a zip-top sandwich or quart-sized bag is usually the right size. Just give it a quick check for any tiny holes.
- Distilled White Vinegar: This is the magic ingredient. You’ll need just enough to cover the face of your shower head where the water sprays out.
- A Rubber Band or Twist Tie: Anything that will hold the bag securely in place around the shower arm will work.
- An Old Toothbrush: You'll want this for the final scrub-down to get rid of any stubborn bits.
Once you have your supplies, you’re ready to get that shower head spraying like new again.
The Soaking Process
Go ahead and pour the distilled white vinegar into your plastic bag until it's about halfway full. You just need enough liquid to ensure all the little spray nozzles are completely underwater once you position the bag.
Now, carefully lift the bag up and slip it over the shower head, submerging the face completely in the vinegar. Wrap your rubber band or twist tie around the top of the bag to secure it to the shower arm. You want it snug enough to hold the bag and vinegar up without any drips.
Our Professional Recommendation: For light to moderate buildup, letting it soak for at least four hours usually does the trick. But if you’ve been dealing with a weak, sputtering spray for a while, we highly recommend leaving it overnight. This gives the vinegar more time to really work on those tough, caked-on mineral deposits.
After the soak is done, gently take the bag off and pour the used vinegar down the drain. Turn the shower on hot and let it blast for a minute or two. This is a crucial step—it flushes out all the gunk the vinegar just loosened up from inside the nozzles.
For the finishing touch, grab that old toothbrush and give the face of the shower head a quick, gentle scrub. This will dislodge any last little particles clinging on. One final rinse with hot water, and it should be performing as good as new. It’s a simple trick, but it’s a cornerstone of keeping your bathroom in top shape.
For a Deeper Clean: Removing and Soaking the Shower Head
Sometimes, that simple vinegar bag trick just won't cut it, especially if you're battling years of caked-on mineral buildup. If you're in a Portland-area home with particularly hard water, you know exactly what we're talking about. When a shower head is seriously clogged and sputtering, taking it off for a full soak is the only way to get a truly deep clean.
This method ensures the vinegar gets into every nook and cranny, dissolving the hidden limescale that a surface soak simply can't reach. It’s a bit more hands-on, sure, but it's the most effective way to restore that like-new water pressure.
Think of the full removal as the heavy-duty solution for those stubborn clogs that a basic soak can't resolve.
Not sure which method is right for you? This quick comparison should help you decide.
Choosing Your Vinegar Cleaning Method
| Factor | Vinegar Bag Soak | Full Removal Soak |
|---|---|---|
| Best For | Routine maintenance, light mineral spots, and minor clogs. | Severe clogs, years of buildup, and first-time deep cleaning. |
| Effort Level | Low - quick and easy setup. | Medium - requires tools and basic plumbing know-how. |
| Time | 30 minutes to a few hours. | Several hours to overnight for best results. |
| Effectiveness | Good for surface-level cleaning and minor blockages. | Excellent for deep, internal cleaning of all components. |
Ultimately, if your shower head is sputtering badly or hasn't been cleaned in ages, taking it off for a full soak is well worth the extra few minutes of effort.
How to Safely Remove Your Shower Head
First things first, you'll need an adjustable wrench or a pair of pliers. But before you start cranking on that nut, you have to protect your fixture’s finish.
Ready for a spotless home?
Pro Tip from the Field: Always wrap a soft cloth or a rag around the connecting nut before you put a wrench on it. This simple step prevents scratches and dings, which is a lifesaver for those beautiful modern finishes like matte black or brushed gold. It's a key part of any professional cleaning service.
Grip the cloth-covered nut with your wrench and turn it counter-clockwise. It might put up a little fight, but steady pressure will get it moving. Once it's loose, you can usually spin the shower head off the rest of the way by hand.
The Full Immersion Soak
With the fixture free, it's time for its spa day.
- Submerge It: Find a bowl or small bucket and place the shower head inside. Pour in enough distilled white vinegar to cover it completely.
- Let It Soak: For the best results, let it soak for at least a few hours. If the buildup is really bad, leaving it overnight is the way to go. The vinegar needs time to work its magic on all those internal mineral deposits.
- Scrub and Rinse: After its bath, grab an old toothbrush and scrub away any softened gunk on the outside. To clear out the individual nozzles, a toothpick or a straightened paperclip works wonders for poking out stubborn bits of limescale.
- Flush It Out: The final step is crucial. Hold the shower head upside down under a faucet and run hot water through it. This backward flush forces out all the debris you just loosened up.
Reinstalling for a Leak-Free Finish
Putting it back on correctly is just as important as taking it off. You don't want to be rewarded for your hard work with an annoying drip.
Look at the threads on the shower arm extending from the wall. See that old, flaky white tape? That’s plumber's tape (also known as Teflon tape), and it’s time for a refresh.
Peel off the old tape and wrap a fresh layer around the threads two or three times, making sure you wrap it in a clockwise direction. This ensures it tightens as you screw the head on, creating a perfect watertight seal.
Now, screw the shower head back on until it's hand-tight. To finish, use your cloth-wrapped wrench to give it one last quarter-turn—just enough to be snug. That's it! You've just performed a professional-level deep clean and ensured a perfect, leak-free connection.
Dealing With Really Stubborn Buildup: Bring in the Baking Soda
Sometimes, Portland’s hard water puts up a serious fight. If a simple vinegar soak didn't quite cut through all that chalky, white buildup, it’s time to call in reinforcements. This is where the classic combination of vinegar and baking soda comes into play.
The magic is in the fizz. When you mix acidic vinegar with alkaline baking soda, you get a bubbling reaction that creates carbon dioxide gas. This isn't just for show—those bubbles are actively agitating and scrubbing away at the mineral deposits, breaking them down physically. It’s a trick our maid service often pulls out during a deep clean service, especially when tackling fixtures in older Portland homes that haven't seen much love in a while.
Mix Up a Powerful Cleaning Paste
Making this paste couldn't be easier, and you don't need to be precise. You're just looking for the right consistency.
- Start by putting a half-cup or so of baking soda into a small bowl.
- Slowly pour in a little white vinegar. Start with just a tablespoon or two.
- Stir everything together. It’ll start to fizz up immediately—that's a good thing! Keep stirring until you have a thick paste, something like the consistency of toothpaste.
Once the bubbling has calmed down a bit, you’ve created a fantastic, non-toxic scouring agent that’s ready to go to work on that caked-on limescale.
This paste is our secret weapon for fixtures that have been seriously neglected. We smear it on thick, making sure every single nozzle and crevice is covered. Then we let it sit for a good 15-30 minutes. That gives the chemical reaction time to really penetrate and weaken the mineral deposits.
How to Apply It for the Best Results
With your shower head already removed, grab an old toothbrush and apply the paste all over it. Really work it into the spray nozzles and any grooves where grime likes to hide. You’ll probably see a second round of fizzing as the paste makes direct contact with the buildup.
Let it sit and do its thing for the full time. After that, take your toothbrush and start scrubbing in small, circular motions. The paste acts as a mild abrasive, so you should feel the gunk starting to loosen and break away.
When you’re done scrubbing, give the shower head a thorough rinse under hot water. If any nozzles still seem blocked, a quick poke with a toothpick should clear them out.
A Word of Caution: Protecting Your Shower Head's Finish
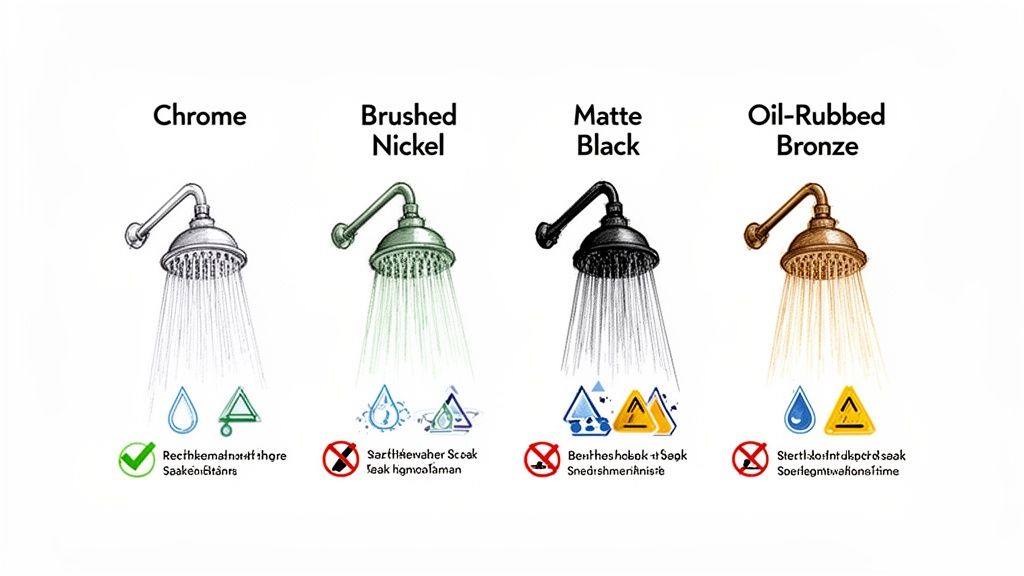
Vinegar is a fantastic tool for dissolving stubborn mineral buildup, but it's not a universal solution for every shower head out there. The specific finish on your fixture—whether it's classic chrome, trendy matte black, or a warm brushed nickel—really dictates how you should tackle the job. As professionals, we've seen how the wrong approach can cause permanent damage, so paying attention to the material is non-negotiable.
The main issue is vinegar's acidity. While that's what makes it so effective against limescale, leaving it on too long can strip protective coatings, cause discoloration, or dull the shine on more delicate surfaces.
Soaking Times for Different Finishes
To keep your fixtures looking their best, especially some of the beautiful designer ones we see in homes around Hillsboro and Lake Oswego, stick to these guidelines. Standard chrome and stainless steel are workhorses; they're pretty durable and can usually handle a longer soak without any problems.
For more sensitive materials, however, you need to be careful.
- Brushed Nickel, Gold-Plated & Brass: These have more delicate surfaces. You'll want to limit their vinegar soak to no more than 30 minutes. Any longer and you're running the risk of damaging that beautiful coating.
- Matte Black & Oil-Rubbed Bronze: These are often "living" finishes or have a special coating that acid can easily strip away. Soaking should be a last resort. If you absolutely have to, keep it to a 30-minute maximum and always do a spot test first.
Pro Tip: Before you soak any fixture you're unsure about, do this quick test. Dab a little vinegar on a hidden spot with a cotton swab. Let it sit for about 15-20 minutes, then wipe it off and check for any dullness or discoloration. This simple step can save you a lot of headaches and money.
Tweaking Your Technique for Different Shower Head Styles
The type of shower head you have will also point you toward the best cleaning method. Those big, fixed rain shower heads, for instance, are perfect candidates for the bag method. Trying to take one of those down can be a real pain.
Handheld shower wands, on the other hand, are usually a breeze to remove. Just unscrew the hose from the wall bracket and you can submerge the head and the hose in a bucket of vinegar. This ensures you get a deep clean inside and out.
And what about those multi-function heads with all the different spray settings? A full soak is definitely the way to go. It allows the vinegar to get into all the complex little mechanisms inside that control the spray patterns, clearing out any gunk that's causing them to stick.
By matching your cleaning technique to both the finish and the style of your shower head, you can get that water pressure back to full strength without causing any harm. This kind of careful attention to detail is a huge part of our professional house cleaning philosophy—it’s all about protecting your home while making it sparkle.
Keeping Your Shower Head Clean For Good
Getting your shower's water pressure back to its former glory feels amazing, but the real win is making sure it stays that way. Especially in places like Portland with hard water, you have to be proactive to prevent that weak, sputtering spray from creeping back in. Shifting from a one-time fix to regular upkeep is a core part of how our cleaning services approach home care.
Create a Simple Maintenance Schedule
You don’t need to break out the vinegar for a deep soak every few weeks. For most homes, a quick cleaning every 2-3 months is plenty to keep heavy mineral deposits from taking hold.
Here's a small habit that makes a huge difference: just wipe the nozzles with a cloth after your last shower of the day. This simple action removes water droplets before they have a chance to evaporate and leave those stubborn mineral spots behind. It takes five seconds but can seriously extend the time between deep cleans.
By making these little tasks part of your routine, you're setting yourself up for a great shower experience all year long. This kind of proactive care helps maintain the results of your hard work and keeps your bathroom feeling fresh and functional.
Want to take it a step further? Check out our complete bathroom deep cleaning checklist to keep your entire space sparkling.
Answering Your Top Questions About Vinegar Cleaning
As professional cleaners here in Portland, we've heard just about every question there is when it comes to keeping a home sparkling. Cleaning a shower head with vinegar is a classic DIY trick, but a few common questions always pop up. Here’s our straightforward advice based on years of experience providing apartment cleaning and house cleaning throughout the metro area.
Can I Use Apple Cider Vinegar Instead of White Vinegar?
This is a big one. Our advice? Stick with distilled white vinegar. It has a higher acidity, which is exactly what you need to break down the tough mineral scale that builds up from our local water. Plus, it’s completely clear, so there's no chance of it staining your fixtures.
Apple cider vinegar, on the other hand, is less acidic and contains natural sugars. That can leave behind a sticky residue, which ironically might attract even more gunk down the road.
How Long Should I Soak a Brushed Nickel or Matte Black Shower Head?
When you're dealing with special finishes like brushed nickel, matte black, or even oil-rubbed bronze, you have to be more careful. The acid in vinegar is great for dissolving minerals, but it can be too harsh for these sensitive coatings if left on too long.
We always tell our clients in Beaverton and Lake Oswego, especially those with newer, stylish bathrooms, to err on the side of caution. Start with a short soak—just 30 minutes. Check it. If you still see buildup, you can do another 30-minute round. Just never leave these types of finishes to soak for hours on end, and always give them a good rinse with cool water when you're done.
What If Vinegar Doesn't Fully Unclog My Shower Head?
Don't panic! If one round of vinegar doesn't completely clear the nozzles, it just means you've got some seriously stubborn mineral deposits. You have a couple of tricks left up your sleeve before you have to think about buying a new one.
First, you can try another soak, maybe a little longer this time (as long as you have a standard chrome fixture). If that doesn't do it, it's time for a little manual labor. The vinegar will have softened the deposits, so you can often break up the rest by gently poking a toothpick or a straight pin into each little nozzle. This physically dislodges anything the vinegar couldn't fully dissolve.
If you’ve tried all that and the water pressure is still weak, the blockage might be from sediment caught deeper inside the fixture, which might be a job for a plumber.
When DIY methods don't cut it, or you'd simply rather spend your free time enjoying our beautiful city, the team at Neat Hive Cleaning is ready to step in. Our trusted home cleaning service handles everything from routine maintenance to deep cleans that make your whole home feel brand new. Book your free estimate online today!
Ready for a spotless home?