
Your Ultimate Bathroom Deep Cleaning Checklist for a Sparkling Portland Home
Published on January 19, 2026
In the damp Portland climate, bathrooms can quickly become a battleground against soap scum, hard water stains, and persistent mildew. From classic bungalows in Beaverton to modern apartments in the Pearl District, every bathroom deserves a reset that goes beyond the surface. A standard wipe-down often misses the hidden grime that accumulates in grout lines, behind faucets, and inside ventilation fans, compromising both aesthetics and hygiene. This is where a systematic, professional-grade approach makes all the difference.
This comprehensive bathroom deep cleaning checklist is your roadmap to achieving a truly sanitized, sparkling space. We are breaking down the same methodical approach our house cleaning teams use to restore bathrooms across the Portland metro area, ensuring no detail is overlooked. We'll move beyond the obvious, tackling everything from descaling shower heads to sanitizing cabinet interiors.
Whether you're a homeowner in Lake Oswego preparing for guests, a renter tackling a move-out clean, or simply want to reclaim your bathroom as a pristine sanctuary, this guide provides the actionable steps for a profound clean you can see and feel. Forget the quick wipe-down; we're guiding you through a process that eliminates buildup, disinfects surfaces, and leaves your bathroom looking and feeling impeccably clean. This checklist provides the structure and expert insights needed to transform your space from grimy to gleaming, covering everything from the toilet bowl to the exhaust fan with professional precision.
1. Toilet Bowl Deep Cleaning
A standard swish and scrub is fine for weekly maintenance, but a true deep clean targets the stubborn, hard-to-reach buildup that regular cleaning leaves behind. This process is a crucial first step in any comprehensive bathroom deep cleaning checklist because it eliminates mineral deposits, rust stains, and bacteria colonies thriving under the rim and in the siphon jet. For homeowners in areas like Hillsboro with hard water, this is essential for preventing permanent stains and maintaining a hygienic environment.
This intensive cleaning goes beyond surface-level wiping. It involves using targeted cleaners and tools to restore the porcelain to a like-new condition, a task our professional house cleaning service often handles during a move-out cleaning to ensure the property is pristine for the next occupants.
How to Deep Clean Your Toilet Bowl
The goal is to dissolve tough buildup, not just scrub it away. Start by turning off the water supply to the toilet and flushing to empty the bowl. This allows your cleaning solution to work directly on the stained porcelain without being diluted.
- Apply a potent cleaner: Use a high-quality, acid-based toilet bowl cleaner, applying it generously under the rim so it coats the entire bowl. For a more eco-friendly approach, enzyme-based cleaners are effective but may require a longer sitting time.
- Let it dwell: Allow the cleaner to sit for at least 15-30 minutes. This dwell time is critical for breaking down mineral scale and rust.
- Scrub effectively: Use a stiff-bristled toilet brush to scrub the entire bowl, paying special attention to the area under the rim. For persistent rings and rust stains, a pumice stone (used on wet porcelain only) can gently abrade the deposits without scratching the surface.
- Rinse and finish: Turn the water supply back on, flush the toilet a few times to rinse away the cleaner and debris, and then wipe down the exterior.
Pro Tip: Addressing stains as soon as they appear prevents them from setting into the porcelain. The hard water common in the Portland area can cause rings to form quickly, so prompt action saves significant effort later.
Deep cleaning the toilet bowl is more than just an aesthetic task; it's a fundamental part of home hygiene. To see how this task fits into a larger strategy, you can explore what our professional deep clean service includes.
2. Shower and Bathtub Grout Cleaning
Unlike non-porous tile, grout readily absorbs moisture, soap scum, and dirt, making it a prime breeding ground for mold and mildew. A standard wipe-down doesn't penetrate these porous lines, allowing discoloration and bacteria to set in. This is a vital part of any bathroom deep cleaning checklist, especially for preparing Airbnb properties in areas like Lake Oswego, where guest expectations for hygiene are exceptionally high.
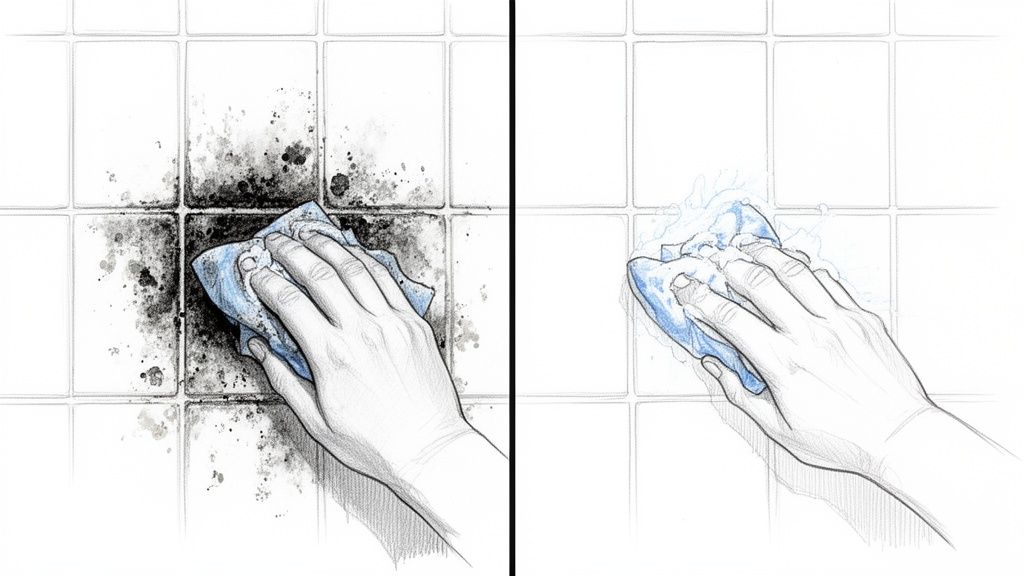
Restoring grout involves more than just aggressive scrubbing; it requires the right cleaners and techniques to kill mold and lift deep-seated stains without damaging the grout itself. This specialized task is often a key focus during a move-in cleaning, ensuring the bathroom is sanitized and visually appealing from day one.
How to Deep Clean Shower and Bathtub Grout
The key to effective grout cleaning is allowing a targeted cleaner to penetrate the porous material and break down the grime chemically before you begin scrubbing.
- Apply a dedicated cleaner: Spray an enzymatic or oxygen-based grout cleaner directly onto the grout lines. For stubborn mold, a specialized mold and mildew remover may be necessary. Ensure proper ventilation by opening a window or turning on the exhaust fan.
- Let it dwell: Allow the cleaning solution to sit for 10-15 minutes. This dwell time is crucial for the active ingredients to dissolve soap scum, body oils, and mildew.
- Scrub with precision: Use a stiff-bristled grout brush or an old electric toothbrush to scrub the lines directly. The small, firm bristles are essential for agitating and lifting the grime from the porous surface.
- Rinse thoroughly: Rinse the entire area with warm water to wash away the loosened debris and cleaning solution. For best results, use the shower head to spray down all the walls and the tub floor.
Pro Tip: After a deep clean, consider applying a grout sealer. This creates a protective barrier that repels moisture and prevents future stains, significantly reducing the frequency of intensive scrubbing needed.
A professional deep clean service will often include grout restoration as a standard part of their bathroom detailing, ensuring a truly hygienic and refreshed space.
3. Shower Glass and Enclosure Deep Cleaning
Daily squeegeeing helps, but a deep clean for your shower glass is essential for tackling the hazy film of soap scum, hard water spots, and mildew that builds up over time. This process is a non-negotiable part of a thorough bathroom deep cleaning checklist, as it restores transparency and eliminates the germs that thrive in damp corners. For homeowners in Beaverton and surrounding Portland suburbs with mineral-rich water, this step prevents permanent etching and keeps the enclosure looking new.
This intensive cleaning goes far beyond a quick spray and wipe. It involves using specific tools and solutions to dissolve stubborn buildup from glass, tracks, and seals, a crucial task for preparing rental properties or staging a home for sale.
How to Deep Clean Your Shower Glass and Enclosure
The objective is to break down mineral deposits and soap scum chemically, making them easy to wipe away without harsh scrubbing. Start by spraying the entire glass surface, inside and out, with your chosen cleaning solution.
- Apply an effective cleaner: A solution of equal parts white vinegar and warm water in a spray bottle works well for an eco-friendly approach. For tougher grime, a commercial soap scum remover or a paste of baking soda and water can be applied directly to problem areas.
- Let it dwell: Allow the cleaner to sit for at least 10-20 minutes. This gives the active ingredients time to dissolve the hard water stains and soap residue, which is especially important in Portland-area homes.
- Scrub and rinse: Use a non-abrasive sponge or microfiber cloth to scrub the glass in a circular motion. Pay close attention to corners and the bottom edge where buildup is heaviest. A detail brush or old toothbrush is perfect for cleaning the metal tracks and seals. Rinse thoroughly with warm water.
- Squeegee and dry: Use a high-quality squeegee to remove all water, wiping the blade after each pass. Finally, buff the glass, frame, and fixtures with a dry microfiber cloth to prevent streaks and leave a sparkling finish.
Pro Tip: After cleaning, apply a water-repellent product to the glass. This creates a hydrophobic barrier that causes water to bead up and roll off, drastically reducing future soap scum and hard water spot formation.
A crystal-clear shower enclosure elevates the entire bathroom's appearance and hygiene. To understand how this fits into a full home refresh, learn more about what our comprehensive deep clean service includes.
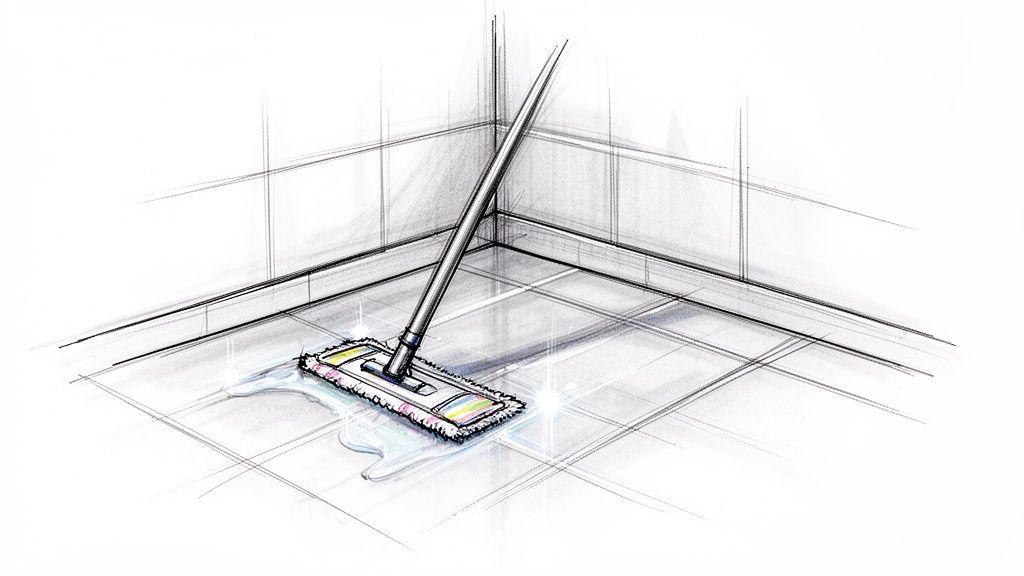
4. Bathroom Tile Wall and Floor Cleaning
Weekly sweeping and mopping are sufficient for day-to-day upkeep, but a deep clean of your bathroom tile and grout tackles the accumulated grime, soap scum, and hard water deposits that regular cleaning can’t remove. This step is a vital part of any bathroom deep cleaning checklist because it not only restores the shine to your tile but also sanitizes the grout lines where mold and mildew thrive. For homeowners in areas like Beaverton, where mineral-rich water is common, this process prevents stubborn buildup and protects tile integrity.
This intensive cleaning goes far beyond a quick wipe-down. It involves using targeted cleaners and tools to lift dirt from both the tile surface and the porous grout, a task often essential during a move-out cleaning to leave the bathroom in pristine condition. A thorough tile cleaning eliminates slipping hazards, prevents permanent staining, and preserves the finish of your surfaces.
How to Deep Clean Your Bathroom Tiles and Grout
The key is to use the right cleaner for your specific tile type and to give it enough time to break down grime before scrubbing. Start by clearing the floor and any surfaces of all items to ensure complete access.
- Select the right cleaner: A pH-neutral cleaner is safest for most tile types, including ceramic, porcelain, and natural stone. For tough soap scum or mildew, an alkaline-based cleaner or a solution of vinegar and water can be effective, but always test on a small, inconspicuous area first.
- Apply and let it sit: Liberally spray the cleaner on the tile walls and floor, ensuring full coverage. Let the solution sit for 10-15 minutes to penetrate and loosen dirt, soap scum, and mineral deposits.
- Scrub grout and tile: Use a stiff-bristled grout brush to scrub the grout lines in a back-and-forth motion. Then, use a larger brush or non-abrasive pad to scrub the tile surfaces in a circular motion, which helps lift dirt without leaving streaks.
- Rinse and dry thoroughly: Rinse the tiles completely with clean water to remove all cleaning solution and loosened grime. Use a squeegee on the walls and a microfiber mop on the floor to dry the surfaces completely, preventing water spots and mildew growth.
Pro Tip: Proper ventilation is crucial. Open a window or turn on the exhaust fan while cleaning to help fumes dissipate and to speed up the drying process, which is key to preventing new mildew from forming in the damp Portland climate.
Ready for a spotless home?
Deep cleaning your bathroom tiles is essential for both hygiene and aesthetics, ensuring your bathroom is a clean and safe environment. This task is a cornerstone of a comprehensive home cleaning service that leaves no detail overlooked.
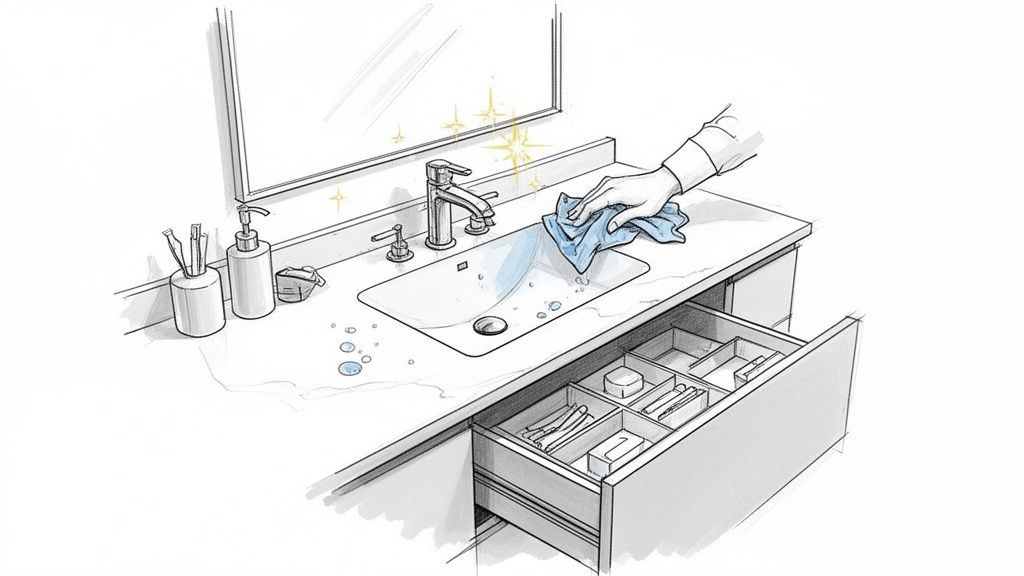
5. Vanity and Sink Deep Cleaning
The bathroom vanity and sink are high-traffic zones that quickly accumulate toothpaste splatter, soap scum, water spots, and cosmetic residue. A standard wipe-down manages daily grime, but a deep clean is essential for removing buildup in crevices, sanitizing high-touch surfaces like faucets, and restoring the countertop's original luster. This task is a cornerstone of any thorough bathroom deep cleaning checklist, directly impacting both the hygiene and visual appeal of the space.
For homeowners with specific countertop materials, such as the popular granite vanities in many Lake Oswego homes, this process is crucial for maintaining the stone's integrity and shine. It's a non-negotiable step in any professional move-in or move-out cleaning, ensuring the area is pristine and free from the previous occupant's use.
How to Deep Clean Your Vanity and Sink
The key is to use the right products for your surfaces and to be methodical, cleaning from the inside out. Start by completely clearing the countertop and emptying all vanity drawers and cabinets.
- Select the right cleaner: First, identify your countertop material. Use a pH-neutral cleaner for natural stone like granite or marble, a gentle all-purpose cleaner for laminate, and a quartz-specific cleaner for engineered stone.
- Declutter and clean storage: Wipe down the inside of all drawers and cabinets with a damp microfiber cloth, removing dust and debris. This is the perfect time to organize contents before putting them back.
- Tackle the sink and faucet: Spray the sink basin, faucet, and handles with a bathroom cleaner suitable for the material. Use a small detail brush or old toothbrush to scrub around the drain, faucet base, and handles where grime collects. To clear mineral deposits from the faucet aerator, unscrew it, soak it in white vinegar for 15-20 minutes, then rinse and reattach.
- Wipe and polish: Spray your chosen cleaner on the countertop and wipe it clean with a microfiber cloth to prevent streaking. Polish the faucet and handles with a dry cloth for a spot-free shine.
Pro Tip: For stubborn hard water stains around faucet bases, soak a cloth in white vinegar and wrap it around the affected area. Let it sit for 20 minutes before scrubbing and rinsing. This is especially effective in the Portland area where mineral buildup can be persistent.
A meticulously cleaned vanity not only looks better but also contributes to a more hygienic bathroom environment. This level of detail is a standard part of what our deep clean service includes, ensuring every surface is addressed.
6. Mirror and Glass Fixture Cleaning
Often overlooked in routine tidying, a thorough cleaning of mirrors and glass fixtures is a hallmark of a truly deep-cleaned bathroom. This step in a bathroom deep cleaning checklist goes beyond a quick wipe, targeting the stubborn film of hairspray, water spots, and dust that can make a space feel dull and grimy. Achieving a streak-free shine enhances light reflection, making even smaller bathrooms, like those in downtown Portland apartments, feel larger and brighter.
This detailed process ensures every glass surface, from the main mirror to glass light fixture covers and shower doors, is crystal clear. It’s a critical finishing touch for a home staging or a move-out cleaning, where pristine surfaces signal a high standard of care and cleanliness to potential buyers or new tenants.
How to Deep Clean Mirrors and Glass
The secret to a flawless finish is using the right tools and technique to cut through buildup without leaving behind lint or streaks. Start by dusting the fixtures to remove any loose debris before applying any liquid.
- Apply a quality cleaner: Lightly mist the surface with a high-quality glass cleaner or a simple solution of equal parts white vinegar and water. Avoid over-saturating the surface, which can cause drips and streaking.
- Wipe with the right tool: Use a clean, dry microfiber cloth to wipe the surface. Start at the top and work your way down in an “S” pattern to ensure full coverage and prevent re-depositing grime. For larger surfaces like shower doors, a squeegee can provide a perfect, streak-free result.
- Detail the edges: Use a fresh microfiber cloth or a cotton swab to clean the corners and edges of the mirror or glass where dust and moisture accumulate.
- Polish and inspect: Step back and view the glass from different angles to spot any remaining streaks or smudges. Use a separate, dry microfiber cloth to buff these areas for a perfect shine.
Pro Tip: Clean mirrors and glass fixtures last. This prevents dust and splatters from other cleaning tasks, like scrubbing the sink or countertop, from landing on your freshly cleaned surfaces and undoing your work.
Properly cleaned glass elevates the entire bathroom's appearance, reflecting a commitment to detail. This meticulous approach is central to how we deliver a comprehensive deep clean service to homes across the area.
7. Baseboards and Wall Scuff Mark Removal
Baseboards and walls are often overlooked during routine cleans, yet they accumulate dust, scuff marks, and moisture-related stains that can make an otherwise clean bathroom feel grimy. A thorough scrub of these surfaces is a vital part of any bathroom deep cleaning checklist, targeting the buildup in crevices where the walls meet the floor and removing unsightly marks from daily use. In high-traffic family bathrooms or rental properties in Beaverton, this step is crucial for maintaining the paint finish and preventing mold growth in a moisture-rich environment.
This detailed task goes beyond a quick dusting. It involves carefully cleaning surfaces to remove soap splatter, scuffs, and dust without damaging the paint, a key part of a professional move-out cleaning service designed to leave the space in pristine condition for the next resident.
How to Clean Baseboards and Remove Wall Marks
The goal is to gently lift stains and grime without stripping the paint. The right technique depends on your paint finish, as glossy surfaces can handle more scrubbing than delicate matte finishes. Start by vacuuming the baseboards with a brush attachment to remove all loose dust and debris.
- Prepare a gentle cleaning solution: For most painted surfaces, a solution of warm water and a few drops of dish soap is effective. Mix it in a bucket for easy access.
- Wipe down surfaces: Dampen a microfiber cloth in the soapy water, wringing it out until it's just damp, not dripping. Wipe down all baseboards and any visible wall splatters. For tougher scuffs, a magic eraser can be effective, but use it gently and test it on an inconspicuous area first to avoid dulling the paint.
- Tackle stubborn stains and crevices: For tight corners and detailed trim, use a soft-bristled brush or a cotton swab dipped in your cleaning solution. This helps dislodge grime that cloths can’t reach. After cleaning, wipe the area with a clean, damp cloth to rinse away any soap residue.
- Dry completely: Use a dry microfiber cloth to wipe down all cleaned areas. Ensuring baseboards are completely dry is essential in bathrooms to prevent moisture from seeping into the wood or drywall, which can lead to mold.
Pro Tip: Before using any cleaning product on your walls, identify the paint type. Semi-gloss or satin finishes, common in bathrooms, are more durable and washable than matte or eggshell finishes, which may be damaged by abrasive cleaners.
Cleaning baseboards and walls is a finishing touch that elevates the entire bathroom's appearance. For more detailed guidance on specific blemishes, you can find helpful information on how to remove stains from walls.
8. Exhaust Fan and Ventilation System Cleaning
Often overlooked during routine upkeep, the bathroom exhaust fan is a critical component for maintaining air quality and preventing moisture damage. A deep clean of this system removes the accumulated dust, lint, and grime that choke its performance. This task is a non-negotiable part of a bathroom deep cleaning checklist, as a clogged fan cannot properly vent humid air, leading to mildew, mold growth, and peeling paint. For rental properties and Airbnbs in the Portland area, ensuring proper ventilation is key to preventing humidity-related issues and ensuring a healthy environment for tenants and guests.
This essential maintenance goes far beyond a quick wipe of the vent cover. It involves safely accessing and cleaning the fan motor, blades, and housing to restore optimal airflow. This is particularly important for a move-in cleaning, as you want to ensure the ventilation system is functioning efficiently from day one in your new home.
How to Deep Clean Your Exhaust Fan and Ventilation System
The goal is to clear all obstructions and ensure the fan can move air effectively. Always begin by turning off the power to the fan at the circuit breaker to ensure your safety before starting any work.
- Disassemble and clean the cover: Carefully remove the fan cover. Most can be pulled down gently and unclipped. Wash the cover in warm, soapy water to remove all dust and grime, then set it aside to dry completely.
- Clean the fan blades and housing: Use a vacuum with a brush attachment to remove the thickest layers of dust from the fan blades and the interior of the housing. Use a damp microfiber cloth or compressed air to dislodge any remaining buildup.
- Check the ductwork: If possible, inspect the visible portion of the ductwork for any blockages. A poorly performing fan might indicate a larger obstruction further down the line that could require professional attention.
- Reassemble and test: Once all components are clean and dry, reattach the cover. Turn the power back on and test the fan to ensure it is running smoothly and quietly.
Pro Tip: Make this an annual task, especially in high-moisture bathrooms. A simple test for fan efficiency is to hold a single square of toilet paper up to the vent while it's running; if the fan can't hold it in place, it’s time for a thorough cleaning.
Maintaining your bathroom's ventilation is a crucial step in protecting your home from moisture damage. For a complete approach to home hygiene, see how this task integrates with our comprehensive deep clean service.
9. Bathroom Hardware and Fixture Polishing
Often overlooked during routine cleaning, bathroom hardware and fixtures are the finishing touches that can make the entire space look either dated and grimy or sparkling and modern. A deep clean focuses on removing the water spots, fingerprints, soap scum, and oxidation that dulls these surfaces over time. This step is a vital part of a complete bathroom deep cleaning checklist, as it restores shine and protects the finish of your faucets, handles, and light fixtures.
This task goes beyond a quick wipe-down. It requires identifying the specific metal finish and using the right products and techniques to bring back its original luster without causing damage. For homeowners preparing for a move-out cleaning in Beaverton or real estate staging professionals in Lake Oswego, polished fixtures are a detail that significantly boosts a property's appeal.
How to Polish Your Bathroom Hardware and Fixtures
The key to success is using the correct cleaner for the specific material, whether it's chrome, brushed nickel, brass, or oil-rubbed bronze. Always test a new cleaner in an inconspicuous spot first to ensure it won't harm the finish.
- Identify the finish: Chrome is highly reflective, brushed nickel has a softer, matte look, and brass has a distinct golden tone. Each requires a different approach.
- Apply the right cleaner: For chrome, a simple solution of equal parts white vinegar and water is highly effective at dissolving mineral deposits. For tougher jobs on appropriate metals, a dedicated product like Bar Keeper's Friend or Brasso Metal Polish can restore shine. Apply the cleaner to a soft microfiber cloth, not directly onto the fixture.
- Polish gently: Work the cleaner into the surface using small, circular motions. A soft-bristled toothbrush can help you access tight areas around the base of faucets and handle crevices.
- Rinse and dry thoroughly: Wipe away the cleaning solution with a clean, damp cloth. Immediately follow up with a dry microfiber cloth to buff the fixture to a streak-free shine and prevent new water spots from forming.
Pro Tip: Prevention is easier than restoration. Keep a dedicated microfiber cloth in the bathroom and quickly wipe down faucets and handles after each use. This simple habit prevents the buildup of hard water spots common in the Portland area and keeps your hardware gleaming.
Polishing your hardware is a high-impact task that elevates the entire bathroom's appearance. It’s one of the final details our professional deep clean service focuses on to deliver a truly comprehensive clean.
10. Bathroom Cabinet and Drawer Interior Sanitization
While exterior surfaces get regular attention, the interiors of bathroom cabinets and drawers often become neglected repositories for dust, moisture, and spilled product residue. A proper deep clean targets these hidden spaces, a critical component of any thorough bathroom deep cleaning checklist. This process is vital for eliminating bacteria, preventing mold growth fueled by bathroom humidity, and ensuring personal care items are stored in a hygienic environment. For families in Beaverton or those managing rental properties, sanitizing these areas is non-negotiable for health and maintenance.
This intensive cleaning goes beyond a simple wipe-down. It involves completely emptying the contents, vacuuming out debris, and sanitizing every interior surface to create a truly clean storage space, a key step in preparing a home for a move-in cleaning or staging it for sale.
How to Deep Clean Your Cabinet and Drawer Interiors
The goal is to remove all debris and sanitize surfaces, not just rearrange clutter. Start by taking everything out of one cabinet or drawer at a time to keep the process manageable.
- Empty and vacuum: Remove all items and set them aside. Use a vacuum with a brush or crevice attachment to thoroughly remove all loose hair, dust, and debris from the corners and seams.
- Wipe and sanitize: Mix a solution of equal parts water and white vinegar, or use a gentle all-purpose cleaner. Spray the interior surfaces, including shelves, walls, and the drawer bottom. Wipe clean with a microfiber cloth and allow it to air dry completely before replacing items.
- Organize and protect: Discard any expired products or empty containers. Group similar items together using drawer dividers or small bins. Consider adding a non-adhesive shelf liner to protect the wood or laminate from future spills and make cleanup easier.
Pro Tip: Before returning items, wipe down each bottle, container, and organizer to avoid reintroducing grime. Keeping a small, moisture-absorbing packet (like silica gel) inside cabinets can also help manage the damp Portland climate and prevent musty odors.
Sanitizing cabinet interiors is a foundational part of maintaining a healthy home. To understand how this fits into a complete property refresh, you can learn more about how to deep clean a house and see what a comprehensive approach entails.
10-Item Bathroom Deep Cleaning Comparison
| Service | 🔄 Implementation Complexity | ⚡ Resources & Tools | 📊 Expected Outcomes | 💡 Ideal Use Cases | ⭐ Key Advantages |
|---|---|---|---|---|---|
| Toilet Bowl Deep Cleaning | Moderate–High; manual scrubbing and targeted stain work | Pumice, acidic cleaners, toilet brushes, gloves | Removes hard‑water/rust stains; sanitizes; odor removal | Move‑in/out, heavily stained toilets, rentals | Restores porcelain; prevents long‑term staining |
| Shower and Bathtub Grout Cleaning | High; detailed grout work, may need re‑grouting | Grout brushes, enzymatic/oxygen cleaners, steam/pressure | Restores grout color; reduces mold and allergens | Pre‑sale, Airbnb, post‑renovation | Prevents grout replacement; improves hygiene |
| Shower Glass & Enclosure Deep Cleaning | Moderate; technique‑sensitive to protect seals | Squeegee, microfiber, glass cleaners, vinegar | Streak‑free clarity; reduces water spots/etching | Hard‑water homes, staging, rental inspections | Improves light/transparency; strong aesthetic impact |
| Bathroom Tile Wall & Floor Cleaning | Moderate–High; depends on tile type and area size | pH‑neutral cleaners, brushes, mop, non‑abrasive pads | Restores shine; removes soap scum; improves slip safety | Large bathrooms, showings, hard‑water areas | Extends tile life; reduces slip hazards |
| Vanity & Sink Deep Cleaning | Moderate; multiple materials and crevices | Surface‑specific cleaners, microfiber, sealants | Sanitized high‑touch areas; restored countertop finish | Move‑in/out, upscale properties, hygiene‑focused homes | Improves functionality; restores like‑new appearance |
| Mirror & Glass Fixture Cleaning | Low–Moderate; requires streak‑free technique | Microfiber, squeegee, glass cleaner/vinegar | Brighter rooms; improved light reflection | Staging, regular maintenance, Airbnb prep | Makes space feel larger; enhances ambiance |
| Baseboards & Wall Scuff Removal | Moderate; careful technique to avoid paint damage | Magic erasers (cautious), mild cleaners, microfiber | Clean edges; removed scuffs; reduced visible wear | Family homes, rental turnovers, pre‑sale touchups | Boosts overall appearance; prevents mold at edges |
| Exhaust Fan & Ventilation Cleaning | High; requires safe access and mechanical care | Screwdrivers, compressed air, replacement filters | Improved air quality; reduced mold risk; better efficiency | High‑moisture bathrooms, recurring mold problems | Prevents costly remediation; extends fan life |
| Hardware & Fixture Polishing | Low–Moderate; finish‑specific methods | Finish‑specific polishes, microfiber cloths | Restored shine; removed fingerprints and spots | Staging, vintage fixtures, cosmetic refreshes | High visual impact at low cost; prevents corrosion |
| Cabinet & Drawer Interior Sanitization | Moderate–High; time‑consuming and detail‑oriented | Vacuum, sanitizers, shelf liners, organizers | Hygienic, odor‑free, organized storage | Properties with meds, Airbnb, move‑in/out services | Prevents cross‑contamination; extends cabinet life |
When DIY Isn't Enough: Elevating Your Clean with Professional Services
You've made it through the ultimate bathroom deep cleaning checklist, a comprehensive guide designed to transform one of the most used rooms in your home from functional to flawless. We’ve dissected every zone, from the persistent soap scum on your shower glass to the often-overlooked grime inside your exhaust fan vent. By now, you understand the methodical approach required to truly sanitize your toilet, restore your grout lines, and make every chrome fixture shine.
This checklist empowers you to tackle your bathroom with the strategy of a professional. You've learned not just what to clean, but how and why. The value of this knowledge extends beyond a single sparkling bathroom; it’s about creating a healthier, more pleasant living environment for you and your family. Mastering these steps means you can maintain a higher standard of cleanliness, prevent the buildup of mold and mildew, and extend the life of your fixtures and surfaces. It’s about taking pride in your home, whether it’s a downtown Portland apartment or a spacious family house in Beaverton.
The True Value of a Professional Deep Clean
Following this guide will undoubtedly produce incredible, satisfying results. However, there are times when the scope of the project, the stubbornness of the stains, or the limits on your time make calling a professional not a luxury, but a strategic decision. While our checklist provides the map, a professional home cleaning service brings the heavy-duty equipment, specialized knowledge, and an efficiency honed over hundreds of cleaning jobs.
Consider these scenarios where a professional deep clean service might be the right choice:
- Stubborn, Deep-Set Stains: Years of hard water buildup on shower doors, deeply stained grout that resists every DIY remedy, or rust stains around drains often require commercial-grade solvents and tools that aren't typically found in a home cleaning caddy. Professionals can diagnose the stain and apply the correct treatment without damaging the surface.
- Time and Energy Savings: A thorough deep clean, as you've seen, can take an entire afternoon or even a full day. For busy professionals and families in the Portland area, that time is invaluable. Hiring a maid service frees up your weekend to enjoy the local parks, run errands, or simply relax, knowing the most demanding household chore is being handled expertly.
- Move-In / Move-Out Cleaning: When you're moving, your focus is on packing, logistics, and setting up your new home. A professional move out cleaning ensures you meet your rental agreement requirements and leave the space pristine for the next occupants. Similarly, a move in cleaning guarantees your new home is sanitized and fresh before you even unpack a single box.
- Restorative Cleaning: Sometimes, a bathroom just needs a complete reset. If it's been a while since the space had a top-to-bottom scrub, a professional service can bring it back to a baseline of clean that is far easier for you to maintain with your regular weekly routine.
Key Insight: A professional cleaning isn't about admitting defeat; it's about investing in your home and your time. It’s the ultimate step in your bathroom maintenance plan, tackling the jobs that DIY methods can't, and setting a new standard of clean.
Your Path to a Permanently Pristine Bathroom
This bathroom deep cleaning checklist is your roadmap to a brilliantly clean space. Use it for your seasonal deep cleans, refer to it for tackling specific problems, and let it guide your regular maintenance. The feeling of stepping into a bathroom that is not just tidy but deeply, hygienically clean is a daily reward. It elevates your home, reduces stress, and creates a sanctuary where you can begin and end your day.
Whether you choose to conquer this checklist yourself or decide to bring in expert help for the toughest jobs, you are now equipped with the knowledge to make it happen. The goal is the same: a beautiful, sanitary, and relaxing bathroom you can be proud of. From the sparkling tile in your Hillsboro home to the spotless fixtures in your Lake Oswego property, a pristine bathroom is always within reach.
Ready to skip the scrubbing and experience a truly transformative clean? The team at Neat Hive Cleaning specializes in the detailed work outlined in this bathroom deep cleaning checklist, delivering meticulous results for homeowners and businesses across the Portland metro area. Let us put our professional tools and expertise to work for you.
Get your free estimate from Neat Hive Cleaning today!
Ready for a spotless home?
More Articles

The Ultimate Household Cleaning Schedule Checklist for Portland Homes
Tired of cleaning chaos? Grab our ultimate household cleaning schedule checklist to keep your Portland home spotless. For homeowners, renters, and more.
March 16, 2026

Do You Vacuum or Dust First? A Pro Cleaning Guide for Portland Homes
Settle the debate: do you vacuum or dust first? Get expert tips from Portland's trusted cleaners for a truly spotless home and better air quality.
March 15, 2026

How Much Does House Cleaning Cost in Portland?
Wondering how much does house cleaning cost in Portland? Our 2026 guide breaks down rates, factors, and tips to budget for professional cleaning services.
March 14, 2026

How to Hire a House Cleaner in Portland: A Local Guide
Learn how to hire a house cleaner in Portland with this guide. Get expert tips on finding, vetting, and choosing the right service for your home.
March 13, 2026