
How to Clean Tile Floors: A Professional's Guide for Portland Homes
Published on February 3, 2026
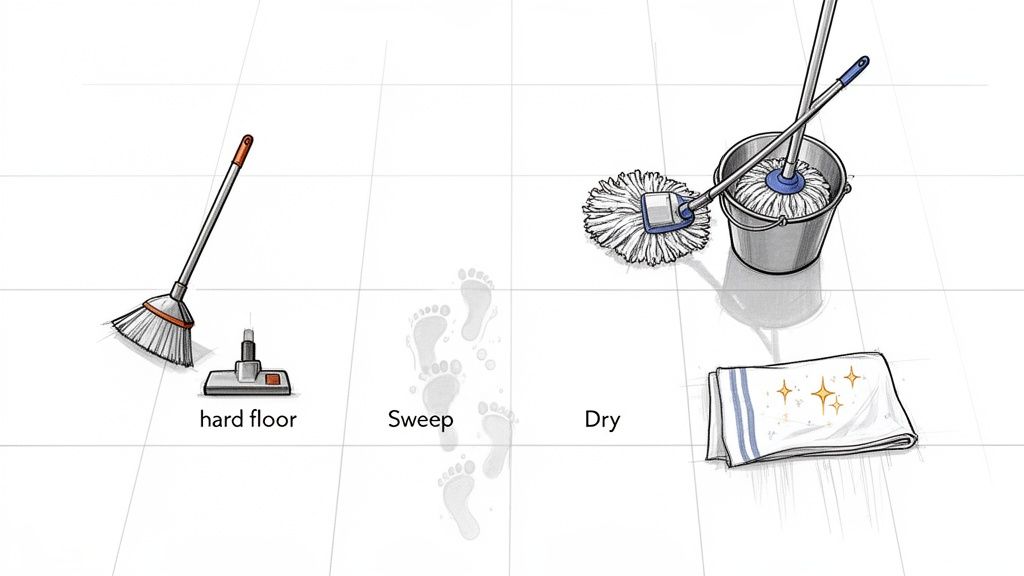
At its core, keeping tile floors clean is all about a simple, consistent routine. First, you've got to get rid of all the loose stuff—the crumbs, the dust, the pet hair—with a good sweep or vacuum. Then, you mop with the right kind of cleaner for your specific tile, and this is key: it should almost always be a pH-neutral solution. Finally, you need to dry the floor completely to avoid those annoying streaks and water spots.
Stick to this basic process, and you’ll stop grime from building up and keep your tile looking fantastic.
Why The Right Cleaning Method Matters For Portland Homes
Here in the Portland metro area, our floors go through a lot. Between the muddy paw prints from a rainy spring day and the usual dust and spills of a busy household, tile floors really take a beating. Using the wrong cleaning method doesn't just make your floors look dull; it can actually cause permanent damage, especially with the wide range of materials you find in local homes.
For example, the beautiful natural stone in a Lake Oswego entryway needs a much gentler touch than the tough, workhorse ceramic tile in a Beaverton family kitchen. Knowing the difference is the first step to truly effective floor care.
Avoiding Common Cleaning Mistakes
It’s easy to grab a cleaner or a tool that you think will work, but many people accidentally use products that harm their tile and grout over time. Harsh, acidic cleaners like vinegar can literally etch the surface of natural stone, while those heavy-duty scrubbing pads can leave tiny scratches on porcelain that end up trapping more dirt.
A key takeaway from our years of experience providing professional house cleaning: The goal is to lift dirt away, not just spread it around. A classic mistake is using one bucket of increasingly dirty water for the whole floor. You're often just moving grime from one spot to another and pushing it deep into your grout lines.
This guide is all about giving you practical advice that actually works for homes in the Pacific Northwest. We'll cover everything from picking the right tools to setting up a cleaning schedule that makes sense. After providing house cleaning services across the region for years, we’ve learned what it really takes to keep tile floors looking brand new.
Cheat Sheet for Common Portland Tile Types
Before we get into the nitty-gritty, here’s a quick-reference table for the types of tile we see most often around here. Think of it as your cheat sheet for getting started.
| Tile Type | Best Cleaner | Tools to Use | Key Precaution |
|---|---|---|---|
| Ceramic/Porcelain | Mild pH-neutral cleaner or a DIY water/vinegar mix | Microfiber mop, soft-bristle brush, vacuum | Avoid abrasive scrubbers that can dull the finish. |
| Natural Stone | pH-neutral stone-specific cleaner | Soft microfiber mop, soft cloths | Never use acidic cleaners (vinegar, lemon juice). |
| Slate | pH-neutral stone cleaner or mild detergent | Soft mop, soft brush for texture | Avoid waxy or oil-based cleaners that cause buildup. |
| Vinyl/Luxury Vinyl | Manufacturer-recommended cleaner, gentle soap and water | Microfiber mop, soft broom | Do not use steam mops, which can damage the adhesive. |
Whether you're doing a quick weekly cleanup or a full-on seasonal deep clean, starting with this knowledge will protect your investment. By using the right techniques from the get-go, you'll keep that fresh, clean look all year long and save yourself a ton of frustration.
Gathering Your Tile Cleaning Toolkit
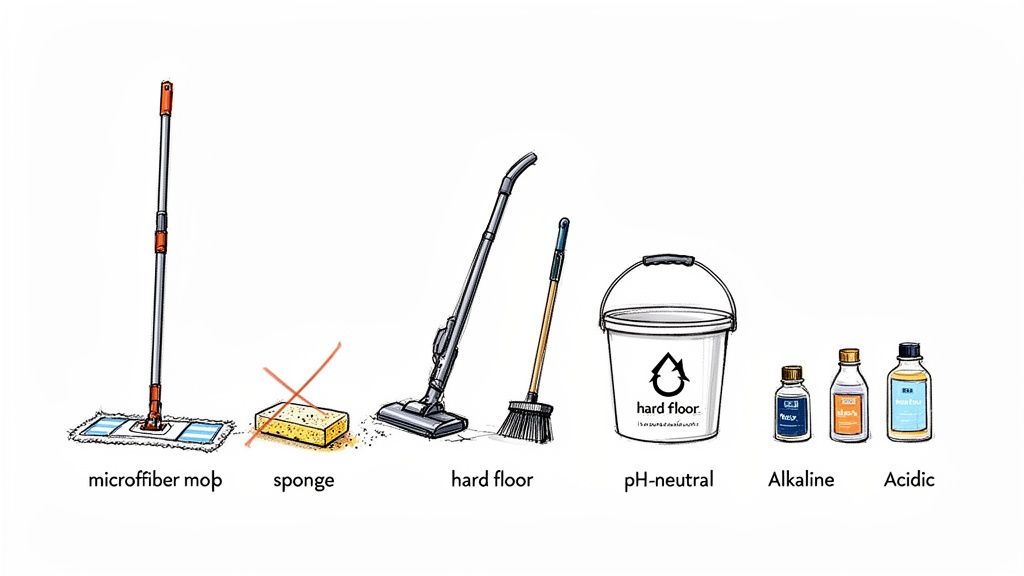
Before you even think about mixing up a cleaning solution, let's talk about what you'll need to do the job right. Having the right tools isn't just about making the work easier; it's about protecting your investment. I’ve seen countless floors, from Hillsboro to right here in Portland, that suffer from well-intentioned but improper cleaning techniques.
Think about it: that old string mop you’ve had for years? It mostly just pushes dirty water around, and a lot of that grime ends up packed into your grout lines, creating a bigger headache later on. Switch to a quality microfiber flat mop, and you'll immediately see the difference. Those tiny fibers are designed to grab onto dirt and lift it away, not just smear it. It's a simple swap that dramatically changes your results.
First Things First: Getting Rid of Debris
You can't get a clean floor if you're mopping over crumbs and grit. This first pass is non-negotiable if you want to avoid scratching your tile.
- A Soft-Bristle Broom: Great for daily sweeps. It’s perfect for grabbing the pet hair and kitchen crumbs before they get tracked through the house.
- A Vacuum with a Hard Floor Setting: This is your heavy hitter for a deeper clean. The key is to make sure the beater bar—that spinning brush meant for carpets—is turned off. A spinning brush can easily fling debris everywhere and can even micro-scratch delicate tile finishes over time.
- Dust Mop: If you have large tiled areas, a microfiber dust mop is a game-changer. It works like a magnet for dust and allergens.
These are your frontline tools against the daily assault of dirt and dust.
Your Go-To Mopping and Scrubbing Gear
With the loose dirt gone, it’s time to mop. The equipment you use here is what separates a sparkling, streak-free floor from a dull, sticky one.
Your essential kit should include:
- Microfiber Mop: As I mentioned, these are far superior to old-school mops. Look for one with a machine-washable head; you can toss it in the laundry and know you're starting with a genuinely clean tool every time.
- Two Buckets: This is a pro tip that makes a huge difference. One bucket holds your cleaning solution, and the other holds clean rinse water. This simple system stops you from dipping your mop back into dirty water and spreading it all over the floor you just cleaned.
- Grout Brush: You need something with stiff bristles to really get into those grout lines. An old toothbrush can work in a pinch, but a dedicated grout brush is designed to give you better leverage and scrubbing power. For stubborn spots, you can also learn more about how to use a Magic Eraser, as it can be surprisingly effective on certain grout stains.
Choosing Your Cleaning Solutions Wisely
The cleaner you pour into that bucket is just as critical as the brush you scrub with. Different messes call for different solutions, and using the wrong one can be a costly mistake.
The pH scale is your best friend here. It runs from 0 (very acidic) to 14 (very alkaline), with 7 being neutral. Using the wrong pH, especially on natural stone, can cause etching and permanent damage.
Here's a quick cheat sheet for what to grab and when:
| Cleaner Type | pH Level | Best For | Tile Types |
|---|---|---|---|
| pH-Neutral Cleaner | Around 7 | Routine cleaning, light dirt, spills. | Perfect for all tile, including delicate natural stone. |
| Alkaline Cleaner | Above 7 | Cutting through grease, soap scum, and heavy grime. | Safe on ceramic and porcelain. Use with caution. |
| Acidic Cleaner | Below 7 | Tackling hard water spots, mineral deposits, and rust stains. | Ceramic and porcelain only. Never use on natural stone. |
For your regular weekly clean, a pH-neutral cleaner is almost always the right call. It gets the job done without leaving behind residue or harming your tile's finish. Save the stronger alkaline and acidic cleaners for targeted deep cleaning when you have a specific problem to solve.
Your Weekly Tile Floor Cleaning Ritual
The real secret to floors that always look amazing? Consistency. A simple weekly ritual is what stops everyday grime from turning into a weekend-long scrubbing marathon. This isn't about spending hours on your hands and knees. It's about working smarter to keep that clean, fresh look, whether you're in a busy family home in Beaverton or a sleek downtown Portland apartment.
Think of it as a weekly reset button for your floors. You’re clearing away a week's worth of footprints, spills, and dust before it has a chance to settle in. A good weekly clean not only keeps your tile looking its best but also makes those bigger, deep-cleaning jobs far less intimidating.
Start by Clearing the Debris
You’d never wash a muddy car without rinsing it first, right? The same logic applies here. Trying to mop a floor that’s covered in crumbs, pet hair, or dirt just grinds all that grit into the tile and, worse, pushes it deep into your grout lines. That’s exactly how grout gets stained and damaged over time.
So, always start with a good sweep using a soft-bristle broom or a vacuum. If you grab the vacuum, make sure it’s on the hard floor setting or that you’ve turned off the beater bar. A spinning brush can just fling debris everywhere and might even leave tiny scratches on certain tile finishes. Getting this first step right is probably the most important part of the whole routine.
Master the Two-Bucket Mopping Method
Here’s a little trick of the trade that will completely change your mopping game: use two buckets. It’s a simple idea, but it stops you from making the most common cleaning mistake—sloshing dirty water all over the very floor you’re trying to clean.
Here’s how you set it up:
- Solution Bucket: Fill this one with your cleaning solution and warm water.
- Rinse Bucket: Fill the second one with plain, clean water.
Dip your mop into the solution, wash a small patch of the floor, and then dunk that dirty mop into the rinse bucket. Wring it out really well before dipping it back into your cleaning solution. This way, you’re always putting clean solution on the floor and actually lifting the dirt away instead of just pushing it around.
Ready for a spotless home?
The key to a perfect, streak-free finish is working in small, manageable sections—think 4x4 feet at a time. This keeps the cleaning solution from drying on the tile before you can get to it, which is what usually causes that annoying haze or streaky look.
Our Go-To DIY Tile Cleaner Recipe
For most ceramic and porcelain tile, you really don't need a pricey, specialized cleaner for your weekly upkeep. A simple homemade solution does an incredible job cutting through everyday gunk.
Here’s the recipe we swear by:
- 1 gallon of warm water
- ½ cup of distilled white vinegar
- A few drops of dish soap (optional, but great for greasy kitchen floors)
Just mix it all up in your solution bucket. The vinegar is a fantastic natural degreaser and disinfectant, and the warm water helps loosen up dirt. That little bit of dish soap is a game-changer on kitchen floors where cooking messes happen. It's a staple in our residential cleaning services because it’s effective, cheap, and simple.
The global market for floor cleaners hit USD 6.35 billion in 2024, a number fueled by the demand for products that kill germs. While there's a time and place for powerful commercial cleaners, more people are turning to sustainable, budget-friendly DIY options. Here in Portland, our damp weather can lead to 40% more grime on tile, making a solid routine non-negotiable. Eco-friendly products now make up about 30% of the market, a trend we’re happy to see and support in our own work. You can dig into more of these market trends at Straits Research.
A Critical Warning for Natural Stone
Okay, this is important. That DIY vinegar solution I just shared is NOT safe for natural stone floors. I’m talking about materials like:
- Marble
- Travertine
- Limestone
- Slate
Vinegar is an acid. It will etch, dull, and permanently damage the surface of these beautiful, porous stones. You must use a cleaner specifically made to be pH-neutral for natural stone. Using the wrong product is a costly mistake that no amount of scrubbing can fix. If you're ever in doubt, just stick to a cleaner that says it's safe for natural stone right on the label.
Tackling Grimy Grout and Tough Stains
Let's be honest, even if your tiles are spotless, dingy grout can make the whole floor look tired and dirty. Grout is porous, which is a nice way of saying it’s a magnet for dirt, spills, and grime. In high-traffic spots like a busy Portland kitchen or entryway, those clean lines can disappear fast. Bringing your grout back to life is one of the single most impactful things you can do to refresh your floors.
The secret isn't complicated: you need a cleaner that can get into those tiny pores and a stiff-bristled brush to do the heavy lifting. It definitely takes some elbow grease, but the payoff is always worth it.
Choosing Your Grout Cleaning Method
You've got a few great options for reviving your grout, from simple household concoctions to heavy-duty commercial cleaners. The best choice really hinges on how stained your grout is and the type of tile you're working with.
Here’s a quick rundown of the most common approaches:
| Method | Best For | Pros | Cons |
|---|---|---|---|
| Baking Soda & Peroxide Paste | Light to moderate staining, regular maintenance. | Gentle, affordable, and effective on common stains. | May require multiple applications for deep-set grime. |
| Oxygenated Bleach Cleaner | Tougher organic stains (mold, mildew). | Powerful whitening action without harsh chlorine fumes. | Can be too strong for colored grout; always test first. |
| Commercial Grout Cleaner | Heavy, set-in stains and deep discoloration. | Formulated for maximum effectiveness. | Can be harsh; requires good ventilation and careful handling. |
For most situations, a simple paste of baking soda and hydrogen peroxide is a fantastic place to start. Just mix them into a thick, spreadable consistency, smear it onto the grout lines, and let it bubble away for 10-15 minutes. Then, get to scrubbing with a firm brush.
The Right Way to Scrub and Rinse
Regardless of the cleaner you land on, your technique is what really gets the job done. Once the cleaning solution has had time to work its magic, it's time to scrub. Grab a dedicated grout brush or an old toothbrush and use small, circular motions to really agitate and lift that embedded grime.
After scrubbing a section, the final and most important step is to rinse it thoroughly. Use a clean, damp microfiber cloth to wipe away the dirty foam. Don't skimp on this part—any cleaning residue left behind will become a sticky magnet for new dirt, and you'll be right back where you started.
This visual shows how a simple weekly routine can prevent that major grout buildup in the first place.
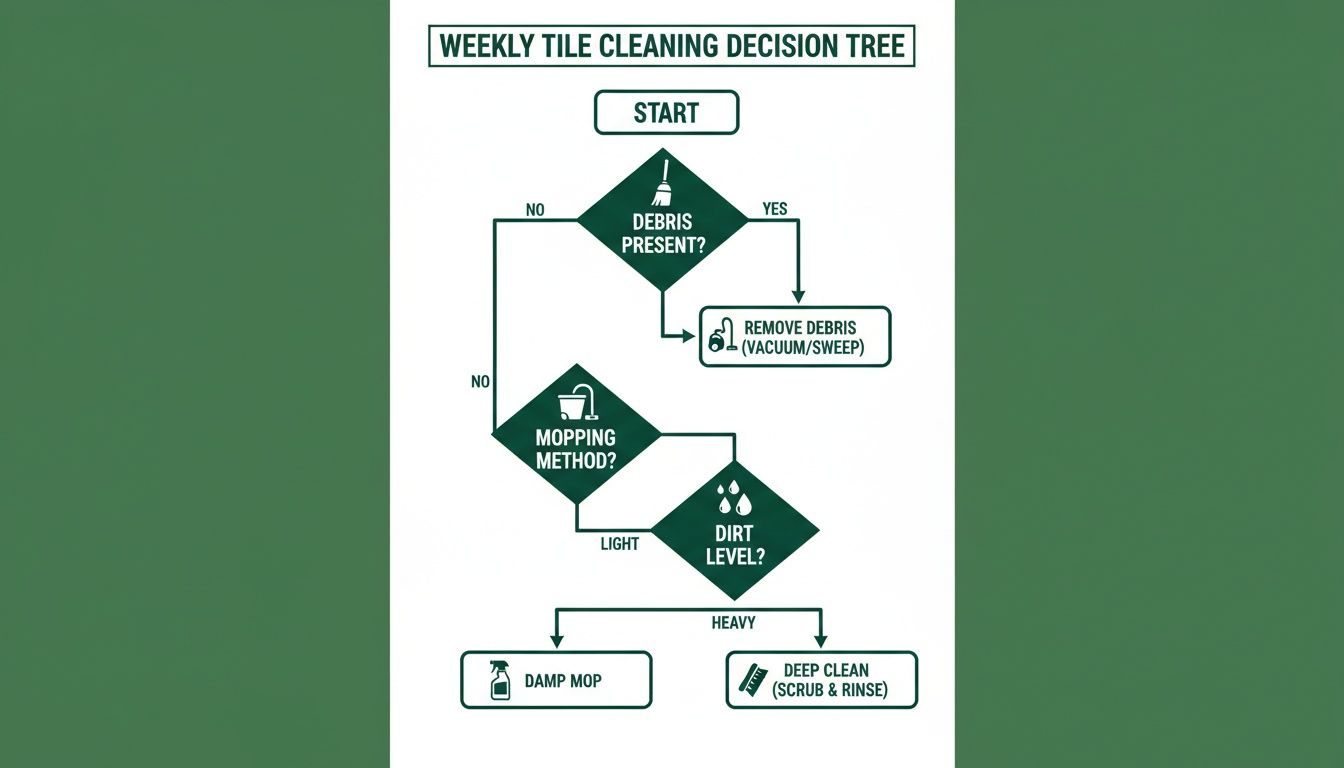
Sticking to this simple process stops minor, everyday messes from becoming stubborn stains that demand an afternoon of intense scrubbing.
Attacking Common Household Stains
Life is messy, and spills are just part of the deal. The key is to act fast and use the right tactic for the job.
- Coffee, Tea, or Wine: Blot, don't rub! For fresh spills on porcelain or ceramic, a quick paste of baking soda and water usually does the trick. For older, set-in stains, an oxygenated bleach cleaner is your best bet.
- Grease and Oil: A classic kitchen problem. Your first move should be to sprinkle cornstarch or baking soda directly on the spot to soak up the oil. Let it sit for a bit, then sweep it up and tackle the rest with warm, soapy water.
- Rust Stains: These can be a real headache. A paste of lemon juice and salt can sometimes lift the stain, but be warned: this is an acidic solution and should never be used on natural stone. For more persistent rust spots, we've put together a full guide on how to remove rust stains from various surfaces.
When you're tackling deep-set grout stains for a move out cleaning in Hillsboro or preparing a rental for new tenants, the level of detail required is immense. This is often when a professional deep clean service becomes the most efficient and effective solution.
The global tile cleaner market isn’t small—it hit USD 2.8 billion in 2023 and is expected to reach USD 4.2 billion by 2032, according to insights from DataIntelo.com. This growth reflects a major focus on home hygiene. Here in Portland, our damp climate means tile floors can trap a surprising amount of grime. Investing in professional cleaning can prevent 30-50% more wear and tear compared to standard DIY methods. That's why our 100% Satisfaction Guarantee and transparent pricing are so important to us—we make sure your floors truly shine.
Knowing When to Call a Cleaning Pro
Even with the best weekly routine and a solid deep-cleaning plan, there are times when your own efforts just won't be enough. Let's be honest, sometimes you need the heavy-duty equipment and professional-grade solutions that a dedicated cleaning service brings to the table. Recognizing when you've hit that wall not only saves you hours of frustration but also protects the long-term health and beauty of your tile floors.
It’s one thing to wipe up a fresh spaghetti sauce spill, but it’s another to tackle years of built-up grime. If you've spent an afternoon on your hands and knees scrubbing grout with every concoction imaginable, only to have it stay stubbornly dingy, that’s a clear sign. The same goes for beautiful natural stone that has lost its shine and now looks perpetually dull, no matter what you do.
These are common headaches in busy homes all over the Portland area, and they often require more power than what’s hiding under your sink.
When DIY Hits a Wall
Certain situations almost always call for professional backup. The goal of a home cleaning service isn't just to make things look clean; it's to truly restore them. Our technicians are trained to identify the exact type of tile and grout in your home and match it with the precise cleaning agents and machinery needed for a safe, impressive restoration.
Think about calling in the experts for these scenarios:
- Deeply Embedded Grout Stains: When dirt and oils have worked their way deep into porous grout, surface scrubbing just can't reach them. Professionals use high-pressure steam and powerful extractors to lift that deep-set grime from the inside out.
- Persistent Haze on Tile: That cloudy film that never seems to go away is often residue from the wrong kind of cleaners or years of soap buildup. We have specific solutions to strip this layer without harming the tile's finish.
- Overwhelming Move-In or Move-Out Cleans: Getting a property ready for new occupants is a massive job. A professional move out cleaning ensures every square inch of the floor, including tricky baseboards and corners, is sanitized and spotless for the next resident.
The Value of a Professional Deep Clean
In homes with high-end finishes, like many you'll find in Lake Oswego, calling a pro is really about protecting your investment. Natural stone, in particular, can be permanently etched or discolored by the wrong cleaning methods. Our team understands the chemistry behind cleaning different materials, ensuring we enhance their beauty, not diminish it.
A professional deep clean achieves a level of sanitation that is nearly impossible to match with household tools. We eliminate bacteria, allergens, and mold spores that love to hide in porous grout, which can make a real difference in your home's air quality.
For a small business in downtown Portland, maintaining a pristine appearance is crucial for making a good impression. Clean, bright tile floors reflect a high standard of care and professionalism. A scheduled deep clean service keeps your commercial space looking its best, handling the heavy lifting so you can focus on running your business. You can see everything we cover by exploring our guide on what a deep cleaning service includes.
The Bigger Picture of Professional Cleaning Services
The demand for professional cleaning is growing, and for good reason. The global cleaning services market hit USD 415.93 billion in 2024 and is expected to climb to USD 616.98 billion by 2030.
For busy Portland families and property managers, our move-in/out services, which start from $260 for 4-6 hours, are a perfect fit. We deliver detail-focused results on tile floors, especially on grout that's 70% more prone to staining without professional tools. It's no surprise that after recent health concerns, nearly 80% of consumers now prefer hiring pros for deep cleans to reclaim their valuable time. You can learn more about these cleaning industry trends on GrandViewResearch.com.
Your Top Tile Floor Care Questions Answered
After years of cleaning homes all over Portland, we've gotten pretty much every question you can imagine about tile floors. So, to wrap things up, I wanted to tackle some of the most common ones we hear from homeowners. Think of this as your go-to cheat sheet.
How Often Should I Really Be Deep Cleaning My Tile Floors?
For most homes, a solid deep clean of your tile and grout every 6 to 12 months is a great rule of thumb. Here in the Pacific Northwest, our damp weather means a lot of stuff gets tracked inside, and life just happens.
That said, some spots need more love than others. High-traffic areas—think kitchens, entryways, and mudrooms—could probably use a deep cleaning every 3 to 4 months. This is especially true if you’ve got kids or pets in the mix. A professional maid service can easily work this into a regular schedule, so your floors stay looking their best without you ever having to mark it on a calendar.
Can I Just Use a Steam Mop on All My Tile?
Steam mops are amazing for sealed ceramic and porcelain tile. The heat does a fantastic job of sanitizing and cutting through grime without needing a bunch of chemicals, which is always a plus.
But—and this is a big one—you should never use a steam mop on unsealed natural stone like travertine, slate, or marble. That intense heat and moisture can push water straight into the pores of the stone. This can lead to discoloration, mineral deposits, and damage that's tough to fix. Always, always check what the manufacturer recommends first. If you're not sure, just play it safe with a pH-neutral cleaner and a good microfiber mop.
What’s the Secret to Keeping Grout from Getting Gross?
Honestly, the best strategy is prevention. The number one thing you can do is apply a good grout sealer after you’ve given it a deep clean. This creates an invisible shield that helps repel moisture, dirt, and stains before they can soak in.
We always tell our clients in high-moisture spots, like family bathrooms or kitchens in Beaverton, to reseal their grout at least once a year. For other areas in the house, every couple of years should do the trick.
Your day-to-day habits also play a huge role. Wiping up spills right away and sweeping or vacuuming weekly keeps dirt from getting ground into the grout lines in the first place.
Is It Okay to Use Vinegar to Clean My Tile?
A simple mix of white vinegar and water is a fantastic, budget-friendly option for most standard ceramic and porcelain tiles. The acidity is just enough to cut through soap scum, light water spots, and daily grime without leaving behind a film. It’s a go-to for many people for their weekly mops.
But again, natural stone is the exception. Vinegar is an acid, and you have to keep it away from natural stone like marble, limestone, or travertine. It will literally eat away at the surface, creating dull spots called "etches" that you can't get out.
When it comes to natural stone, stick with cleaners that are specifically marked as pH-neutral. Using the wrong product on a beautiful stone floor is a mistake you only make once, so it’s worth being cautious.
Hopefully, this guide leaves you feeling ready to tackle your tile floors and keep them looking fantastic. Of course, if the job feels overwhelming or you'd rather spend your weekend doing something else, our team of trusted professionals is always here to help. We offer thorough, reliable cleaning services for homes and businesses all around the Portland area. Get your free estimate today!
Ready for a spotless home?
More Articles

Floor Cleaner with Baking Soda: A Portland DIY Guide
Create a safe, effective floor cleaner with baking soda. Our guide has recipes for tile, vinyl, and laminate, plus when to call for professional house cleaning.
July 15, 2026

Professional Cleaning Equipment: A Portland Pro's Guide
Your guide to professional cleaning equipment from Portland's Neat Hive Cleaning. Learn what pros use to deliver a perfect home or apartment cleaning service.
July 14, 2026

How to Clean Kitchen Grout: Pro Tips for a Sparkling Finish
Learn how to clean kitchen grout with pro tips. We cover DIY methods, stain removal, sealing, and when to call for a deep clean.
July 13, 2026

How to Clean Bottom of Pan: A Pro's 2026 Guide
Discover how to clean bottom of pan effectively in 2026. Our guide covers burnt-on food on stainless steel, non-stick, & cast iron pans.
July 12, 2026