
A Portland Homeowner's Guide to Clean Mold in Shower Stalls
Published on February 6, 2026
To really get rid of mold in your shower for good, you need more than just a sponge and some willpower. It’s a three-part strategy: you have to use a cleaner that actually kills the mold, scrub away every last spore and stain, and then get the area bone dry to stop it from coming right back. For most small outbreaks, a simple vinegar solution or a store-bought mold killer will do the trick.
Why Mold Loves Your Portland Shower
 If you’ve spotted those telltale dark spots creeping into your grout lines, you're definitely not alone. Here in the Portland metro area, our famously damp, gray climate is basically a welcome mat for mold and mildew. From cozy bungalows in Beaverton to sleek downtown apartments, the bathroom is almost always the warmest, most humid spot in the house—making it prime real estate for fungi.
That constant moisture, mixed with poor airflow and a buffet of soap scum and skin cells, is everything mold needs to set up shop. It's one of the most common issues we tackle during our professional house cleaning calls across the region.
Differentiating Mold from Mildew
People often use "mold" and "mildew" as if they're the same thing, but knowing the difference is key to cleaning them effectively. Figuring out which one you're dealing with is the first step.
- Mildew: Think of this as mold's less-aggressive cousin. It’s a surface-level fungus that looks powdery and is usually gray or white. The good news? It’s pretty easy to wipe out with a standard household cleaner and a bit of scrubbing.
- Mold: This is the more serious intruder. It often looks slimy or fuzzy and can show up as green, black, or even orange splotches. Because mold works its way into porous surfaces like grout and caulk, it’s a much bigger battle to fully remove.
And that pinkish film you sometimes see? That’s usually a bacteria called Serratia marcescens. While not technically mold, it loves the same damp conditions and often shows up as a warning sign that the environment is perfect for fungal growth.
The real problem with shower mold isn't just that it looks gross. Mold releases spores into the air, which can tank your indoor air quality and trigger allergies, asthma, and other respiratory issues, especially for sensitive family members.
Common Causes in Local Homes
Beyond Portland’s signature drizzle, a few specific issues inside the home really encourage mold to grow. During our deep clean service appointments in homes from Hillsboro to Lake Oswego, we’ve pinpointed the usual suspects.
Bad ventilation is the number one offender. A bathroom without a decent exhaust fan—or one that isn't run for at least 20-30 minutes after every shower—becomes a steam-filled incubator. The humid air gets trapped, giving airborne mold spores the perfect place to land and multiply.
Slow, sneaky plumbing leaks from a dripping shower head or faucet also provide a constant water source. On top of that, cracked grout or old, peeling caulk lets water seep behind your tiles, creating a hidden, dark, and damp haven where mold can thrive completely out of sight. Addressing these root problems is just as critical as the cleanup itself.
Getting Your Mold-Fighting Toolkit Ready
Before you even think about scrubbing, you need to gather the right supplies. Seriously, don't skip this step. Walking into a mold cleanup unprepared is a recipe for a job half-done and can expose you to some nasty stuff. Getting your gear in order first is what separates a quick fix from a real, lasting solution.
First things first: safety. Mold spores are tiny and get into the air easily, which can mess with your lungs and trigger allergies. This is where personal protective equipment (PPE) becomes your best friend.
- N-95 Respirator Mask: This is absolutely essential. A flimsy dust mask won't do the trick. You need a proper respirator designed to filter out microscopic particles like mold spores.
- Protective Gloves: Grab a pair of rubber or nitrile gloves. Make sure they cover your wrists to keep harsh cleaners and mold off your skin.
- Safety Goggles: Protect your eyes. The last thing you want is a splash of a powerful cleaner or a face full of airborne spores.
Choosing Your Cleaning Solution
With your safety gear sorted, it's time to pick your weapon. What you choose really depends on how bad the mold is and how you feel about using strong chemicals. A bit of mildew on the tile in your new Beaverton apartment might just need a natural approach. But for that stubborn, deep-seated mold in an older home's grout, you'll probably need to call in the heavy hitters.
You might be surprised to find some of the best mold killers are already in your kitchen cabinet. A simple 50/50 mix of white vinegar and water in a spray bottle works wonders. Vinegar's acidity is fantastic at killing off most types of surface mold. For tougher stains, a thick paste of baking soda and water acts as a great, gentle abrasive.
If the DIY route isn't making a dent, there are plenty of powerful commercial products out there. Just look for something specifically made to kill mold and mildew. These cleaners are formulated to get deep into porous materials like grout and caulk. Always, and I mean always, read the instructions for how long to let it sit and make sure you have plenty of fresh air circulating.
The biggest mistake our cleaning teams see people make is spraying and immediately wiping. It's so common. Whether you're using vinegar or a store-bought cleaner, you have to give it time to work its magic. Let that solution sit for at least 10–15 minutes. This gives it a chance to actually penetrate and break down the mold, making your scrubbing job way easier and much more effective.
DIY vs. Commercial Mold Cleaners At a Glance
Feeling a bit stuck on what to use? Here’s a quick rundown to help you decide between a homemade solution and a product from the store. This table breaks down the pros and cons of the most common options for your shower.
| Cleaner Type | Best For | Pros | Cons |
|---|---|---|---|
| Vinegar Solution | Light mildew, hard surfaces, regular maintenance | Natural, non-toxic, affordable, effective on many mold species | Strong smell, may not kill all mold types, less effective on porous surfaces |
| Baking Soda Paste | Grout stains, surface mold, gentle scrubbing | Mild abrasive, deodorizes, inexpensive, non-toxic | Can be messy, requires some elbow grease, not a disinfectant on its own |
| Hydrogen Peroxide | Stubborn stains on tile & grout, alternative to bleach | Antifungal, antibacterial, less harsh than bleach, no toxic fumes | Can cause discoloration on some materials, slower acting |
| Commercial Mold & Mildew Remover | Heavy mold growth, deep-set stains in grout/caulk | Powerful and fast-acting, specifically formulated for mold, often contains bleach | Harsh chemicals, requires good ventilation, can irritate skin and eyes |
Ultimately, the best choice depends on the job at hand. For routine cleaning, a natural option is great. For a serious infestation, a dedicated commercial cleaner is probably your best bet.
The Right Tools for the Job
The right tools can make all the difference between a frustrating afternoon and a quick, satisfying clean. You don’t need anything fancy, just a few key items to hit every nook and cranny.
Here's your basic cleaning kit:
- Stiff-Bristled Brushes: Get a couple of sizes. A medium brush is great for the tile faces, but a small grout brush (or an old toothbrush) is non-negotiable for getting into those tight grout lines and corners where mold loves to set up shop.
- Spray Bottles: Have at least two on hand—one for your cleaner and a separate one with plain water for rinsing everything down afterward.
- Microfiber Cloths or Sponges: You’ll need these for wiping down surfaces, applying any paste-like cleaners, and—most importantly—drying everything completely when you're done. For really stubborn scuffs, a specialty sponge can be a lifesaver. You can even check out our tips on how to use a magic eraser on our blog for those tough spots.
- Squeegee: A squeegee is a fantastic tool for preventing mold, but it's also handy for whisking away excess cleaner and water from glass doors and tiles during the final rinse.
Once you’re suited up with your safety gear and have your cleaners and tools ready to go, you can tackle that mold with confidence.
A Practical Guide to Removing Shower Mold
Alright, with your safety gear on and your cleaning supplies at the ready, it's time to get to work. Getting rid of shower mold for good is less about brute force and more about following a smart process. It's about killing the mold where it lives and then dealing with the ugly stains it leaves behind. Let's get hands-on.
Before you even think about spraying anything, get the air moving. This is non-negotiable. Crack open a window and flick on that exhaust fan. No fan? A small box fan aimed out the bathroom door works, too. You’re doing this to pull chemical fumes and any mold spores you kick up out of the room and away from your lungs.
This simple visual breaks down the core of what you're about to do—it's all about staying safe while you work.
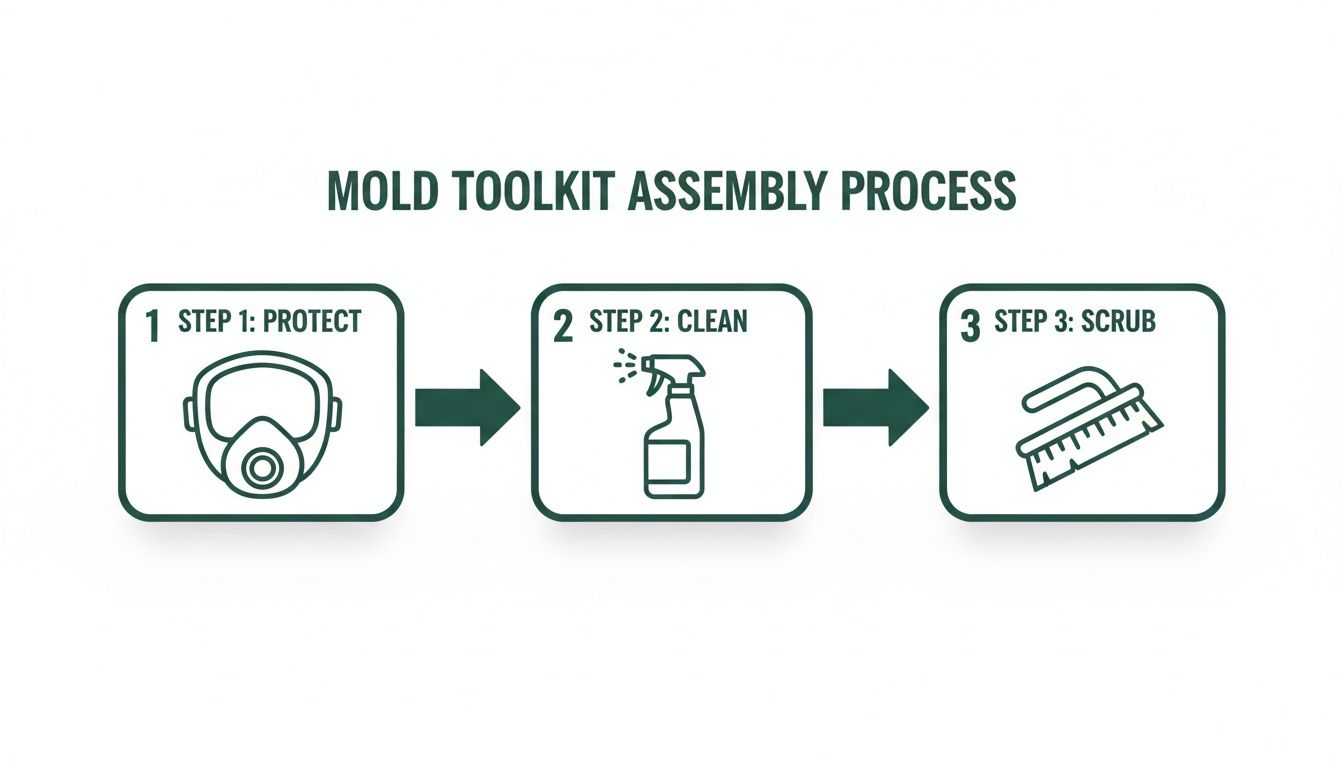
As you can see, it's a simple flow: protect yourself, apply the cleaner, and then physically scrub the mold away. Stick to this, and you'll work safely and get much better results.
Applying Your Cleaner and Letting It Dwell
Grab your weapon of choice—be it a DIY vinegar mix or a heavy-duty commercial cleaner. The secret here isn't just spraying, it's saturating.
Always start at the top of the moldy area and work your way down to prevent clean areas from getting streaked. Don't be shy with the spray; you want every last bit of visible mold to be soaked. Really focus on those grout lines, corners, and the seams around fixtures and shower doors where water loves to sit.
Now for the most overlooked step: let the cleaner sit. I can't stress this enough. If you start scrubbing right away, you're just wasting your energy. The cleaner needs time to work, to break down the mold's cell structure. Give it a solid 15 to 30 minutes. If you're dealing with a really stubborn, long-term patch of mold, you might even let it sit for up to an hour.
Mastering the Art of Scrubbing
Once the cleaner has had time to do its job, it’s time to add some elbow grease. But make sure you’re using the right tool for the surface to avoid accidentally scratching things up.
For Tile and Grout: A stiff-bristled grout brush is your best friend. Its skinny profile gets right into those lines. For the face of the tile, a slightly larger, medium-stiff brush is perfect. Use a circular motion for tile and a firm back-and-forth scrub for grout.
Ready for a spotless home?
For Fiberglass and Acrylic Surrounds: These surfaces are much softer and scratch easily. Never use anything too abrasive. A non-scratch scrubber or a medium-bristle brush will do the trick. If you're not sure, test it on a small, hidden spot first.
For Glass Doors and Fixtures: Stick with a non-scratch sponge or a microfiber cloth here. Mold loves to hide in the metal tracks and rubber seals of shower doors—an old toothbrush is the perfect tool for getting into those tight spots.
Tackle the job in small, manageable sections. It helps you stay focused and ensures you don't miss anything. You should see the mold and mildew lifting as you scrub. Don’t get discouraged if some stains are still hanging around; we have a trick for that.
Insider Techniques for Stubborn Stains
Even with a good scrubbing, some deep-set stains in porous grout just don't want to leave. This is where a couple of pro tricks come into play—the kind of thing we often use on our deep clean service calls in Beaverton.
For those frustrating grout stains, mix up a thick paste of baking soda and a little water. Smear it directly onto the stained grout and let it sit for another 10-15 minutes. Then, hit it with a spray of your vinegar solution. You'll see it fizz and bubble, which helps lift the stain right out of the grout's pores. Give it a final scrub with your grout brush and then rinse.
Here's a common mistake we see: people scrub endlessly at moldy caulk. If the mold is black inside the silicone, you can't clean it off. The caulk is compromised. It has to be carefully cut out, the area cleaned and completely dried, and then a fresh line of mold-resistant caulk has to be applied.
If you're inspired to keep going after the mold is gone, our bathroom deep cleaning checklist is a great resource for making the entire room shine.
The Final Rinse and Dry
When you’re happy with the results of your scrubbing, it’s time to rinse everything down. Use a cup or a handheld shower sprayer to wash all the cleaning solution and loosened gunk away. Just like before, start at the top and let gravity do the work.
Finally, we've reached the most important part of preventing a comeback: getting everything completely dry. Use a squeegee on the glass and tile to get rid of most of the water. Then, grab a clean, dry microfiber towel and wipe down every single surface—walls, floor, fixtures, everything. Remember, moisture is mold's best friend. Getting the shower bone-dry is your best defense. For good measure, leave the fan running for at least another hour to pull out any last bits of humidity.
Keeping Your Bathroom Mold-Free for Good
Winning the battle against shower mold feels great, but the real victory is making sure it never comes back. After you’ve put in all that effort to scrub your shower clean, the last thing you want is to see those dark spots reappear. The secret is shifting from a reactive cleaning mindset to a proactive, preventative one.
This is all about creating simple, sustainable habits that fit into your daily routine. Especially here in Portland, where dampness is a constant companion, a little bit of daily prevention goes an incredibly long way in keeping your bathroom healthy and pristine.
Daily Habits to Stop Mold Before It Starts
The most effective way to prevent mold is to rob it of the one thing it needs most: moisture. This doesn't take much time, just consistency. Think of these as small, two-minute tasks that will save you hours of scrubbing down the line.
Here are the most impactful daily strategies we recommend to our clients, from Hillsboro family homes to downtown Portland apartments:
Squeegee After Every Shower: Keep a squeegee hanging in your shower and make it a reflex to wipe down the walls, glass, and floor immediately after you’re done. This simple action removes over 75% of the moisture that would otherwise linger and feed mold spores. It’s a game-changer.
Run the Exhaust Fan: Flip on your bathroom fan before you step into the shower and leave it running for at least 30 minutes afterward. This is non-negotiable for pulling all that humid, steam-filled air out of the room.
Towel-Dry What’s Left: After squeegeeing, use a dedicated microfiber towel to quickly wipe any remaining damp spots. Pay close attention to corners, ledges, and around the faucet fixtures where water loves to hide.
These small steps create an environment where mold simply can’t get a foothold, drastically reducing the need for another deep clean.
Weekly and Monthly Maintenance Checks
Beyond the daily wipe-down, a little regular upkeep can catch potential problems before they escalate. Setting aside just a few minutes each week makes a huge difference in long-term mold prevention.
A light weekly cleaning is your first line of defense. A quick spray and wipe with a 50/50 vinegar-and-water solution can neutralize any budding mold spores that might have settled. This is also a good time to check your shower curtain; if you have a liner, give it a quick spray or consider swapping it for a machine-washable, mold-resistant fabric one.
Once a month, take a closer look at your grout and caulk. Are you seeing any cracking, peeling, or gaps where water could be seeping behind the walls? Catching these issues early and re-sealing them promptly is one of the most important preventative measures you can take.
Upgrades That Make a Difference
If you feel like you’re constantly fighting a losing battle, a few strategic upgrades can make your bathroom a much less hospitable place for mold. These changes target the root causes of moisture buildup and can be particularly helpful in older homes.
Consider these long-term solutions:
- Install a Better Fan: Many standard builder-grade exhaust fans are seriously underpowered. Upgrading to a fan with a higher CFM (cubic feet per minute) rating will do a much better job of venting humid air out.
- Fix Leaks Promptly: That slow-dripping faucet or showerhead might not seem like a big deal, but it provides a constant source of moisture. Addressing plumbing issues immediately is essential.
- Choose Mold-Resistant Products: When it’s time to re-caulk or repaint, opt for products specifically formulated with mildewcides that actively inhibit mold growth.
This proactive approach is catching on everywhere. The global market for mold inhibitors is growing significantly, with consumers showing a strong preference for preventative solutions. The market, valued at USD 1.42 billion in 2025, is projected to reach USD 2.20 billion by 2033, reflecting this demand. You can discover more insights about the rising popularity of mold-preventative products and their market trends.
For many busy homeowners, a professional deep clean service can act as the perfect "hard reset." We come in and meticulously clean every surface, eliminating existing mold and creating a perfectly clean slate. From that point on, incorporating these simple preventative habits becomes far easier and more effective, helping you maintain that just-cleaned freshness for much longer.
Knowing When to Call in the Pros
While you can absolutely tackle minor surface mold yourself, there comes a point when a scrub brush and some elbow grease just won't cut it. Knowing when to wave the white flag and call a professional can save you a ton of time, protect your home from further damage, and, most importantly, safeguard your health. It’s all about recognizing when you’re up against more than just a surface-level annoyance.
Most of us can handle a small spot of mold in the grout. But what if it comes roaring back a few days later? Or that musty, damp smell just won't leave, no matter how much you air out the bathroom? Those are classic signs the problem is hiding, probably behind a wall or under the floor where moisture has found a way in.
Red Flags That Point to a Serious Mold Problem
Some situations are clear indicators that the mold has graduated from a simple DIY project to a job for an experienced cleaning service. These are the moments when you need someone who knows how to handle a deep clean safely and effectively.
Keep an eye out for these tell-tale signs:
- It’s Spreading: If the mold covers an area bigger than 10 square feet—think a 3-foot by 3-foot patch—it's too large to manage safely on your own.
- That Lingering Smell: A persistent earthy or musty odor, even after you’ve cleaned, is a huge red flag that mold is thriving somewhere you can't see it.
- It Keeps Coming Back: You scrub it away, and it’s back in the same spot within a week or two. This means you're only cleaning the symptom, not the root cause (the moisture source).
- Signs of Water Damage: Watch for peeling paint, bubbling wallpaper, warped wood, or drywall that feels soft or spongy near your shower. These are dead giveaways of a hidden leak that’s feeding a much larger mold colony.
The Professional Advantage for Tough Mold Jobs
For a serious infestation, professional help is the only way to go. Imagine you're handling a move out cleaning for a rental in Lake Oswego—you need that place to be perfect. A specialist won't just clean what you can see; they'll help pinpoint the source of the problem.
When you see mold creeping beyond the grout and onto the drywall or ceiling, that's a game-changer. It almost always points to a systemic moisture issue that surface cleaning won't fix. Trying to tackle that yourself can release a massive amount of spores into the air, making your indoor air quality much worse.
It's no surprise that the demand for this kind of work is on the rise. As people become more aware of the health risks, the global mold remediation market has grown substantially, hitting an estimated USD 1,340.3 million in 2025. You can read the full research about the growth of this market to see just how big the industry is getting.
Our deep clean service is built for exactly these situations. We bring the proper training, commercial-grade tools, and safety gear to handle significant mold safely and effectively. You can learn more about our comprehensive house cleaning services and how we can get your bathroom back to a healthy, pristine condition.
Answering Your Shower Mold Questions
To wrap things up, let's tackle some of the most common questions we get from homeowners around Portland. Think of this as your quick-reference guide for keeping your bathroom healthy and mold-free.
What’s the Difference Between Mold and Mildew?
This is a classic question, and it's an important one. The easiest way to think about it is that mildew is mold in its earliest stage. It’s that powdery, gray, or white stuff you see on the surface of your grout or tile. Since it hasn't set in deep, you can usually wipe it away pretty easily.
Mold is the bigger, badder cousin. It’s often fuzzy or slimy, showing up in colors like black, green, or even orange. The real problem with mold is that its roots dig deep into porous materials like grout, drywall, and caulk. That makes it a much tougher and more serious problem to solve.
Is Bleach a Good Idea for Killing Shower Mold?
So many of us grew up thinking bleach was the ultimate killer for everything, but when it comes to mold on porous surfaces, it's actually not your best bet. On a hard, non-porous surface like tile or a fiberglass insert, bleach does a great job of killing surface mold and zapping the stains.
The problem starts with grout. Grout is porous, and the chemical structure of bleach prevents it from soaking in to kill the mold's roots. Instead, the water in the bleach solution sinks in, leaving the surface looking clean while actually feeding the mold deep inside. That’s why you see mold reappear so fast after using bleach. A simple vinegar solution or a quality commercial mold killer will get you much better, lasting results.
We're seeing more and more homeowners connect mold exposure to allergies and respiratory problems. This awareness is pushing the cleaning industry forward, with the global market for mold cleaning equipment growing rapidly. New methods, like ultrasonic cleaning for fixtures, are becoming more mainstream for tackling those hard-to-reach spots. You can read more about the growth of advanced mold cleaning technologies.
How Often Should I Be Deep Cleaning My Shower?
Given Portland's damp climate, a good deep clean of the shower every 1-2 months is a solid goal for most homes. I'm not just talking about a quick spray-and-rinse. A real deep clean means scrubbing grout lines, descaling fixtures, and thoroughly sanitizing everything.
Of course, this isn't a one-size-fits-all rule. If you have a bathroom with poor ventilation or a big family sharing a single shower, you'll want to bump that up to a monthly deep clean. Remember, daily habits like running the fan and using a squeegee make these deeper cleans go a whole lot faster.
Can a Cleaning Service Actually Handle a Bad Mold Problem?
Absolutely. A professional home cleaning service like ours is perfectly set up to tackle the kind of stubborn, recurring mold that drives homeowners crazy. If you've got a massive infestation covering more than 10 square feet from a burst pipe, you'll need a specialized mold remediation company.
But for persistent shower mold that just won't go away with DIY methods? That’s squarely in our wheelhouse. Our deep clean service is designed for exactly this. We come equipped with the right products, tools, and know-how to eliminate the mold safely and effectively. It’s a job we do all the time for folks in Beaverton and across the metro area, so we know exactly how to handle it.
Battling mold is a frustrating chore, and you shouldn't have to do it alone. If you're tired of the fight and just want a sparkling clean, healthy shower, let the pros at Neat Hive Cleaning take care of it. We deliver the kind of meticulous deep clean that gets rid of mold and brings back your peace of mind.
Ready for a spotless home?